
親自動(dòng)手寫一個(gè)屬于自己的Vue3組件庫

環(huán)境搭建
目前流行的組件庫搭建方式都是使用monorepo的方式,好處很多,可以在一個(gè)代碼倉庫中管理多個(gè)項(xiàng)目,可以達(dá)到項(xiàng)目之間的資源共享。這里也是使用這種方式。
以 pnpm 構(gòu)建 monorepo
首先全局安裝pnpm
npm install pnpm -g
復(fù)制代碼
pnpm初始化
pnpm init
復(fù)制代碼
得到 package.json 的初始內(nèi)容后刪除 package.json 中的 name ,添加 "private": true 屬性,因?yàn)檫@個(gè)作為一個(gè)整體是不需要發(fā)布的。組件都是寫在packages中。
{
  "private": true,
  "version": "1.0.0",
  "description": "",
  "main": "index.js",
  "scripts": {
    "test": "echo "Error: no test specified" && exit 1"
  },
  "keywords": [],
  "author": "",
  "license": "ISC"
}
復(fù)制代碼
配置 pnpm 的 monorepo 工作區(qū)
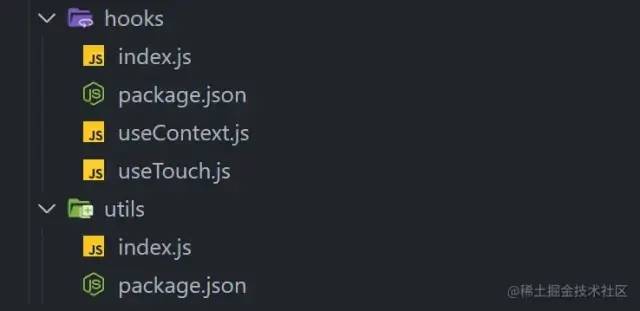
這是我目前的結(jié)構(gòu)目錄,docs用來存放組件庫文檔,examples用于調(diào)試編寫好的組件,packages里的compnents用于存放自己的組件。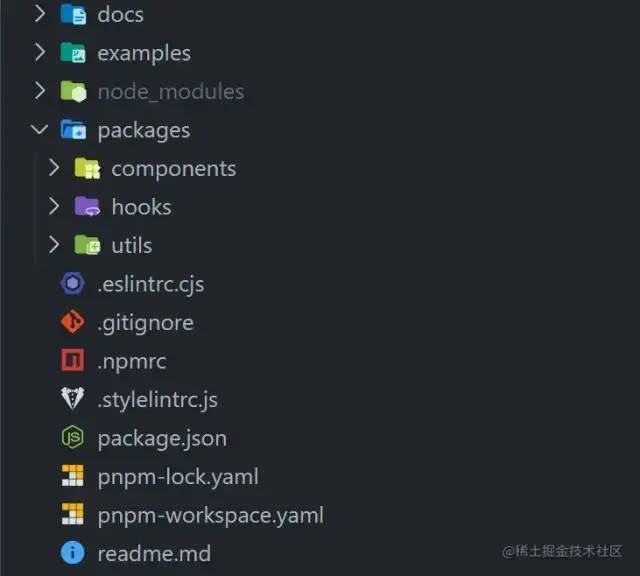
比如我使用到packages和examples這兩個(gè),那么就將這兩個(gè)都配置進(jìn)去,在pnpm-workspace.yaml中配置
packages:
  - 'packages/**'
  - 'examples'
復(fù)制代碼
每個(gè)子模塊都有屬于自己的package.json文件
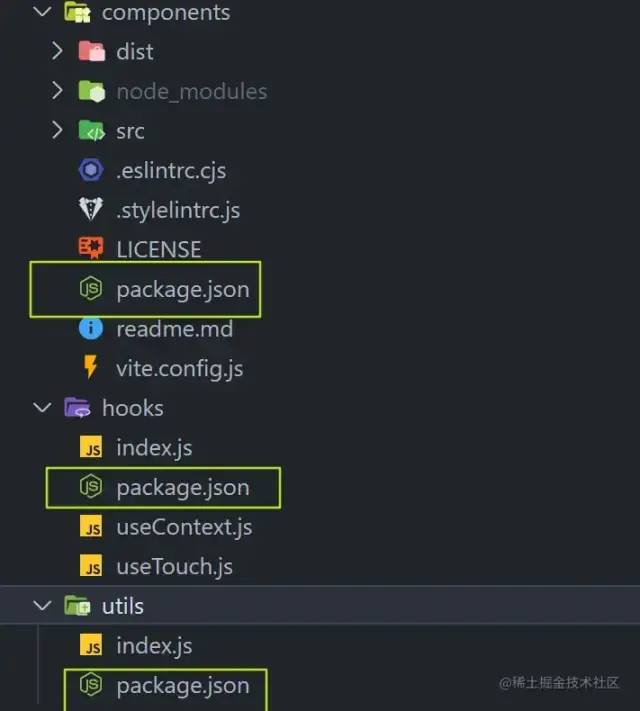
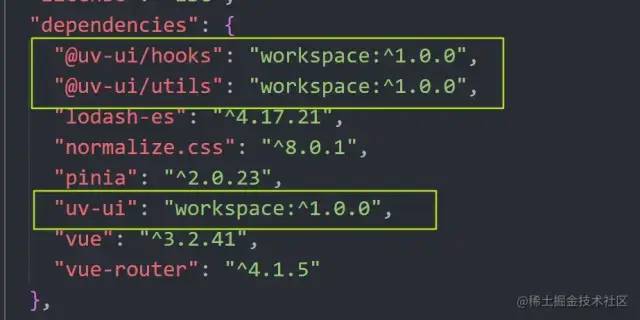
以components包的package.json舉例,其中"@uv-ui/hooks": "workspace:^1.0.0"和 "@uv-ui/utils": "workspace:^1.0.0"是依賴于其他目錄的包,如果這個(gè)components包需要用到這兩個(gè)包,需要在這個(gè)目錄下也安裝上,之后發(fā)布npm包的時(shí)候?qū)?code style="margin: 3px;padding: 3px;outline: 0px;font-size: 14px;font-family: "Operator Mono", Consolas, Monaco, Menlo, monospace;border-radius: 4px;color: rgb(155, 110, 35);background-color: rgb(255, 245, 227);word-break: break-all;">workspace:^去掉即可,這兩個(gè)依賴的包也需要獨(dú)立發(fā)布npm包,這些在發(fā)布組件中有詳細(xì)描述。
{
  "name": "uv-ui",
  "private": false,
  "version": "1.0.11",
  "main": "dist/es/index.js",
  "module": "dist/es/index.js",
  "style": "dist/es/style.css",
  "description": "基于vue3的移動(dòng)端組件庫",
  "scripts": {
    "build": "vite build",
    "lint": "eslint ./src/**/*.{js,jsx,vue,ts,tsx} --fix"
  },
  "repository": {
    "type": "git",
    "url": "https://github.com/monsterxwx/uv-ui",
    "directory": "packages/uv-ui"
  },
  "keywords": [
    "uv-ui",
    "vue3組件庫",
    "mobile",
    "frontend",
    "components"
  ],
  "files": [
    "dist"
  ],
  "author": "coderxwx",
  "license": "MIT",
  "dependencies": {
    "@uv-ui/hooks": "workspace:^1.0.0",
    "@uv-ui/utils": "workspace:^1.0.0"
  }
}
復(fù)制代碼
其他兩個(gè)的包名則分別為:@uv-ui/hooks 和 @uv-ui/utils,創(chuàng)建過程同上。
倉庫項(xiàng)目內(nèi)的包相互調(diào)用
如何對(duì)hooks、utils和components這三個(gè)包進(jìn)行互相調(diào)用呢?我們只需要把這三個(gè)包都安裝到倉庫根目錄下的 node_modules 目錄中即可。所有的依賴都在根目錄下安裝,安裝到根目錄需要加上-w ,表示安裝到公共模塊的 packages.json 中。
pnpm install uv-ui -w
pnpm install @uv-ui/hooks -w
pnpm install @uv-ui/utils -w
復(fù)制代碼
根目錄的package.json將會(huì)出現(xiàn)如下依賴,這三個(gè)就是我們剛剛安裝的包
組件編寫
如果我們的組件庫包需要支持按需引入,那么每個(gè)組件都需要進(jìn)行vue的注冊app.component(comp.name,comp)。每個(gè)都寫一遍會(huì)比較麻煩,可以封裝成一個(gè)函數(shù)。
export const withInstall = (comp) => {
  comp.install = (app) => {
    // 注冊組件
    app.component(comp.name, comp)
  }
  return comp
}
復(fù)制代碼
以button組件為例,首先目錄結(jié)構(gòu)如下,在src目錄下編寫各個(gè)組件,在components目錄下有一個(gè)index用于將所有的組件導(dǎo)出
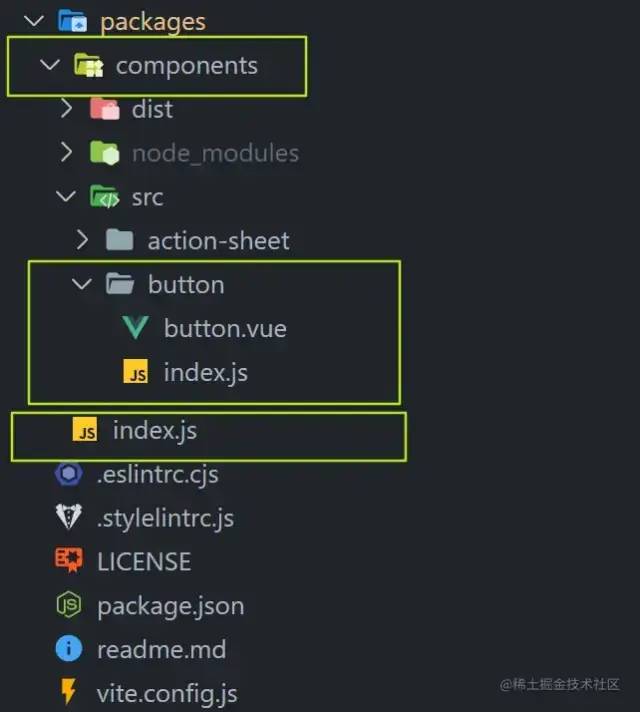
button的index.js代碼如下:將編寫的button組件導(dǎo)進(jìn)來,然后導(dǎo)出去即可實(shí)現(xiàn)組件每個(gè)都是按需加載
import Button from './button.vue'
import {withInstall} from '@uv-ui/utils'

const UvButton = withInstall(Button)

export default UvButton

復(fù)制代碼
再來看看components目錄下的index.js文件,寫多少個(gè)組件就引入多少個(gè),然后全部導(dǎo)出去,這么做的目的是在全量導(dǎo)入的時(shí)候,可以直接引入組件,然后vue.use(uv-ui)即可將全部的組件注冊
import uvButton from './button'

const components = [
  uvButton
]

const install = (Vue) => {
  components.forEach(component => {
    Vue.component(component.name, component)
  })
}

export {
  uvButton
}

export default install

復(fù)制代碼
再來看看button.vue文件,由于寫的比較多,這里直接省略部分代碼,只保留關(guān)鍵代碼。
可以看到每個(gè)組件都需要給他一個(gè)名字方便在vue中注冊,export default { name: 'UvButton' }, 其次樣式通過css變量抽離出來,方便樣式的更改,樣式不用加scoped作用域,只要命名好樣式名稱即可。其他組件同理。
<template>
  <div class="uv-button">

  </div>
</template>

<script setup>
// 代碼
</script>
<script>
export default {
  name: 'UvButton'
}
</script>

<style lang="scss">
:root {
  --uv-button-primary: #409eff;
  --uv-button-success: #67c23a;
  --uv-button-warning: #e6a23c;
  --uv-button-error: #f56c6c;
  --uv-button-info: #909399;
  --uv-button-text: #303133;
}

$primary: var(--uv-button-primary);
$success: var(--uv-button-success);
$warning: var(--uv-button-warning) ;
$error: var(--uv-button-error) ;
$info: var(--uv-button-info) ;
$text: var(--uv-button-text) ;
.uv-button {
  font-size: var(--uv-button-font-size);
  border: 0;
  border-radius: var(--uv-button-border-radius);
  white-space: nowrap;
  color: #ffffff;
  background: none;
  outline: none;
  cursor: pointer;
}

</style>

復(fù)制代碼
組件打包
組件打包采用的是vite的庫模式打包,沒有使用gulp這些工具,是比較簡單的打包方式,只需要簡單配置即可實(shí)現(xiàn)每個(gè)組件都單獨(dú)打包,目前打包后所有組件樣式會(huì)合成一個(gè)style.css文件,樣式需要全部引入,組件是按需引入的方式,如果樣式也想做分離就需要使用到gulp等這些工具,將樣式全部拆分出來作為一個(gè)包theme-chalk,然后引入就類似element-ui那種方式,比較麻煩這里就不詳細(xì)描述了,可以找找相關(guān)的文章了解。
import { defineConfig } from 'vite'
import vue from '@vitejs/plugin-vue'
export default defineConfig({
  build: {
    target: 'modules',
    // 壓縮
    minify: true,
    rollupOptions: {
      // 忽略打包vue文件
      external: ['vue'],
      input: ['src/index.js'],
      output: [
        {
          format: 'es',
          entryFileNames: '[name].js',
          preserveModules: true,
          // 配置打包根目錄
          dir: 'dist/es',
          preserveModulesRoot: 'src'
        },
        {
          format: 'cjs',
          entryFileNames: '[name].js',
          preserveModules: true,
          dir: 'dist/lib',
          preserveModulesRoot: 'src'
        }
      ]
    },
    lib: {
      entry: './index.js',
      formats: ['es', 'cjs']
    }
  },
  plugins: [
    vue()
  ]
})
復(fù)制代碼
下面是打包后的結(jié)構(gòu),分別拆成es和lib,樣式在es目錄下的style.css

使用方式就比較簡單了
第一種:全量使用 main.js中導(dǎo)入
import uvUI from 'uv-ui'
import 'uv-ui/dist/es/style.css'

app.use(uvUI)
復(fù)制代碼
第二種:按需導(dǎo)入 在main.js中引入樣式文件
import 'uv-ui/dist/es/style.css'
復(fù)制代碼
其他用到的地方引入相關(guān)組件
<template>
  <div>
    <uvButton type="primary">切換</uvButton>
  </div>
</template>

<script setup>
import { uvButton } from 'uv-ui'

</script>
復(fù)制代碼
組件發(fā)布
編寫package.json
package.json重要字段說明:
-
name 即npm項(xiàng)目包名,發(fā)布到npm時(shí)就是取的這個(gè)name名,你自己取個(gè)語義化的名字,和已有的npm庫不能重復(fù); -
private 是否私有包,要發(fā)布到npm需要關(guān)閉 -
version 版本號(hào),更新npm包時(shí)必須修改一個(gè)更高的版本號(hào)后才能成功發(fā)布到npm,版本號(hào)最好遵循npm版本管理規(guī)范; -
description 包的描述,發(fā)布到npm后你搜索該npm包時(shí),在搜索聯(lián)想列表里會(huì)顯示在包名的下方,作為描述說明; -
main 入口文件路徑,在你通過import或require引用該npm包時(shí)就是引入的該路徑的文件 -
keywords 該包的關(guān)鍵詞 -
files 白名單目錄,配置哪些文件會(huì)上傳到npm包中。有些文件是必定會(huì)上傳的,無法控制,例如package.json、LICENSE、README.md等等 -
repository 關(guān)聯(lián)github地址
package.json完整代碼
{
  "name": "uv-ui",
  "private": false,
  "version": "1.0.11",
  "main": "dist/es/index.js",
  "module": "dist/es/index.js",
  "style": "dist/es/style.css",
  "description": "基于vue3的移動(dòng)端組件庫",
  "scripts": {
    "build": "vite build",
    "lint": "eslint ./src/**/*.{js,jsx,vue,ts,tsx} --fix"
  },
  "repository": {
    "type": "git",
    "url": "https://github.com/monsterxwx/uv-ui",
    "directory": "packages/uv-ui"
  },
  "keywords": [
    "uv-ui",
    "vue3組件庫",
    "mobile",
    "frontend",
    "components"
  ],
  "files": [
    "dist"
  ],
  "author": "coderxwx",
  "license": "MIT",
  "dependencies": {
    "@coderxwx/uv-ui-hooks": "1.0.0",
    "@coderxwx/uv-ui-utils": "1.0.0"
  }
}
復(fù)制代碼
添加LICENSE
Copyright (c) 2023代表年份,coderxwx替換成自己的名字
MIT License

Copyright (c) 2023 coderxwx

Permission is hereby granted, free of charge, to any person obtaining a copy
of this software and associated documentation files (the "Software"), to deal
in the Software without restriction, including without limitation the rights
to use, copy, modify, merge, publish, distribute, sublicense, and/or sell
copies of the Software, and to permit persons to whom the Software is
furnished to do so, subject to the following conditions:

The above copyright notice and this permission notice shall be included in all
copies or substantial portions of the Software.

THE SOFTWARE IS PROVIDED "AS IS", WITHOUT WARRANTY OF ANY KIND, EXPRESS OR
IMPLIED, INCLUDING BUT NOT LIMITED TO THE WARRANTIES OF MERCHANTABILITY,
FITNESS FOR A PARTICULAR PURPOSE AND NONINFRINGEMENT. IN NO EVENT SHALL THE
AUTHORS OR COPYRIGHT HOLDERS BE LIABLE FOR ANY CLAIM, DAMAGES OR OTHER
LIABILITY, WHETHER IN AN ACTION OF CONTRACT, TORT OR OTHERWISE, ARISING FROM,
OUT OF OR IN CONNECTION WITH THE SOFTWARE OR THE USE OR OTHER DEALINGS IN THE
SOFTWARE.
復(fù)制代碼
npm賬號(hào)注冊登錄
要發(fā)布到npm上首先就要注冊npm賬號(hào),通過官網(wǎng)進(jìn)行賬號(hào)注冊:www.npmjs.com/[1] 。
npm login
復(fù)制代碼
登錄npm,輸入賬號(hào)和密碼,密碼輸入不會(huì)有顯示,正常輸入即可,然后輸入自己的郵箱,郵箱驗(yàn)證碼驗(yàn)證通過后即成功登錄,后續(xù)不需要重復(fù)登錄。
調(diào)試npm
如果不需要調(diào)試,可以跳過調(diào)試步驟,直接發(fā)布。
-
npm項(xiàng)目根目錄運(yùn)行終端命令:運(yùn)行后該npm包會(huì)放進(jìn)本地npm緩存
npm link
復(fù)制代碼
-
如果要在其他項(xiàng)目(例如項(xiàng)目名叫aaa)里引用調(diào)試,只需要在aaa里運(yùn)行命令:
npm link 包名
復(fù)制代碼
-
如果要取消項(xiàng)目aaa與npm包的關(guān)聯(lián),在aaa項(xiàng)目下運(yùn)行命令:
npm unlink 包名
復(fù)制代碼
為了防止本地調(diào)試npm與發(fā)布后的npm混淆沖突,在調(diào)試完成后一定記得手動(dòng)取消項(xiàng)目關(guān)聯(lián)。
發(fā)布組件
在npm包項(xiàng)目根目錄運(yùn)行命令:
npm publish
復(fù)制代碼
運(yùn)行完稍等一段時(shí)間即可在npm官網(wǎng)搜索到發(fā)布的npm包。
關(guān)于發(fā)布的一些錯(cuò)誤匯總
-
403錯(cuò)誤
-
檢查npm源是否是官方源registry.npmjs.org/[2],比如之前是淘寶的源則需要切換回官方源,否則發(fā)布失敗; -
是否登錄成功(npm login 或者npm adduser 登錄); -
是否已有重復(fù)的包名(修改package.json里的name或者使用scope)。 -
402錯(cuò)誤
-
當(dāng)使用npm publish發(fā)布帶有 scope作用域的包時(shí),會(huì)出現(xiàn)402錯(cuò)誤; -
需使用npm publish --access=public; -
詳細(xì)發(fā)布請(qǐng)看下面的發(fā)布私有包。 -
404錯(cuò)誤
-
沒有找到對(duì)應(yīng)的路徑,其實(shí)跟402錯(cuò)誤差不多,基本都是作用域的問題
發(fā)布私有包
我們在寫組件庫的時(shí)候會(huì)用到一些函數(shù),這些都可以作為一個(gè)包進(jìn)行發(fā)布,但是這些不需要發(fā)布為正式的包,只需要給組件庫的主包使用,比如:
package.json中如果name 是使用@xx來表示的則代表私有包,如果發(fā)布npm為私有包則需要收費(fèi),我們可以通過配置publishConfig字段將其表示為共有包,然后進(jìn)行npm publish進(jìn)行發(fā)布,如果不想寫這個(gè)可以直接輸入npm publish --access=public 比如我的私有包的前綴是這個(gè)@coderxwx,@后面跟的是你npm的賬號(hào)名
{
  "name": "@coderxwx/uv-ui-hooks",
  "private": false,
  "version": "1.0.0",
  "description": "",
  "main": "index.js",
  "scripts": {
    "test": "echo "Error: no test specified" && exit 1"
  },
  "publishConfig": {
    "access": "public",
    "registry": "https://registry.npmjs.org/"
  },
  "keywords": [],
  "author": "coderxwx",
  "license": "MIT"
}
復(fù)制代碼
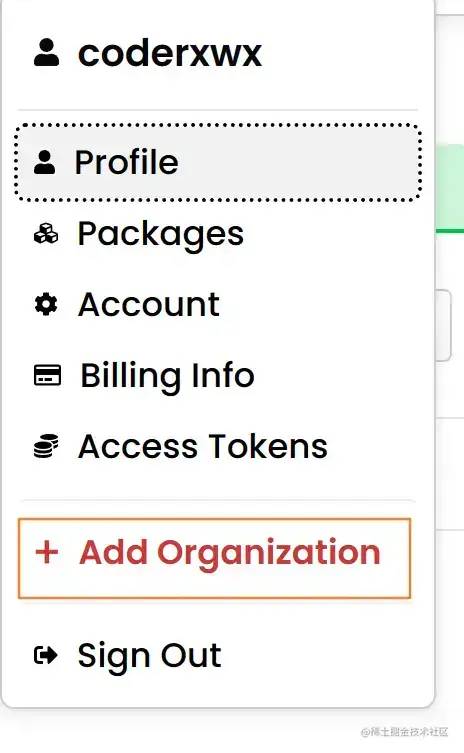
如果不想使用自己的賬號(hào)名作為私有包的前綴,可以創(chuàng)建一個(gè)組織
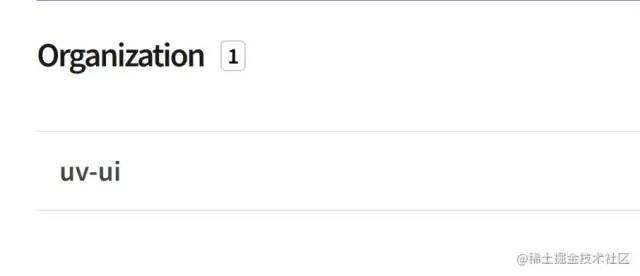
創(chuàng)建完成后就可以使用這個(gè)名字來當(dāng)前綴了,比如我創(chuàng)建的是uv-ui,之后就可以使用@uv-ui進(jìn)行發(fā)布了。
更新組件
當(dāng)完成組件的修改后需要重新發(fā)布更新組件,這里有兩種方式,一種是直接修改package.json中的version信息,然后進(jìn)行npm publish
還有一種更規(guī)范的方式是使用npm的指令。
其中type有這些:
patch:小變動(dòng),比如修復(fù)bug等 版本號(hào)變動(dòng) v1.0.0->v1.0.1
minor:增加新功能,不影響現(xiàn)有功能 版本號(hào)變動(dòng) v1.0.0->v1.1.0
major:破壞模塊對(duì)向后的兼容性,大版本更新 版本號(hào)變動(dòng) v1.0.0->v2.0.0
npm version [type]

npm publish
復(fù)制代碼
文檔編寫
我用的是vitepress來構(gòu)建文檔,基本沒啥難度
安裝
pnpm install -D vitepress vue
復(fù)制代碼
vitepress的具體使用可以參考這篇文章:juejin.cn/post/716427…[3]
教程到這里就結(jié)束了,如有錯(cuò)誤歡迎指出!
作者:唯有灬努力
鏈接:https://juejin.cn/post/7211521650252398649