
手寫React-Router源碼,深入理解其原理
作者:蔣鵬飛
原文:https://github.com/dennis-jiang/Front-End-Knowledges/blob/master/Articles/React/React-Router_Code.md
上一篇文章我們講了React-Router的基本用法,并實(shí)現(xiàn)了常見的前端路由鑒權(quán)。本文會(huì)繼續(xù)深入React-Router講講他的源碼,套路還是一樣的,我們先用官方的API實(shí)現(xiàn)一個(gè)簡(jiǎn)單的例子,然后自己手寫這些API來(lái)替換官方的并且保持功能不變。
本文全部代碼已經(jīng)上傳GitHub,大家可以拿下來(lái)玩玩:https://github.com/dennis-jiang/Front-End-Knowledges/tree/master/Examples/React/react-router-code
簡(jiǎn)單示例
本文用的例子是上篇文章開始那個(gè)不帶鑒權(quán)的簡(jiǎn)單路由跳轉(zhuǎn)例子,跑起來(lái)是這樣子的:

我們?cè)賮?lái)回顧下代碼,在app.js里面我們用Route組件渲染了幾個(gè)路由:
import React from 'react';import {BrowserRouter as Router,Switch,Route,} from "react-router-dom";import Home from './pages/Home';import Login from './pages/Login';import Backend from './pages/Backend';import Admin from './pages/Admin';function App() {return ();}export default App;
每個(gè)頁(yè)面的代碼都很簡(jiǎn)單,只有一個(gè)標(biāo)題和回首頁(yè)的鏈接,比如登錄頁(yè)長(zhǎng)這樣,其他幾個(gè)頁(yè)面類似:
import React from 'react';import { Link } from 'react-router-dom';function Login() {return (<>登錄頁(yè)
回首頁(yè));}export default Login;
這樣我們就完成了一個(gè)最簡(jiǎn)單的React-Router的應(yīng)用示例,我們來(lái)分析下我們用到了他的哪些API,這些API就是我們今天要手寫的目標(biāo),仔細(xì)一看,我們好像只用到了幾個(gè)組件,這幾個(gè)組件都是從react-router-dom導(dǎo)出來(lái)的:
BrowserRouter: 被我們重命名為了
Router,他包裹了整個(gè)React-Router應(yīng)用,感覺跟以前寫過(guò)的react-redux的Provider類似,我猜是用來(lái)注入context之類的。Route: 這個(gè)組件是用來(lái)定義具體的路由的,接收路由地址
path和對(duì)應(yīng)渲染的組件作為參數(shù)。Switch:這個(gè)組件是用來(lái)設(shè)置匹配模式的,不加這個(gè)的話,如果瀏覽器地址匹配到了多個(gè)路由,這幾個(gè)路由都會(huì)渲染出來(lái),加了這個(gè)只會(huì)渲染匹配的第一個(gè)路由組件。
Link:這個(gè)是用來(lái)添加跳轉(zhuǎn)鏈接的,功能類似于原生的
a標(biāo)簽,我猜他里面也是封裝了一個(gè)a標(biāo)簽。
BrowserRouter源碼
我們代碼里面最外層的就是BrowserRouter,我們先去看看他的源碼干了啥,地址傳送門:https://github.com/ReactTraining/react-router/blob/master/packages/react-router-dom/modules/BrowserRouter.js
看了他的源碼,我們發(fā)現(xiàn)BrowserRouter代碼很簡(jiǎn)單,只是一個(gè)殼:
import React from "react";import { Router } from "react-router";import { createBrowserHistory as createHistory } from "history";class BrowserRouter extends React.Component {history = createHistory(this.props);render() {return; }}
在這個(gè)殼里面還引用了兩個(gè)庫(kù)react-router和history,BrowserRouter僅僅是調(diào)用history的createHistory得到一個(gè)history對(duì)象,然后用這個(gè)對(duì)象渲染了react-router的Router組件。看起來(lái)我們要搞懂react-router-dom的源碼還必須得去看react-router和history的源碼,現(xiàn)在我們手上有好幾個(gè)需要搞懂的庫(kù)了,為了看懂他們的源碼,我們得先理清楚他們的結(jié)構(gòu)關(guān)系。
React-Router的項(xiàng)目結(jié)構(gòu)
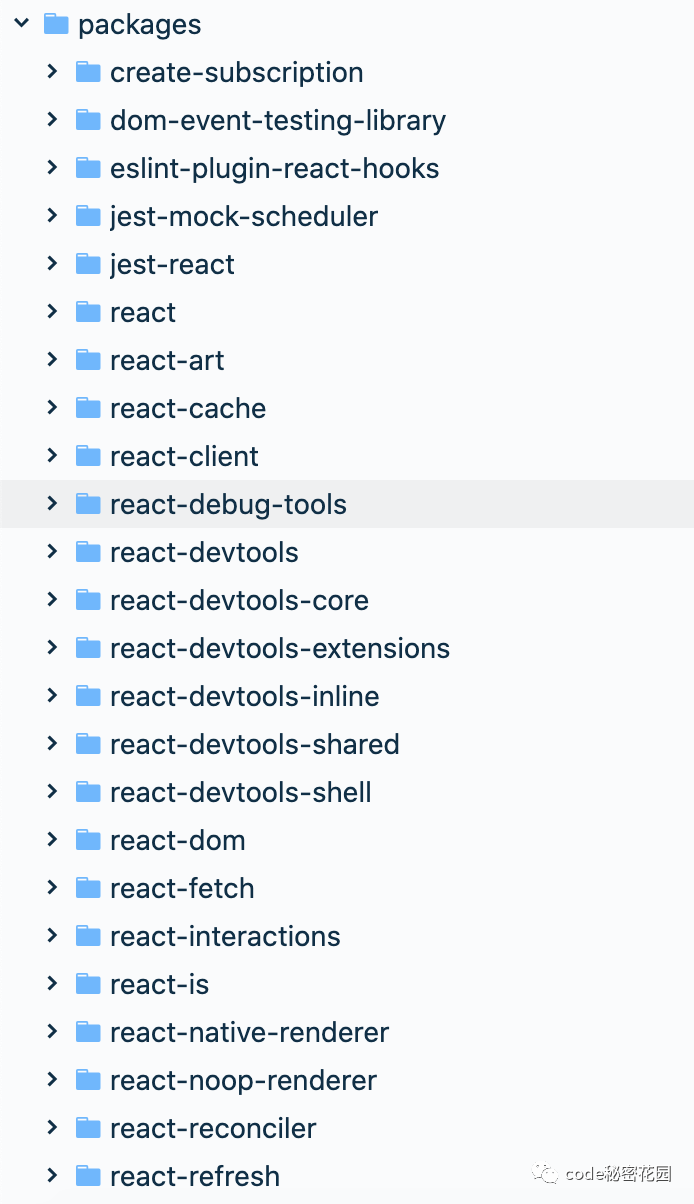
React-Router的結(jié)構(gòu)是一個(gè)典型的monorepo,monorepo這兩年開始流行了,是一種比較新的多項(xiàng)目管理方式,與之相對(duì)的是傳統(tǒng)的multi-repo。比如React-Router的項(xiàng)目結(jié)構(gòu)是這樣的:

注意這里的packages文件夾下面有四個(gè)文件夾,這四個(gè)文件夾每個(gè)都可以作為一個(gè)單獨(dú)的項(xiàng)目發(fā)布。之所以把他們放在一起,是因?yàn)樗麄冎坝泻軓?qiáng)的依賴關(guān)系:
react-router:是
React-Router的核心庫(kù),處理一些共用的邏輯react-router-config:是
React-Router的配置處理,我們一般不需要使用react-router-dom:瀏覽器上使用的庫(kù),會(huì)引用
react-router核心庫(kù)react-router-native:支持
React-Native的路由庫(kù),也會(huì)引用react-router核心庫(kù)
像這樣多個(gè)倉(cāng)庫(kù),發(fā)布多個(gè)包的情況,傳統(tǒng)模式是給每個(gè)庫(kù)都建一個(gè)git repo,這種方式被稱為multi-repo。像React-Router這樣將多個(gè)庫(kù)放在同一個(gè)git repo里面的就是monorepo。這樣做的好處是如果出了一個(gè)BUG或者加一個(gè)新功能,需要同時(shí)改react-router和react-router-dom,monorepo只需要一個(gè)commit一次性就改好了,發(fā)布也可以一起發(fā)布。如果是multi-repo則需要修改兩個(gè)repo,然后分別發(fā)布兩個(gè)repo,發(fā)布的時(shí)候還要協(xié)調(diào)兩個(gè)repo之間的依賴關(guān)系。所以現(xiàn)在很多開源庫(kù)都使用monorepo來(lái)將依賴很強(qiáng)的模塊放在一個(gè)repo里面,比如React源碼也是一個(gè)典型的monorepo。
yarn有一個(gè)workspaces可以支持monorepo,使用這個(gè)功能需要在package.json里面配置workspaces,比如這樣:
"workspaces": {"packages": ["packages/*"]}
扯遠(yuǎn)了,monorepo可以后面單獨(dú)開一篇文章來(lái)講,這里講這個(gè)主要是為了說(shuō)明React-Router分拆成了多個(gè)包,這些包之間是有比較強(qiáng)的依賴的。
前面我們還用了一個(gè)庫(kù)是history,這個(gè)庫(kù)沒(méi)在React-Router的monorepo里面,而是單獨(dú)的一個(gè)庫(kù),因?yàn)楣俜桨阉麑懙墓δ芎塥?dú)立了,不一定非要結(jié)合React-Router使用,在其他地方也可以使用。
React-Router架構(gòu)思路
我之前另一篇文章講Vue-Router的原理提到過(guò),前端路由實(shí)現(xiàn)無(wú)非這幾個(gè)關(guān)鍵點(diǎn):
監(jiān)聽URL的改變 改變vue-router里面的current變量 監(jiān)視current變量 獲取對(duì)應(yīng)的組件 render新組件
其實(shí)React-Router的思路也是類似的,只是React-Router將這些功能拆分得更散,監(jiān)聽URL變化獨(dú)立成了history庫(kù),vue-router里面的current變量在React里面是用Context API實(shí)現(xiàn)的,而且放到了核心庫(kù)react-router里面,一些跟平臺(tái)相關(guān)的組件則放到了對(duì)應(yīng)的平臺(tái)庫(kù)react-router-dom或者react-router-native里面。按照這個(gè)思路,我們自己寫的React-Router文件夾下面也建幾個(gè)對(duì)應(yīng)的文件夾:
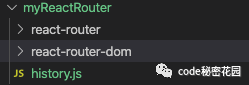
手寫自己的React-Router?
然后我們順著這個(gè)思路一步一步的將我們代碼里面用到的API替換成自己的。
BrowserRouter組件
BrowserRouter這個(gè)代碼前面看過(guò),直接抄過(guò)來(lái)就行:
import React from "react";import { Router } from "react-router";import { createBrowserHistory as createHistory } from "history";class BrowserRouter extends React.Component {history = createHistory(this.props);render() {return; }}export default BrowserRouter;
react-router的Router組件
上面的BrowserRouter用到了react-router的Router組件,這個(gè)組件在瀏覽器和React-Native端都有使用,主要獲取當(dāng)前路由并通過(guò)Context API將它傳遞下去:
import React from "react";import HistoryContext from "./HistoryContext.js";import RouterContext from "./RouterContext.js";/*** The public API for putting history on context.*/class Router extends React.Component {// 靜態(tài)方法,檢測(cè)當(dāng)前路由是否匹配static computeRootMatch(pathname) {return { path: "/", url: "/", params: {}, isExact: pathname === "/" };}constructor(props) {super(props);this.state = {location: props.history.location // 將history的location掛載到state上};// 下面兩個(gè)變量是防御性代碼,防止根組件還沒(méi)渲染location就變了// 如果location變化時(shí),當(dāng)前根組件還沒(méi)渲染出來(lái),就先記下他,等當(dāng)前組件mount了再設(shè)置到state上this._isMounted = false;this._pendingLocation = null;// 通過(guò)history監(jiān)聽路由變化,變化的時(shí)候,改變state上的locationthis.unlisten = props.history.listen(location => {if (this._isMounted) {this.setState({ location });} else {this._pendingLocation = location;}});}componentDidMount() {this._isMounted = true;if (this._pendingLocation) {this.setState({ location: this._pendingLocation });}}componentWillUnmount() {if (this.unlisten) {this.unlisten();this._isMounted = false;this._pendingLocation = null;}}render() {// render的內(nèi)容很簡(jiǎn)單,就是兩個(gè)context// 一個(gè)是路由的相關(guān)屬性,包括history和location等// 一個(gè)只包含history信息,同時(shí)將子組件通過(guò)children渲染出來(lái)return (value={{history: this.props.history,location: this.state.location,match: Router.computeRootMatch(this.state.location.pathname),}}>children={this.props.children || null}value={this.props.history}/>);}}export default Router;
上述代碼是我精簡(jiǎn)過(guò)的代碼,原版代碼可以看這里。這段代碼主要是創(chuàng)建了兩個(gè)context,將路由信息和history信息放到了這兩個(gè)context上,其他也沒(méi)干啥了。關(guān)于React的Context API我在另外一篇文章詳細(xì)講過(guò),這里不再贅述了。
history
前面我們其實(shí)用到了history的三個(gè)API:
createBrowserHistory: 這個(gè)是用在BrowserRouter里面的,用來(lái)創(chuàng)建一個(gè)history對(duì)象,后面的listen和unlisten都是掛載在這個(gè)API的返回對(duì)象上面的。
history.listen:這個(gè)是用在Router組件里面的,用來(lái)監(jiān)聽路由變化。
history.unlisten:這個(gè)也是在Router組件里面用的,是
listen方法的返回值,用來(lái)在清理的時(shí)候取消監(jiān)聽的。
下面我們來(lái)實(shí)現(xiàn)這個(gè)history:
// 創(chuàng)建和管理listeners的方法function createEvents() {let handlers = [];return {push(fn) {handlers.push(fn);return function () {handlers = handlers.filter(handler => handler !== fn);};},call(arg) {handlers.forEach(fn => fn && fn(arg));}}}function createBrowserHistory() {const listeners = createEvents();let location = {pathname: '/',};// 路由變化時(shí)的回調(diào)const handlePop = function () {const currentLocation = {pathname: window.location.pathname}listeners.call(currentLocation); // 路由變化時(shí)執(zhí)行回調(diào)}// 監(jiān)聽popstate事件// 注意pushState和replaceState并不會(huì)觸發(fā)popstate// 但是瀏覽器的前進(jìn)后退會(huì)觸發(fā)popstate// 我們這里監(jiān)聽這個(gè)事件是為了處理瀏覽器的前進(jìn)后退window.addEventListener('popstate', handlePop);// 返回的history上有個(gè)listen方法const history = {listen(listener) {return listeners.push(listener);},location}return history;}export default createBrowserHistory;
上述history代碼是超級(jí)精簡(jiǎn)版的代碼,官方源碼很多,還支持其他功能,我們這里只拎出來(lái)核心功能,對(duì)官方源碼感興趣的看這里:https://github.com/ReactTraining/history/blob/28c89f4091ae9e1b0001341ea60c629674e83627/packages/history/index.ts#L397
Route組件
我們前面的應(yīng)用里面還有個(gè)很重要的組件是Route組件,這個(gè)組件是用來(lái)匹配路由和具體的組件的。這個(gè)組件看似是從react-router-dom里面導(dǎo)出來(lái)的,其實(shí)他只是相當(dāng)于做了一個(gè)轉(zhuǎn)發(fā),原封不動(dòng)的返回了react-router的Route組件:
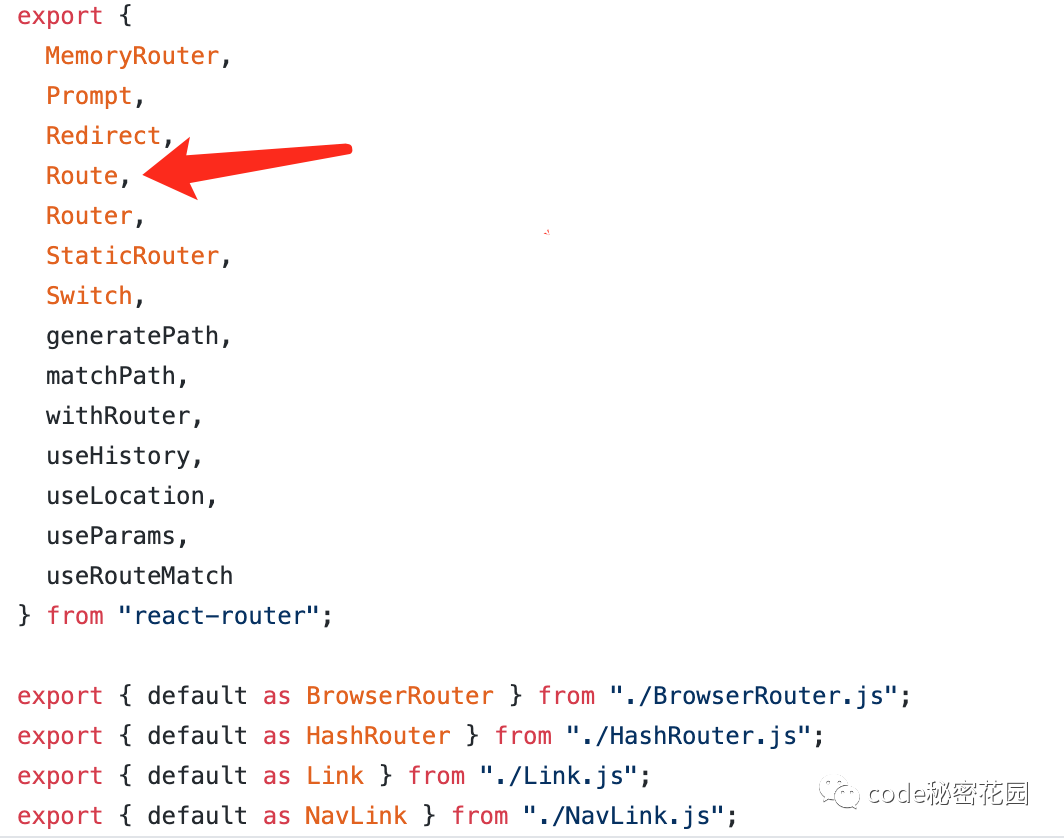
這個(gè)組件其實(shí)只有一個(gè)作用,就是將參數(shù)上的path拿來(lái)跟當(dāng)前的location做對(duì)比,如果匹配上了就渲染參數(shù)上的component就行。為了匹配path和location,還需要一個(gè)輔助方法matchPath,我直接從源碼抄這個(gè)方法了。大致思路是將我們傳入的參數(shù)path轉(zhuǎn)成一個(gè)正則,然后用這個(gè)正則去匹配當(dāng)前的pathname:
import pathToRegexp from "path-to-regexp";const cache = {};const cacheLimit = 10000;let cacheCount = 0;function compilePath(path, options) {const cacheKey = `${options.end}${options.strict}${options.sensitive}`;const pathCache = cache[cacheKey] || (cache[cacheKey] = {});if (pathCache[path]) return pathCache[path];const keys = [];const regexp = pathToRegexp(path, keys, options);const result = { regexp, keys };if (cacheCount < cacheLimit) {pathCache[path] = result;cacheCount++;}return result;}/*** Public API for matching a URL pathname to a path.*/function matchPath(pathname, options = {}) {if (typeof options === "string" || Array.isArray(options)) {options = { path: options };}const { path, exact = false, strict = false, sensitive = false } = options;const paths = [].concat(path);return paths.reduce((matched, path) => {if (!path && path !== "") return null;if (matched) return matched;const { regexp, keys } = compilePath(path, {end: exact,strict,sensitive});const match = regexp.exec(pathname);if (!match) return null;const [url, ...values] = match;const isExact = pathname === url;if (exact && !isExact) return null;return {path, // the path used to matchurl: path === "/" && url === "" ? "/" : url, // the matched portion of the URLisExact, // whether or not we matched exactlyparams: keys.reduce((memo, key, index) => {memo[key.name] = values[index];return memo;}, {})};}, null);}export default matchPath;
然后是Route組件,調(diào)用下matchPath來(lái)看下當(dāng)前路由是否匹配就行了,當(dāng)前路由記得從RouterContext里面拿:
import React from "react";import RouterContext from "./RouterContext.js";import matchPath from "./matchPath.js";/*** The public API for matching a single path and rendering.*/class Route extends React.Component {render() {return ({context => {// 從RouterContext獲取locationconst location = context.location;const match = matchPath(location.pathname, this.props); // 調(diào)用matchPath檢測(cè)當(dāng)前路由是否匹配const props = { ...context, location, match };let { component } = this.props;// render對(duì)應(yīng)的component之前先用最新的參數(shù)match更新下RouterContext// 這樣下層嵌套的Route可以拿到對(duì)的值return ({props.match? React.createElement(component, props): null});}});}}export default Route;
上述代碼也是精簡(jiǎn)過(guò)的,官方源碼還支持函數(shù)組件和render方法等,具體代碼可以看這里:https://github.com/ReactTraining/react-router/blob/master/packages/react-router/modules/Route.js
其實(shí)到這里,React-Router的核心功能已經(jīng)實(shí)現(xiàn)了,但是我們開始的例子中還用到了Switch和Link組件,我們也一起來(lái)把它實(shí)現(xiàn)了吧。
Switch組件
我們上面的Route組件的功能是只要path匹配上當(dāng)前路由就渲染組件,也就意味著如果多個(gè)Route的path都匹配上了當(dāng)前路由,這幾個(gè)組件都會(huì)渲染。所以Switch組件的功能只有一個(gè),就是即使多個(gè)Route的path都匹配上了當(dāng)前路由,也只渲染第一個(gè)匹配上的組件。要實(shí)現(xiàn)這個(gè)功能其實(shí)也不難,把Switch的children拿出來(lái)循環(huán),找出第一個(gè)匹配的child,給它添加一個(gè)標(biāo)記屬性computedMatch,順便把其他的child全部干掉,然后修改下Route的渲染邏輯,先檢測(cè)computedMatch,如果沒(méi)有這個(gè)再使用matchPath自己去匹配:
import React from "react";import RouterContext from "./RouterContext.js";import matchPath from "./matchPath.js";class Switch extends React.Component {render() {return ({context => {const location = context.location; // 從RouterContext獲取locationlet element, match; // 兩個(gè)變量記錄第一次匹配上的子元素和match屬性// 使用React.Children.forEach來(lái)遍歷子元素,而不能使用React.Children.toArray().find()// 因?yàn)閠oArray會(huì)給每個(gè)子元素添加一個(gè)key,這會(huì)導(dǎo)致兩個(gè)有同樣component,但是不同URL的重復(fù)渲染 React.Children.forEach(this.props.children, child => {// 先檢測(cè)下match是否已經(jīng)匹配到了// 如果已經(jīng)匹配過(guò)了,直接跳過(guò)if (!match && React.isValidElement(child)) {element = child;const path = child.props.path;match = matchPath(location.pathname, { ...child.props, path });}});// 最終組件的返回值只是匹配子元素的一個(gè)拷貝,其他子元素被忽略了 // match屬性會(huì)被塞給拷貝元素的computedMatch// 如果一個(gè)都沒(méi)匹配上,返回nullreturn match? React.cloneElement(element, { location, computedMatch: match }): null;}});}}export default Switch;
然后修改下Route組件,讓他先檢查computedMatch:
// ... 省略其他代碼 ...const match = this.props.computedMatch? this.props.computedMatch: matchPath(location.pathname, this.props); // 調(diào)用matchPath檢測(cè)當(dāng)前路由是否匹配
Switch組件其實(shí)也是在react-router里面,源碼跟我們上面寫的差不多:https://github.com/ReactTraining/react-router/blob/master/packages/react-router/modules/Switch.js
Link組件
Link組件功能也很簡(jiǎn)單,就是一個(gè)跳轉(zhuǎn),瀏覽器上要實(shí)現(xiàn)一個(gè)跳轉(zhuǎn),可以用a標(biāo)簽,但是如果直接使用a標(biāo)簽可能會(huì)導(dǎo)致頁(yè)面刷新,所以不能直接使用它,而應(yīng)該使用history API,history API具體文檔可以看這里。我們這里要跳轉(zhuǎn)URL可以直接使用history.pushState。使用history.pushState需要注意一下幾點(diǎn):
history.pushState只會(huì)改變history狀態(tài),不會(huì)刷新頁(yè)面。換句話說(shuō)就是你用了這個(gè)API,你會(huì)看到瀏覽器地址欄的地址變化了,但是頁(yè)面并沒(méi)有變化。當(dāng)你使用 history.pushState或者history.replaceState改變history狀態(tài)的時(shí)候,popstate事件并不會(huì)觸發(fā),所以history里面的回調(diào)不會(huì)自動(dòng)調(diào)用,當(dāng)用戶使用history.push的時(shí)候我們需要手動(dòng)調(diào)用回調(diào)函數(shù)。history.pushState(state, title[, url])接收三個(gè)參數(shù),第一個(gè)參數(shù)state是往新路由傳遞的信息,可以為空,官方React-Router會(huì)往里面加一個(gè)隨機(jī)的key和其他信息,我們這里直接為空吧,第二個(gè)參數(shù)title目前大多數(shù)瀏覽器都不支持,可以直接給個(gè)空字符串,第三個(gè)參數(shù)url是可選的,是我們這里的關(guān)鍵,這個(gè)參數(shù)是要跳往的目標(biāo)地址。由于 history已經(jīng)成為了一個(gè)獨(dú)立的庫(kù),所以我們應(yīng)該將history.pushState相關(guān)處理加到history庫(kù)里面。
我們先在history里面新加一個(gè)APIpush,這個(gè)API會(huì)調(diào)用history.pushState并手動(dòng)執(zhí)行回調(diào):
// ... 省略其他代碼 ...push(url) {const history = window.history;// 這里pushState并不會(huì)觸發(fā)popstate// 但是我們?nèi)匀灰@樣做,是為了保持state棧的一致性history.pushState(null, '', url);// 由于push并不觸發(fā)popstate,我們需要手動(dòng)調(diào)用回調(diào)函數(shù)location = { pathname: url };listeners.call(location);}
上面說(shuō)了我們直接使用a標(biāo)簽會(huì)導(dǎo)致頁(yè)面刷新,但是如果不使用a標(biāo)簽,Link組件應(yīng)該渲染個(gè)什么標(biāo)簽在頁(yè)面上呢?可以隨便渲染個(gè)span,div什么的都行,但是可能會(huì)跟大家平時(shí)的習(xí)慣不一樣,還可能導(dǎo)致一些樣式失效,所以官方還是選擇了渲染一個(gè)a標(biāo)簽在這里,只是使用event.preventDefault禁止了默認(rèn)行為,然后用history api自己實(shí)現(xiàn)了跳轉(zhuǎn),當(dāng)然你可以自己傳component參數(shù)進(jìn)去改變默認(rèn)的a標(biāo)簽。因?yàn)槭?code style="font-size: 14px;overflow-wrap: break-word;padding: 2px 4px;border-radius: 4px;margin-right: 2px;margin-left: 2px;background-color: rgba(27, 31, 35, 0.05);font-family: 'Operator Mono', Consolas, Monaco, Menlo, monospace;word-break: break-all;color: rgb(239, 112, 96);">a標(biāo)簽,不能兼容native,所以Link組件其實(shí)是在react-router-dom這個(gè)包里面:
import React from "react";import RouterContext from "../react-router/RouterContext";// LinkAnchor只是渲染了一個(gè)沒(méi)有默認(rèn)行為的a標(biāo)簽// 跳轉(zhuǎn)行為由傳進(jìn)來(lái)的navigate實(shí)現(xiàn)function LinkAnchor({navigate, ...rest}) {let props = {...rest,onClick: event => {event.preventDefault();navigate();}}return ;}function Link({component = LinkAnchor, // component默認(rèn)是LinkAnchorto,...rest}) {return ({context => {const { history } = context; // 從RouterContext獲取history對(duì)象const props = {...rest,href: to,navigate() {history.push(to);}};return React.createElement(component, props);}});}export default Link;
上述代碼是精簡(jiǎn)版的Link,基本邏輯跟官方源碼一樣:https://github.com/ReactTraining/react-router/blob/master/packages/react-router-dom/modules/Link.js
到這里開頭示例用到的全部API都換成了我們自己的,其實(shí)也實(shí)現(xiàn)了React-Router的核心功能。但是我們只實(shí)現(xiàn)了H5 history模式,hash模式并沒(méi)有實(shí)現(xiàn),其實(shí)有了這個(gè)架子,添加hash模式也比較簡(jiǎn)單了,基本架子不變,在react-router-dom里面添加一個(gè)HashRouter,他的基本結(jié)構(gòu)跟BrowserRouter是一樣的,只是他會(huì)調(diào)用history的createHashHistory,createHashHistory里面不僅僅會(huì)去監(jiān)聽popstate,某些瀏覽器在hash變化的時(shí)候不會(huì)觸發(fā)popstate,所以還需要監(jiān)聽hashchange事件。對(duì)應(yīng)的源碼如下,大家可以自行閱讀:
HashRouter: https://github.com/ReactTraining/react-router/blob/master/packages/react-router-dom/modules/HashRouter.js
createHashHistory: https://github.com/ReactTraining/history/blob/28c89f4091ae9e1b0001341ea60c629674e83627/packages/history/index.ts#L616
總結(jié)
React-Router的核心源碼我們已經(jīng)讀完了,下面我們來(lái)總結(jié)下:
React-Router因?yàn)橛锌缙脚_(tái)的需求,所以分拆了好幾個(gè)包,這幾個(gè)包采用monorepo的方式管理:react-router是核心包,包含了大部分邏輯和組件,處理context和路由匹配都在這里。react-router-dom是瀏覽器使用的包,像Link這樣需要渲染具體的a標(biāo)簽的組件就在這里。react-router-native是react-native使用的包,里面包含了android和ios具體的項(xiàng)目。瀏覽器事件監(jiān)聽也單獨(dú)獨(dú)立成了一個(gè)包
history,跟history相關(guān)的處理都放在了這里,比如push,replace什么的。React-Router實(shí)現(xiàn)時(shí)核心邏輯如下:使用不刷新的路由API,比如 history或者hash提供一個(gè)事件處理機(jī)制,讓 React組件可以監(jiān)聽路由變化。提供操作路由的接口,當(dāng)路由變化時(shí),通過(guò)事件回調(diào)通知 React。當(dāng)路由事件觸發(fā)時(shí),將變化的路由寫入到 React的響應(yīng)式數(shù)據(jù)上,也就是將這個(gè)值寫到根router的state上,然后通過(guò)context傳給子組件。具體渲染時(shí)將路由配置的 path和當(dāng)前瀏覽器地址做一個(gè)對(duì)比,匹配上就渲染對(duì)應(yīng)的組件。在使用
popstate時(shí)需要注意:原生 history.pushState和history.replaceState并不會(huì)觸發(fā)popstate,要通知React需要我們手動(dòng)調(diào)用回調(diào)函數(shù)。瀏覽器的前進(jìn)后退按鈕會(huì)觸發(fā) popstate事件,所以我們還是要監(jiān)聽popstate,目的是兼容前進(jìn)后退按鈕。
本文全部代碼已經(jīng)上傳GitHub,大家可以拿下來(lái)玩玩:https://github.com/dennis-jiang/Front-End-Knowledges/tree/master/Examples/React/react-router-code
參考資料
官方文檔:https://reactrouter.com/web/guides/quick-start
GitHub源碼地址:https://github.com/ReactTraining/react-router/tree/master/packages
文章的最后,感謝你花費(fèi)寶貴的時(shí)間閱讀本文,如果本文給了你一點(diǎn)點(diǎn)幫助或者啟發(fā),請(qǐng)不要吝嗇你的贊和GitHub小星星,你的支持是作者持續(xù)創(chuàng)作的動(dòng)力。
作者博文GitHub項(xiàng)目地址:https://github.com/dennis-jiang/Front-End-Knowledges
作者掘金文章匯總:https://juejin.im/post/5e3ffc85518825494e2772fd
在看、轉(zhuǎn)發(fā)支持作者??