egg+vue+mongodb實(shí)踐開(kāi)發(fā)在線文檔管理平臺(tái)——水墨文檔

授權(quán)轉(zhuǎn)載自:圍的圍
https://segmentfault.com/a/1190000037621367
前言
團(tuán)隊(duì)中會(huì)遇到在線文檔管理的需求,包括技術(shù)文檔,接口文檔, excel 文檔,和產(chǎn)品原型的托管等需求,一直沒(méi)有找到合適的開(kāi)源項(xiàng)目來(lái)滿足需求,所以動(dòng)手實(shí)現(xiàn)了個(gè)文檔管理系統(tǒng)(實(shí)現(xiàn)起來(lái)并不復(fù)雜,該教程只是提供思路,并非最佳實(shí)踐)
Github: https://github.com/huangwei9527/Ink-wash-docs
演示地址:http://www.inkwash.online/
功能列表
[x] 登錄注冊(cè) [x] 工作臺(tái)|文檔列表 [x] 文檔編輯預(yù)覽(支持:md, excel,html產(chǎn)品原型托管) [x] 協(xié)作編輯 [x] 訪問(wèn)權(quán)限設(shè)置 [x] 團(tuán)隊(duì)管理 [x] 點(diǎn)贊收藏 [x] 模板管理 [x] 瀏覽歷史 [x] 回收站 [ ] 文件夾形式閱讀(接口文檔) [ ] 編輯歷史版本
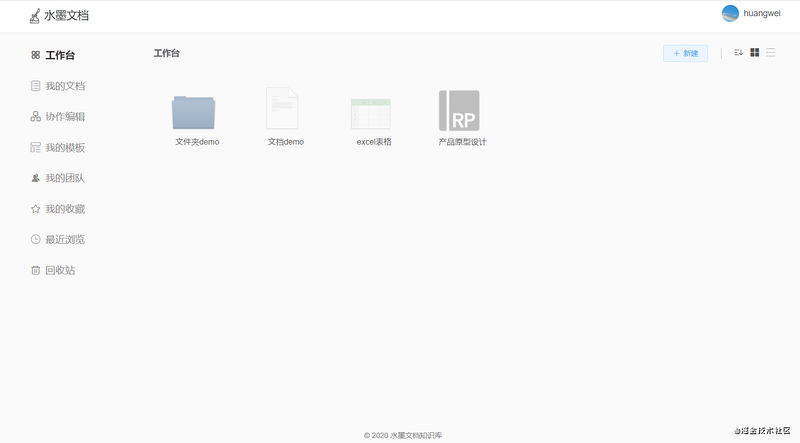
系統(tǒng)界面預(yù)覽
閱讀前準(zhǔn)備
1、了解 vue 技術(shù)棧開(kāi)發(fā)
2、了解 koa3、了解 egg4、了解 mongodb
技術(shù)棧
前端:vue: 模塊化開(kāi)發(fā)少不了angular,react,vue三選一,這里選擇了vue。vuex: 狀態(tài)管理sass: css預(yù)編譯器element-ui:不造輪子,有現(xiàn)成的優(yōu)秀的vue組件庫(kù)當(dāng)然要用起來(lái)。
服務(wù)端:egg.js:企業(yè)級(jí)框架,按照一套統(tǒng)一的約定進(jìn)行應(yīng)用開(kāi)發(fā),開(kāi)發(fā)十分高效。mongodb:一個(gè)基于分布式文件存儲(chǔ)的數(shù)據(jù)庫(kù),比較靈活。egg-alinode:阿里提供的免費(fèi)nodejs服務(wù)器性能監(jiān)控。
工程搭建
這里我們將前后端項(xiàng)目放在同一個(gè)目錄下管理,分別用 egg 腳手架和 vue-cli3 生成初始化項(xiàng)目,拷貝合并到同一個(gè)目錄下,記得合并下 package.json 內(nèi)容。(腳手架生成項(xiàng)目就不介紹了,按照文檔來(lái)就是了),合并后將 vue 項(xiàng)目 src 目錄改為 web ,如下:
···
·
|-- app                    // egg 初始化app目錄
|-- config                // egg 初始化app目錄
|-- public                // vue 靜態(tài)資源目錄
|-- web                    // 原 src 目錄,改成 web 用作前端項(xiàng)目目錄
·
···
這樣的話 我們需要再把我們vue webpack打包配置稍作一下調(diào)整,首先是把原先的編譯指向src的目錄改成 web,其次為了 npm run build 能正常編譯 web 我們也需要為 babel-loader 再增加一個(gè)編譯目錄:
根目錄新增
vue.config.js,目的是為了改造vue項(xiàng)目入口,改為:web/main.jsmodule.exports = {
pages: {
index: {
entry: "web/main.js"
}
}
}babel-loader能正常編譯web目錄, 在vue.config.js新增如下配置
// 擴(kuò)展 webpack 配置
chainWebpack: config => {
    config.module
    .rule('js')
    .include.add(/web/).end()
    .use('babel')
    .loader('babel-loader')
    .tap(options => {
    // 修改它的選項(xiàng)...
    return options
    })
}
package.json新增前端項(xiàng)目打包命令
"dev-web": "vue-cli-service serve",
"build-web": "vue-cli-service build",
至此前后端項(xiàng)目初始化工作就完了,前端開(kāi)發(fā)啟動(dòng)npm run dev-web 后端開(kāi)發(fā)啟動(dòng) npm run dev
工程目錄結(jié)構(gòu)
|-- app                    --------服務(wù)器端項(xiàng)目代碼
    |--controller                --------用于解析用戶的輸入,處理后返回相應(yīng)的結(jié)果
    |--extend                    --------框架的擴(kuò)展
    |--middleware                --------編寫中間件
    |--model                    --------Schema數(shù)據(jù)模型
    |--public                    --------用于放置靜態(tài)資源
    |--service                    --------用于編寫業(yè)務(wù)邏輯層
    |--router.js                --------用于配置 URL 路由規(guī)則
|-- config                    --------egg 配置文件
    |--config.default.js            --------默認(rèn)配置
    |--config.local.js                --------開(kāi)發(fā)環(huán)境配置
    |--config.prod.js                --------生產(chǎn)環(huán)境配置
    |--plugin.js                    --------配置需要加載的插件
|-- web                        --------前端項(xiàng)目界面代碼
    |--common                    --------前端界面對(duì)應(yīng)靜態(tài)資源
    |--components                --------組件
    |--config                    --------配置文件
    |--filter                    --------過(guò)濾器
    |--pages                    --------頁(yè)面
    |--router                    --------路由配置
    |--store                    --------vuex狀態(tài)管理
    |--service                    --------axios封裝
    |--App.vue                    --------App
    |--main.js                    --------入口文件
    |--permission.js            --------權(quán)限控制
|-- docs                    --------預(yù)留編寫項(xiàng)目文檔目錄
|-- vue.config.js            --------vue webpack配置文件
|-- package.json
...
...
完成項(xiàng)目目錄初始化后,接下來(lái)先把 mongodb 全局得一些中間件、擴(kuò)展方法給配置上,為接口開(kāi)發(fā)做好準(zhǔn)備工作
mongodb配置
1、安裝 mongoose模塊
npm install egg-mongoose --save
2、配置 config 文件
// config/plugin.js
exports.mongoose = {
    enable: true,
    package: 'egg-mongoose',
};

// config/config.default.js
config.mongoose = {
    url: 'mongodb://127.0.0.1:27017/inkwash',
    options: {},
};
全局中間件和擴(kuò)展配置
1、統(tǒng)一處理接口
后端接口開(kāi)發(fā)中我們需要一個(gè)統(tǒng)一得返回格式,可以在 context 對(duì)象下擴(kuò)展個(gè)返回?cái)?shù)據(jù) function 用于統(tǒng)一處理接口 response data
app 下新建文件夾 extend 新建 context.js
// app/extend/context.js
module.exports = {
    /**
     * 返回客戶端的內(nèi)容
     * @param status // 接口是否成功
     * @param body // 返回?cái)?shù)據(jù)
     * @param msg // 返回信息提示
     * @param code // 返回狀態(tài)碼
     */
    returnBody (status = true, body = {}, msg = 'success', code = 200) {
        this.status = code;
        this.body = {
            status: status,
            body: body,
            msg,
            code: code
        }
    }
}
// 調(diào)用
const { ctx } = this;
ctx.returnBody(true, {}, "成功");
2、添加統(tǒng)一處理錯(cuò)誤得中間件
app文件夾下新建 middleware 文件夾,新建 error_handler.js , 并配置 congfig 全局中間件配置
// app/middleware/error_handler.js
module.exports = () => {

    return async function errorHandler(ctx, next) {
        try {
            await next();
        } catch (err) {
            // 所有的異常都會(huì)在app上出發(fā)一個(gè)error事件,框架會(huì)記錄一條錯(cuò)誤日志
            ctx.app.emit('error', err, ctx);

            const status = err.status || 500;

            // 如果時(shí)生產(chǎn)環(huán)境的時(shí)候 500錯(cuò)誤的詳細(xì)錯(cuò)誤內(nèi)容不返回給客戶端
            const error = status === 500 && ctx.app.config.env === 'prod' ? '網(wǎng)絡(luò)錯(cuò)誤' : err.message;

            ctx.body = {
                msg: error,
                status: false,
                body: {},
                code: status
            };
        }
    };
};

// app/middleware/error_handler.js
// config/config.default.js 配置全局中間件
config.middleware = [ 'errorHandler'];
jwt鑒權(quán)登錄認(rèn)證
1、安裝 egg-jwt token生成以及驗(yàn)證包
npm install egg-jwt --save
2、安裝完成后在根目錄下的 config/plugin.js 配置一下,如:
'use strict';

/** @type Egg.EggPlugin */
module.exports = {
    jwt: {
        enable: true,
        package: "egg-jwt"
    },
  mongoose: {
    enable: true,
    package: 'egg-mongoose',
  }
};
3、接下來(lái)在 config/config.default.js 里面繼續(xù)配置:
config.jwt = {
  secret: "123456"//自定義 token 的加密條件字符串
};
4、在 context 上擴(kuò)展兩個(gè) function , getToken 和 checkToken 用于生成 token 和驗(yàn)證 token
// app/extend/context.js
async getToken(data) {
    return await this.app.jwt.sign(data, this.app.config.jwt.secret, {expiresIn: 30* 24 * 60 * 60 + 's'});
},
async checkToken(token) {
    return await this.app.jwt.verify(token, this.app.config.jwt.secret)
}
5、編寫個(gè)中間件實(shí)現(xiàn)登錄驗(yàn)證攔截
在 app/middleware 文件夾下新建 auth.js
// app/middleware/auth.js
module.exports = () => {
    return async function(ctx, next) {
        let token = '';
        if (
            ctx.headers.authorization && ctx.headers.authorization.split(' ')[0] === 'Bearer'
        ) {
            token = ctx.headers.authorization.split(' ')[1];
        } else if (ctx.query.accesstoken) {
            token = ctx.query.accesstoken;
        } else if (ctx.request.body.accesstoken) {
            token = ctx.request.body.accesstoken;
        }
        let user;
        try{
            user = await ctx.checkToken(token);
        }catch (e) {
            ctx.returnBody(false,{}, 'Token 無(wú)效,請(qǐng)重新登錄', 401);
        }
        if (!user) {
            ctx.returnBody(false,{}, 'Token 無(wú)效,請(qǐng)重新登錄', 401);
            return;
        }
        ctx.request.user = user;
        await next();
    };
};
好了以上配置完成后就開(kāi)始接下來(lái)的核心注冊(cè)功能相關(guān)操作了。
首先我在根目錄下的 app/router.js創(chuàng)建訪問(wèn)路由:
import { Application } from 'egg';

export default (app: Application) => {
  const { controller, router, jwt } = app;
  //正常路由
  router.post('/auth/register', controller.auth.register);

  // 只有在需要驗(yàn)證 token 的路由上添加jwt
  router.post('/user/infor',jwt, controller.user.infor);
};
接下來(lái)我去編寫我的控制器,在根目錄下的 app/controller/home.ts編寫內(nèi)容:這里使用了兩個(gè)我們?cè)?app/extend/context.js上擴(kuò)展的兩個(gè)通用方法通過(guò) ctx.getToken(用戶信息object對(duì)象)將用戶信息通過(guò)jwt生成token返回給前端通過(guò) ctx.returnBody返回?cái)?shù)據(jù)
// app/controller/auth.js
const Controller = require('egg').Controller
class AuthController extends Controller {
    async login() {
        //... 略
    }
    async register() {
        const { ctx, service } = this;
        const { username, password, email } = ctx.request.body
        let userData = await ctx.service.user.createUser(username, password, email);
        userData = userData.toObject();
        let userDataStr = JSON.parse(JSON.stringify(userData));
        // 生成token
        let token =await ctx.getToken(userDataStr);
        ctx.returnBody(true, {access_token: token, userInfo: userData}, "注冊(cè)成功!")
    }
}

module.exports = AuthController;
前端請(qǐng)求的時(shí)候需要在 headers里面上默認(rèn)的驗(yàn)證字?jǐn)?Authorization就可以了,如:
axios({
 method: 'get',
  url: 'http://127.0.0.1:7001/user/info',
  headers:{
      // 切記 token 不要直接發(fā)送,要在前面加上 Bearer 字符串和一個(gè)空格
    'Authorization':`Bearer ${token}`
  }
})
接口從 token獲取加密信息
在 app/extend/context.js再擴(kuò)展個(gè)getUser方法獲取token加密信息
// app/extend/context.js
// 獲取用戶信息
    async getUserData() {
        var token = this.headers.authorization ? this.headers.authorization : '';
        token = token.substring(7) //把Bearer 截取掉,解析的時(shí)候不需要加上Bearer
        let user = {}
        try {
            user = this.app.jwt.verify(token, this.app.config.jwt.secret);
        } catch (err) {
            user = {}
        }
        return user;
    }
實(shí)現(xiàn)獲取個(gè)人信息接口
// app/controller/user.js
'use strict';

const Controller = require('egg').Controller;

class UserController extends Controller {
    async info() {
        let {ctx} = this;
        let user = await this.ctx.getUserData()
        ctx.returnBody(true, user)
    }
}

module.exports = UserController;
至此我們就實(shí)現(xiàn)了 jwt 生成 token , 然后通過(guò)前端傳過(guò)來(lái)的 token 獲取當(dāng)前登錄用戶的信息, jwt 登錄授權(quán)這塊應(yīng)該是講完了,其他的業(yè)務(wù)接口應(yīng)該實(shí)現(xiàn)起來(lái)難度不大
md文檔編輯
文檔編輯器使用 Vdito r, 一款瀏覽器端的 Markdown 編輯器,支持所見(jiàn)即所得(富文本)、即時(shí)渲染(類似 Typora )和分屏預(yù)覽模式
安裝 Vditor
npm install vditor --save
在代碼中引入并初始化對(duì)象
<template>
  <div class="editor-component editor-md" ref="editor-component">
    <div id="editor-md-dom"></div>
  </div>
</template>

<script>
    import Vditor from 'vditor'
    import "vditor/src/assets/scss/index.scss"

    let timer = null;
    export default {
         data(){
             return {
                contentEditor: '',
            }
          },
          mounted () {
            this.contentEditor = new Vditor('vditor', {
              height: 360,
              toolbarConfig: {
                pin: true,
              },
              cache: {
                enable: false,
              },
              after: () => {
                this.contentEditor.setValue('hello, Vditor + Vue!')
              },
            })
         },
    }
</script>
excel表格編輯
安裝 x-data-spreadsheet
npm install x-data-spreadsheet
<div id="x-spreadsheet-demo"></div>
import Spreadsheet from "x-data-spreadsheet";
// If you need to override the default options, you can set the override
// const options = {};
// new Spreadsheet('#x-spreadsheet-demo', options);
const s = new Spreadsheet("#x-spreadsheet-demo")
  .loadData({}) // load data
  .change(data => {
    // save data to db
  });

// data validation
s.validate()
axure原型托管
原型 axure 頁(yè)面托管,參考 WuliHub 讓用戶上傳生成的 html 壓縮包,然后解壓到靜態(tài)資源目錄,返回訪問(wèn)地址就 ok , 前端拿到原型地址用內(nèi)嵌 iframe 渲染出來(lái)就 ok
打包編譯&&靜態(tài)資源設(shè)置
1、配置前端 vue 頁(yè)面打包命令
// kage.json script新增打包命令
"build-web": "vue-cli-service build",
2、運(yùn)行 npm run build-web 根目錄會(huì)生成 dist 前端代碼靜態(tài)文件,因?yàn)?egg 支持設(shè)置多個(gè)靜態(tài)資源目錄,這里就直接配置根目錄下的dist 文件夾為靜態(tài)目錄, 配置 config
// config/config.default.js
config.static = {
        prefix: '/',// 將靜態(tài)資源前綴改為'/'(默認(rèn)是 '/public')
        dir: [
            path.join(__dirname, '../app/public'),
            path.join(__dirname, '../dist')
        ]
    }
打包完成后啟動(dòng) egg , 就可以通過(guò) http://localhost/:7001/index.html 訪問(wèn)到前端頁(yè)面了
因?yàn)橹苯釉L問(wèn) http://localhost/:7001 會(huì) 404可以再配置個(gè)路由重定向,將跟路由 '/' 重定向到 '/index.html'
// app/router.js
// 重定向到index頁(yè)面
app.router.redirect('/', '/index.html', 302);
部署
服務(wù)端部署運(yùn)行 start 命令
npm run start
性能監(jiān)控
node 服務(wù)性能監(jiān)控這塊可以使用阿里免費(fèi)開(kāi)源的 alinode1、安裝 egg-alinode
npm i egg-alinode
2、插件配置
// config/plugin.js
exports.alinode = {
  enable: true,
  package: 'egg-alinode',
};
3、配置config
// config/config.default.js
exports.alinode = {
  enable: true,
  appid: 'my app id',
  secret: 'my app secret',
};
這樣就可以了,監(jiān)控?cái)?shù)據(jù)可以在阿里 Node.js 性能平臺(tái)控制臺(tái)看到監(jiān)控面板
最后
歡迎加我微信(winty230),拉你進(jìn)技術(shù)群,長(zhǎng)期交流學(xué)習(xí)...
歡迎關(guān)注「前端Q」,認(rèn)真學(xué)前端,做個(gè)專業(yè)的技術(shù)人...