
10個有趣的Python高級腳本,建議收藏!
圖片格式轉(zhuǎn)換,以前小F可能第一時間想到的是【格式工廠】這個軟件。
如今編寫一個Python腳本就能完成各種圖片格式的轉(zhuǎn)換,此處以jpg轉(zhuǎn)成png為例。
有兩種解決方法,都分享給大家。
#?圖片格式轉(zhuǎn)換,?Jpg轉(zhuǎn)Png
#?方法①
from?PIL?import?Image
img?=?Image.open('test.jpg')
img.save('test1.png')
#?方法②
from?cv2?import?imread,?imwrite
image?=?imread("test.jpg",?1)
imwrite("test2.png",?image)
▍2、PDF加密和解密
如果你有100個或更多的PDF文件需要加密,手動進(jìn)行加密肯定是不可行的,極其浪費(fèi)時間。
使用Python的pikepdf模塊,即可對文件進(jìn)行加密,寫一個循環(huán)就能進(jìn)行批量加密文檔。
#?PDF加密
import?pikepdf
pdf?=?pikepdf.open("test.pdf")
pdf.save('encrypt.pdf',?encryption=pikepdf.Encryption(owner="your_password",?user="your_password",?R=4))
pdf.close()
有加密那么便會有解密,代碼如下。
#?PDF解密
import?pikepdf

pdf?=?pikepdf.open("encrypt.pdf",??password='your_password')
pdf.save("decrypt.pdf")
pdf.close()
▍3、獲取電腦的配置信息
很多小伙伴可能會使用魯大師來看自己的電腦配置,這樣還需要下載一個軟件。
使用Python的WMI模塊,便可以輕松查看你的電腦信息。
#?獲取計算機(jī)信息
import?wmi
def?System_spec():
????Pc?=?wmi.WMI()
????os_info?=?Pc.Win32_OperatingSystem()[0]
????processor?=?Pc.Win32_Processor()[0]
????Gpu?=?Pc.Win32_VideoController()[0]
????os_name?=?os_info.Name.encode('utf-8').split(b'|')[0]
????ram?=?float(os_info.TotalVisibleMemorySize)?/?1048576
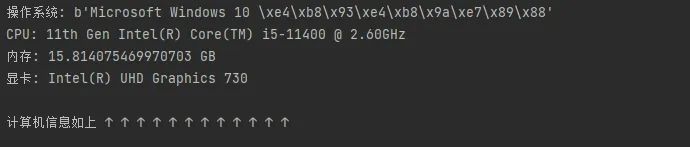
????print(f'操作系統(tǒng):?{os_name}')
????print(f'CPU:?{processor.Name}')
????print(f'內(nèi)存:?{ram}?GB')
????print(f'顯卡:?{Gpu.Name}')
????print("\n計算機(jī)信息如上?↑?↑?↑?↑?↑?↑?↑?↑?↑?↑?↑?↑")
System_spec()
就以小F自己的電腦為例,運(yùn)行代碼就能看到配置。
▍4、解壓文件
使用zipfile模塊進(jìn)行文件解壓,同理也可以對文件進(jìn)行壓縮。
#?解壓文件
from?zipfile?import?ZipFile
unzip?=?ZipFile("file.zip",?"r")
unzip.extractall("output?Folder")
▍5、Excel工作表合并
幫助你將Excel工作表合并到一張表上,表內(nèi)容如下圖。
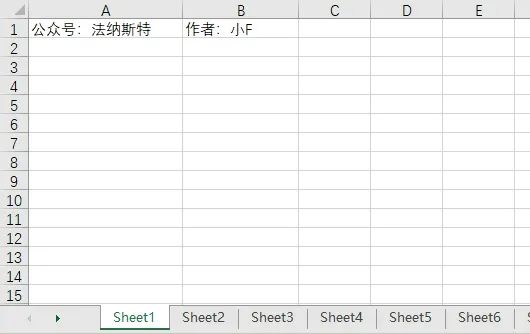
6張表,其余表的內(nèi)容和第一張表都一樣。
設(shè)置表格數(shù)量為5,將會合并前5張表的內(nèi)容。
import?pandas?as?pd
#?文件名
filename?=?"test.xlsx"
#?表格數(shù)量
T_sheets?=?5
df?=?[]
for?i?in?range(1,?T_sheets+1):
????sheet_data?=?pd.read_excel(filename,?sheet_name=i,?header=None)
????df.append(sheet_data)
#?合并表格
output?=?"merged.xlsx"
df?=?pd.concat(df)
df.to_excel(output)
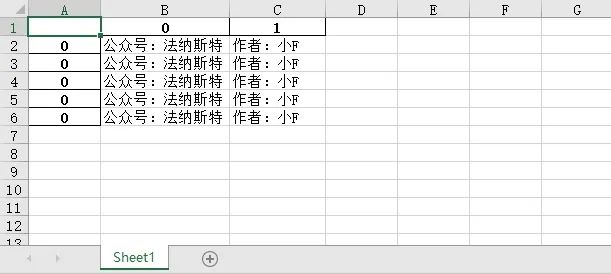
結(jié)果如下。
▍6、將圖像轉(zhuǎn)換為素描圖
和之前的圖片格式轉(zhuǎn)換有點(diǎn)類似,就是對圖像進(jìn)行處理。
以前大家可能會使用到美圖秀秀,現(xiàn)在可能就是抖音的濾鏡了。
其實(shí)使用Python的OpenCV,就能夠快速實(shí)現(xiàn)很多你想要的效果。
#?圖像轉(zhuǎn)換
import?cv2
#?讀取圖片
img?=?cv2.imread("img.jpg")
#?灰度
grey?=?cv2.cvtColor(img,?cv2.COLOR_BGR2GRAY)
invert?=?cv2.bitwise_not(grey)
#?高斯濾波
blur_img?=?cv2.GaussianBlur(invert,?(7,?7),?0)
inverse_blur?=?cv2.bitwise_not(blur_img)
sketch_img?=?cv2.divide(grey,?inverse_blur,?scale=256.0)
#?保存
cv2.imwrite('sketch.jpg',?sketch_img)
cv2.waitKey(0)
cv2.destroyAllWindows()
原圖如下。

素描圖如下,還挺好看的。

▍7、獲取CPU溫度
有了這個Python腳本,你將不需要任何軟件來了解CPU的溫度。
#?獲取CPU溫度
from?time?import?sleep
from?pyspectator.processor?import?Cpu
cpu?=?Cpu(monitoring_latency=1)
with?cpu:
????while?True:
????????print(f'Temp:?{cpu.temperature}?°C')
????????sleep(2)
▍8、提取PDF表格
有的時候,我們需要從PDF中提取表格數(shù)據(jù)。
第一時間你可能會先想到手工整理,但是當(dāng)工作量特別大,手工可能就比較費(fèi)勁。
然后你可能會想到一些軟件和網(wǎng)絡(luò)工具來提取 PDF 表格。
下面這個簡單的腳本將幫助你在一秒鐘內(nèi)完成相同的操作。
#?方法①
import?camelot
tables?=?camelot.read_pdf("tables.pdf")
print(tables)
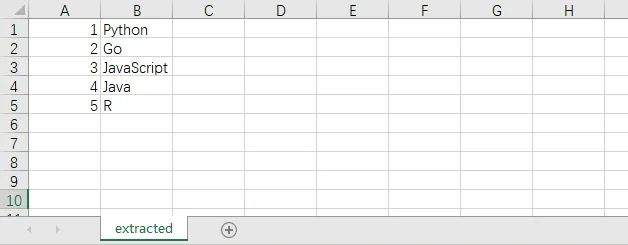
tables.export("extracted.csv",?f="csv",?compress=True)
#?方法②,?需要安裝Java8
import?tabula
tabula.read_pdf("tables.pdf",?pages="all")
tabula.convert_into("table.pdf",?"output.csv",?output_format="csv",?pages="all")
PDF文檔的內(nèi)容如下,包含了一個表格。
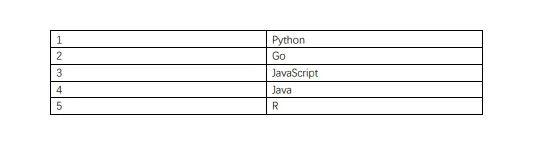
提取到的CSV文件內(nèi)容如下。
▍9、截圖
該腳本將簡單地截取屏幕截圖,而無需使用任何屏幕截圖軟件。
在下面的代碼中,給大家展示了兩種Python截取屏幕截圖的方法。
#?方法①
from?mss?import?mss
with?mss()?as?screenshot:
????screenshot.shot(output='scr.png')
#?方法②
import?PIL.ImageGrab
scr?=?PIL.ImageGrab.grab()
scr.save("scr.png")
▍10、拼寫檢查器
這個Python腳本可以進(jìn)行拼寫檢查,當(dāng)然只對英文有效,畢竟中文博大精深吶。
#?拼寫檢查
#?方法①
import?textblob
text?=?"mussage"
print("original?text:?"?+?str(text))
checked?=?textblob.TextBlob(text)
print("corrected?text:?"?+?str(checked.correct()))
#?方法②
import?autocorrect
spell?=?autocorrect.Speller(lang='en')
#?以英語為例
print(spell('cmputr'))
print(spell('watr'))
print(spell('survice'))
加入知識星球【我們談?wù)摂?shù)據(jù)科學(xué)】
500+小伙伴一起學(xué)習(xí)!
·?推薦閱讀?·
純Python開發(fā)在線GeoJSON數(shù)據(jù)生成器