
koa+react+sequelize搭建博客后臺(附源碼,適合入門)
大廠技術(shù) 高級前端 Node進階
點擊上方 程序員成長指北,關(guān)注公眾號
回復(fù)1,加入高級Node交流群
使用koa+react+sequelize搭建博客系統(tǒng),這篇文章講述koa+sequelize的開發(fā)過程。支持增刪改查等功能。
代碼放到了github:https://github.com/liangchaofei/cms上,可以直接下載運行
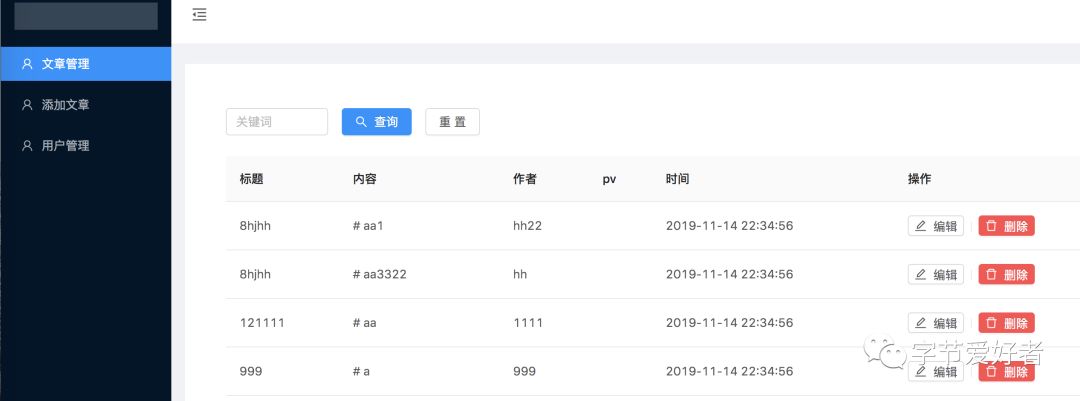
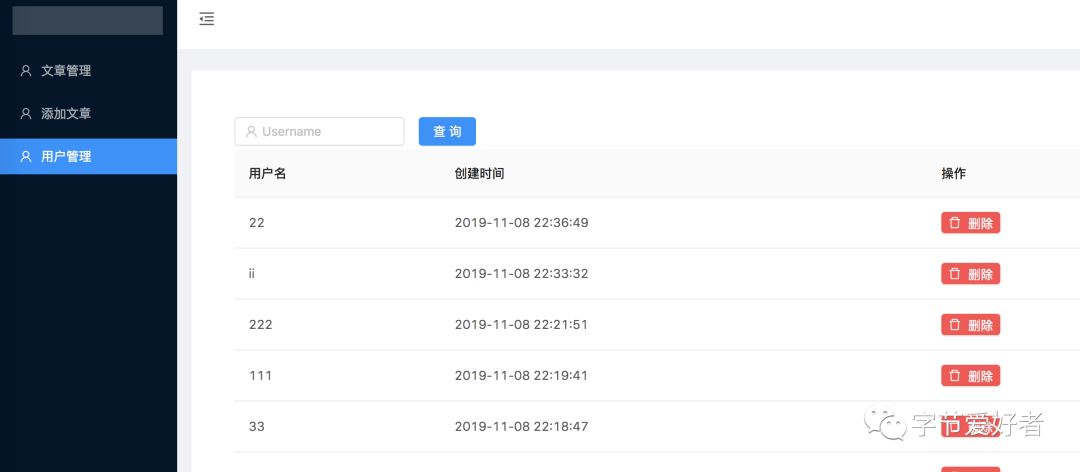
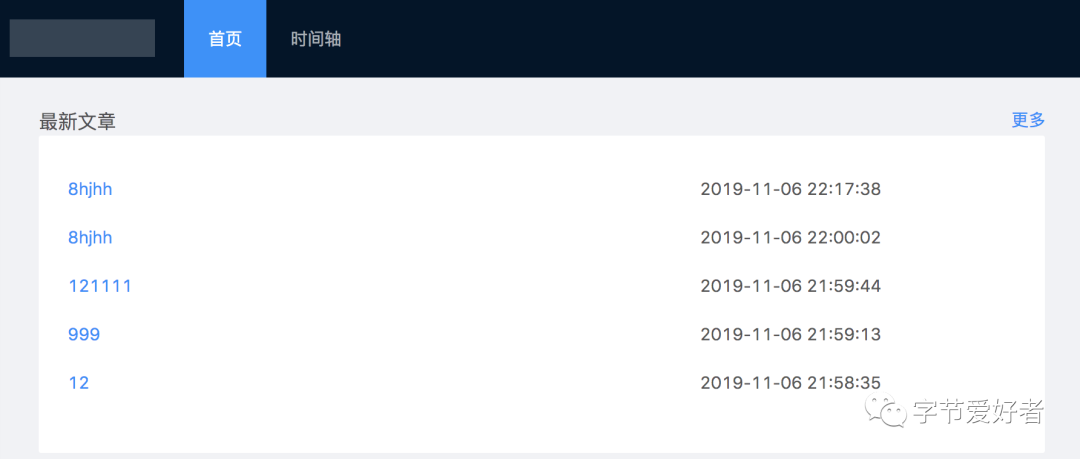
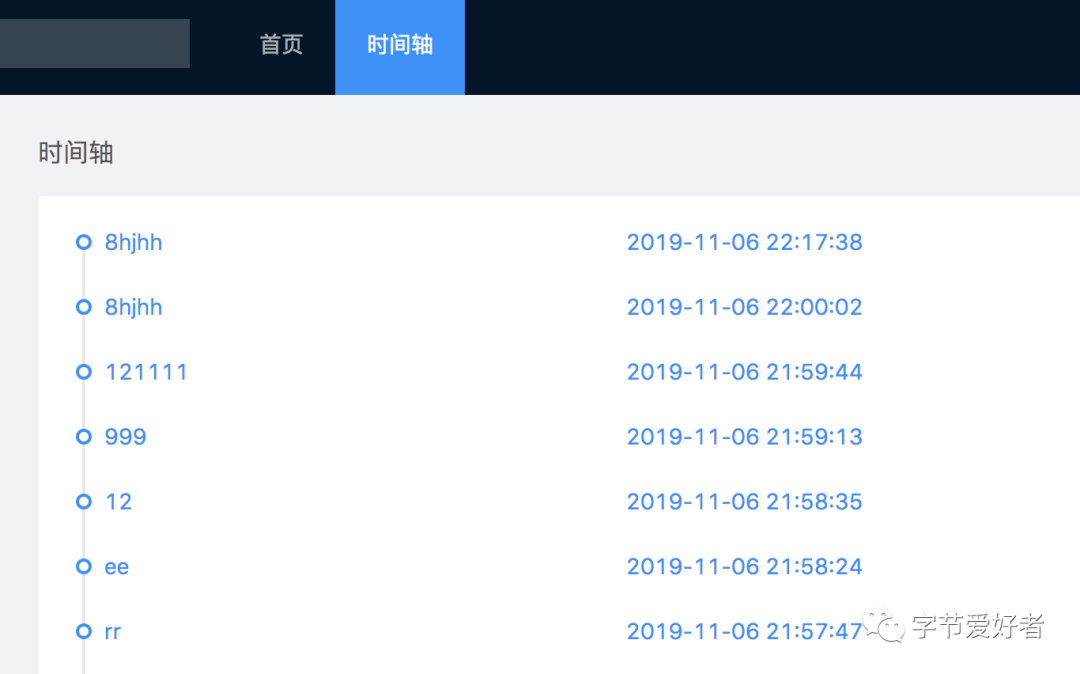
先看下系統(tǒng)界面
koa使用狼叔提供的koa-generate腳手架工具。
安裝koa-generate
npm install -g koa-generator
建立項目并初始化
    koa cms_blog
    cd cms_blog
    npm install
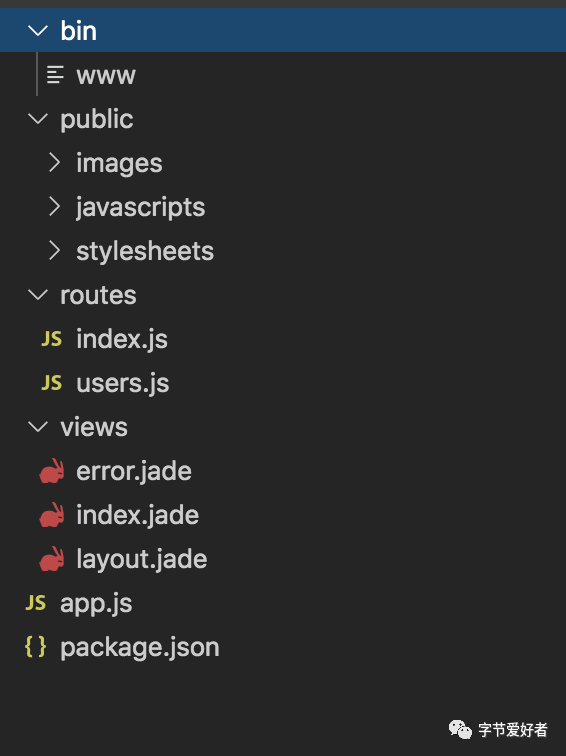
安裝成功后項目目錄如下:
運行并在瀏覽器打開127.0.0.1:3000即可
npm run dev
開始項目搭建:采用MVC模式
在根目錄下創(chuàng)建controllers,modules,schema,config文件夾
controllers:寫控制邏輯部分
modules:寫sql部分
schema:寫數(shù)據(jù)表部分
config:寫數(shù)據(jù)庫配置部分
數(shù)據(jù)庫用nodejs的ORM數(shù)據(jù)庫:Sequelize
在config目錄下創(chuàng)建db.js,配置數(shù)據(jù)庫
    const Sequelize = require('sequelize')
    const sequelize = new Sequelize('koa','root','123456',{
        host:'localhost',
        dialect:'mysql',
        operatorsAliases:false,
        dialectOptions:{
            //字符集
            charset:'utf8mb4',
            collate:'utf8mb4_unicode_ci',
            supportBigNumbers: true,
            bigNumberStrings: true
        },
        pool:{
            max: 5,
            min: 0,
            acquire: 30000,
            idle: 10000
        },
        timezone: '+08:00'  //東八時區(qū)
    })

    module.exports = {
        sequelize
    }
創(chuàng)建一個文章表article
| 名稱 | 類型 | 長度 | 主鍵 |
|---|---|---|---|
| id | int | 11 | true |
| title | varchar | 255 | false |
| authore | varchar | 255 | false |
| content | varchar | 255 | false |
| createdAt | datetime | 0 | false |
| updatedAt | datetime | 0 | false |
在schema文件夾下創(chuàng)建article.js
    const blog = (sequelize, DataTypes) => {
    return sequelize.define('blog',{
        id:{
            type:DataTypes.INTEGER,
            primaryKey:true,
            allowNull:true,
            autoIncrement:true
        },
        title: {
            type: DataTypes.STRING,
            allowNull: false,
            field: 'title'
        },
        author: {
            type: DataTypes.STRING,
            allowNull: false,
            field: 'author'
        },
        content: {
            type: DataTypes.STRING,
            allowNull: false,
            field: 'content'
        },
        createdAt:{
            type:DataTypes.DATE
        },
        updatedAt:{
            type:DataTypes.DATE
        }
    },{
        /**
         * 如果為true,則表示名稱和model相同,即user
         * 如果為fasle,mysql創(chuàng)建的表名稱會是復(fù)數(shù),即users
         * 如果指定的表名稱本身就是復(fù)數(shù),則形式不變
         */
        freezeTableName: false
    })
}
module.exports =  blog
數(shù)據(jù)庫部分配置好后,開始接口開發(fā),采用restful api模式
get請求:數(shù)據(jù)查詢
在routes目錄下創(chuàng)建article.js
    const router = require('koa-router')() // 使用koa-router 來指定接口路由
    const BlogControll = require('../controllers/blog') // 引入Control部分

    // 使用router.get 提供get請求
    router.get('/blog', BlogControll.getAllBlog)
在controllers目錄下創(chuàng)建article.js
    const BlogModel = require('../modules/blog') // 引入model

    static async getAllBlog(ctx) {
        const { query } = ctx.request; // 獲取前端傳來的參數(shù)
        try {
            let data = await BlogModel.getAllBlog(query) // 獲取查詢的數(shù)據(jù)
            ctx.response.status = 200;
            ctx.body = {
                code: 200,
                msg: 'success',
                data,
                count: data.length
            }
        } catch (err) {
            ctx.response.status = 412;
            ctx.body = {
                code: 412,
                msg: 'error',
                err,
            }
        }
    }
在modules目錄下創(chuàng)建article.js
    const db = require('../config/db') // 引入數(shù)據(jù)庫配置
    const Sequelize = db.sequelize; // 使用sequelize
    const Blog = Sequelize.import('../schema/blog.js')
    Blog.sync({force: false})


    static async getAllBlog(query){
        // 通過使用sequelize 的findAll 來查詢數(shù)據(jù)
        // 根據(jù)query參數(shù)實現(xiàn)查詢關(guān)鍵詞功能
        return await Blog.findAll({
            where: {
                ...query
            },
            order:[
                ["id","DESC"]
            ],
        })

    }
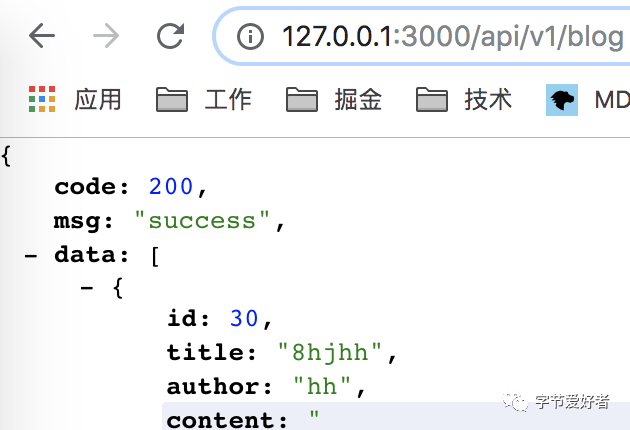
至此一個get請求的接口就寫好了,運行npm run dev,打開瀏覽器運行http://127.0.0.1:3000/api/v1/blog 就可以看到數(shù)據(jù)了。
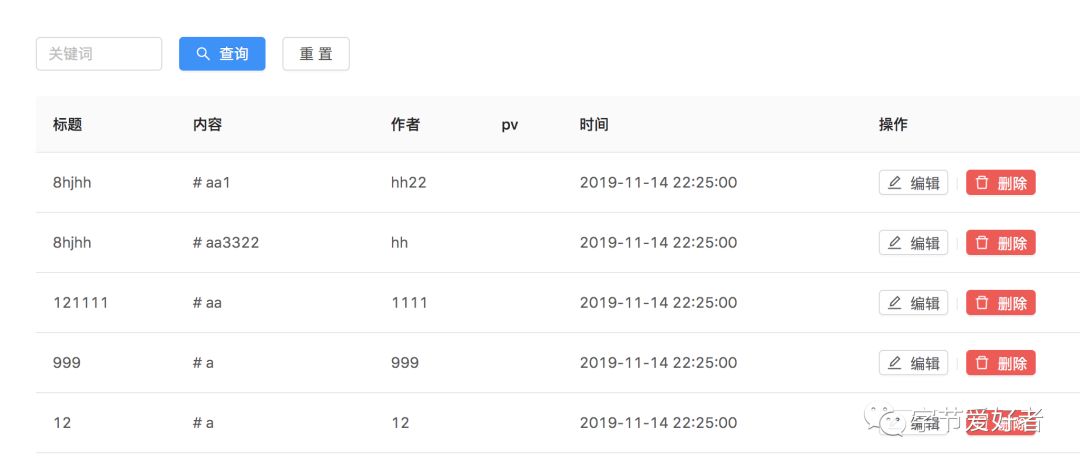
可以在后臺系統(tǒng)中查看
post請求:數(shù)據(jù)添加
在routes/article.js
router.post('/blog', BlogControll.addBlog)
在controllers/article.js
    static async addBlog(ctx) {
        let req = ctx.request.body;
        if (req.title && req.author && req.content) {
            try {
                let data = await BlogModel.addBlog(req)
                ctx.response.status = 200
                ctx.body = {
                    code: 200,
                    msg: 'success',
                    data
                }
            } catch (err) {
                ctx.response.status = 412
                ctx.body = {
                    code: 412,
                    msg: 'error',
                    err
                }
            }
        } else {
            ctx.response.status = 416
            ctx.body = {
                code: 416,
                msg: '參數(shù)不全',
            }
        }
    }
在module/article.js
    static async addBlog(data){
        return await Blog.create({
            title: data.title,
            author: data.author,
            content: data.content,
        })
    }
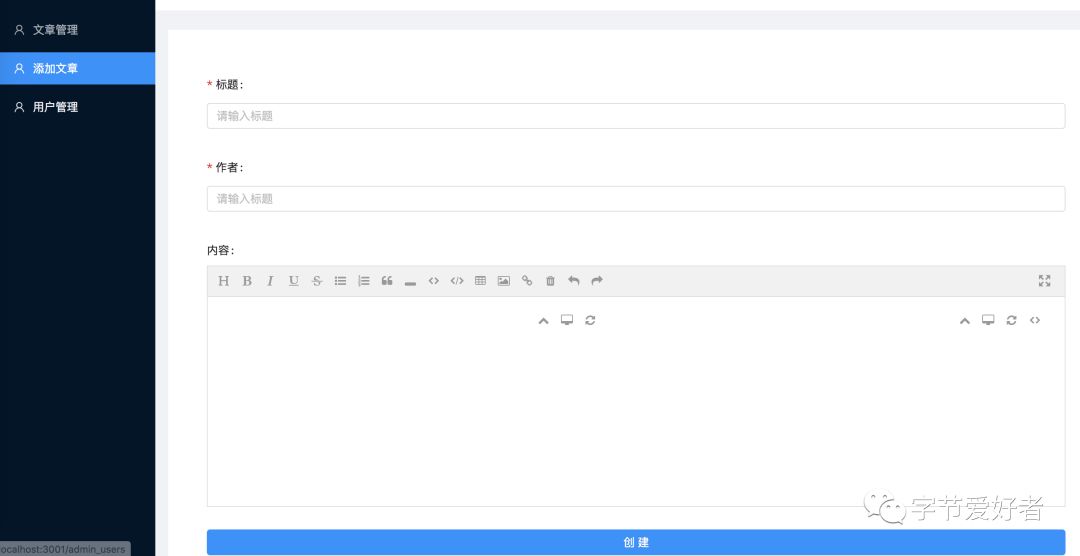
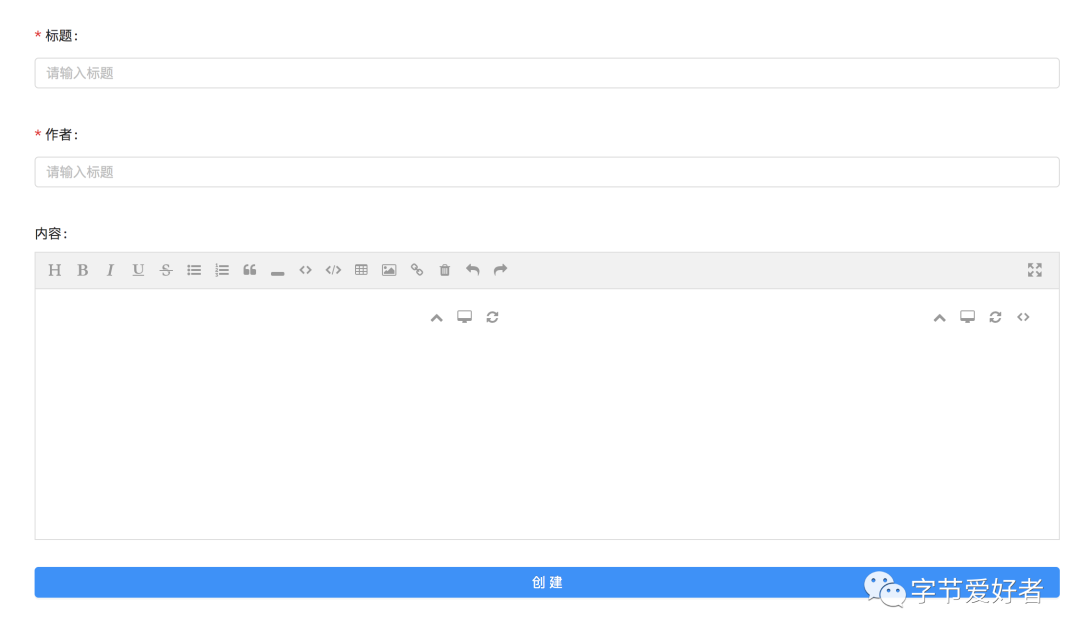
至此添加文章接口就寫好了,可以在后臺系統(tǒng)添加
delete請求:刪除文章
在routes/article.js
router.delete('/blog/:id',BlogControll.deleteBlog)
在controllers/article.js
    static async deleteBlog(ctx) {
        let id = ctx.params.id; // 根據(jù)id刪除
        if (id) {
            try {
                let data = await BlogModel.deleteBlogs(id)
                ctx.response.status = 200;
                ctx.body = {
                    code: 200,
                    msg: 'success',
                }
            } catch (err) {
                ctx.response.status = 412;
                ctx.body = {
                    code: 412,
                    msg: 'err',
                    err
                }
            }
        } else {
            ctx.response.status = 416;
            ctx.body = {
                code: 416,
                msg: '缺少id',
            }
        }
    }
在module/article.js
    static async deleteBlogs(id){
        return await Blog.destroy({
            where:{
                id
            }
        })
    }
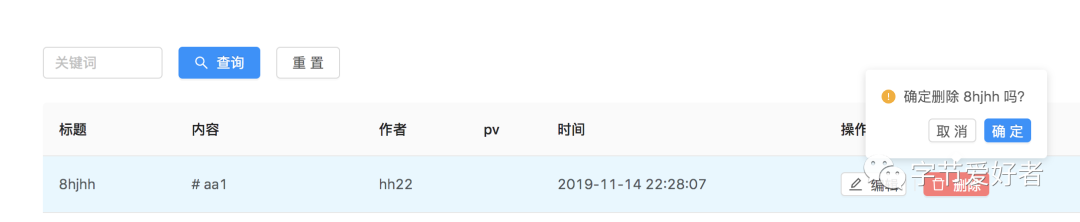
至此刪除文章接口就寫好了,可以在后臺系統(tǒng)刪除
put請求:編輯文章
在routes/article.js
router.put('/blog', BlogControll.updateBlog)
在controllers/article.js
    static async updateBlog(ctx) {
        let req = ctx.request.body;
        try {
            let data = await BlogModel.updateBlog(req)
            ctx.response.status = 200;
            ctx.body = {
                code: 200,
                msg: 'success',
            }
        } catch (err) {
            ctx.response.status = 412;
            ctx.body = {
                code: 412,
                msg: 'error',
                err
            }
        }
    }
在module/article.js
    static async updateBlog(data){
        const {id,title,author,content} = data;
        console.log('id',id)
        return await Blog.update(
            {
                title,
                author,
                content,
                id
            },
            {
                where:{
                    id
                }
            }
        )
    }
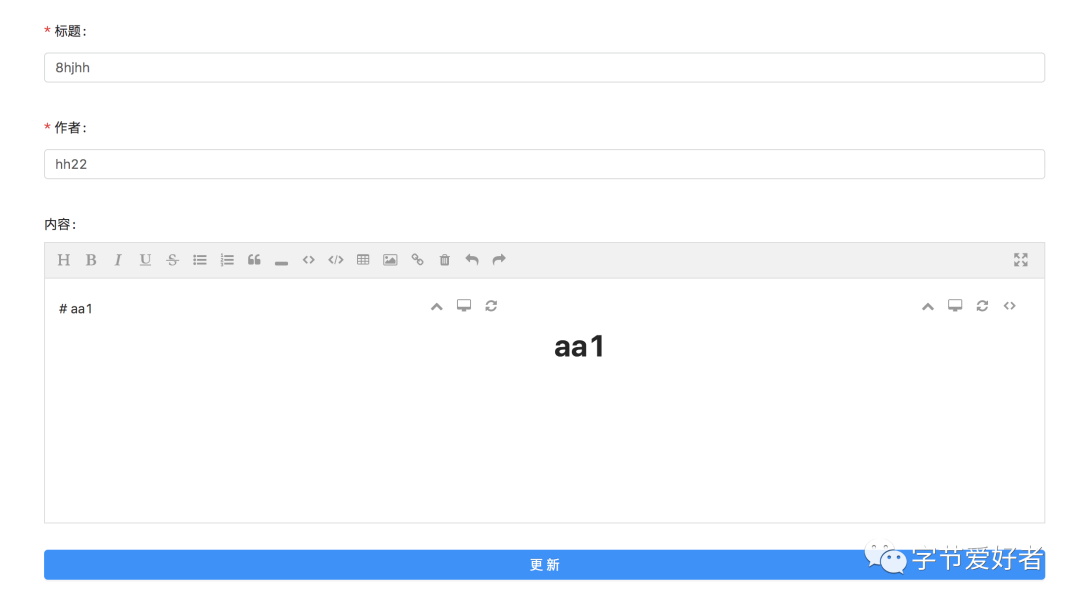
至此更新文章接口就寫好了,可以在后臺系統(tǒng)更新
總結(jié):以上通過koa+sequelize實現(xiàn)了增刪改查的接口。代碼放到了github:https://github.com/liangchaofei/cms上,可以直接下載運行。如果這篇文章對您有幫助,感謝star
我組建了一個氛圍特別好的 Node.js 社群,里面有很多 Node.js小伙伴,如果你對Node.js學(xué)習(xí)感興趣的話(后續(xù)有計劃也可以),我們可以一起進行Node.js相關(guān)的交流、學(xué)習(xí)、共建。下方加 考拉 好友回復(fù)「Node」即可。
“分享、點贊、在看” 支持一波??