
實踐教程 | PyTorch分布式測試踩坑小結
點擊上方“程序員大白”,選擇“星標”公眾號
重磅干貨,第一時間送達


來源 | https://zhuanlan.zhihu.com/p/276154597
編輯 | 極市平臺
極市導讀
本文主要介紹測試 Torch 相關模型遇到的分布式問題和解決其他框架遇到的奇奇怪怪的問題。 >>加入極市CV技術交流群,走在計算機視覺的最前沿
現有的訓練框架一般都會牽涉到分布式、多線程和多進程等概念,所以較難 debug,而大家作為一些開源框架的使用者,有時未必會那么深入了解一些通信庫的內部實現,無法第一時間找到問題,此事不宜求全責備。
因此,本文目的很簡單,內容也很淺顯,就是讓大家可以根據報錯信息和現象,得到最有可能的直接原因,從而修正之后能夠快速將程序運行起來。
本文檔是基于 DLPerf (https://github.com/Oneflow-Inc/DLPerf)測試框架總體測試過程的踩坑總結。測試范圍主要涉及 ResNet50-v1.5 和 BERT 模型的 DeepLearningExamples (https://github.com/NVIDIA/DeepLearningExamples/tree/5cc03caa153faab7a2c3b1b5b5d63663f06ce1b4)倉庫及各框架官方倉庫的單機/多機實現,精度涵蓋 FP32 及 AMP(Automatic Mixed Precision )。
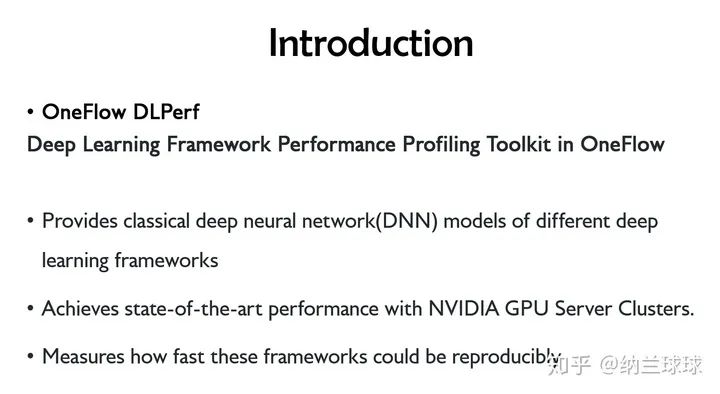
What is DLPerf? 我有幸參與了一個 10.24 在南京的 DAI 大會,會上對 DLPerf 進行了英文~~安利~~分享,貼一下相關介紹。

最開始只是為了解決這個小組里遇到的一些調試和流程規(guī)范的問題,然后就被拉進來了,這一拉就是兩個多月......

本文主要介紹測試 Torch 相關模型遇到的分布式問題和解決其他框架遇到的奇奇怪怪的問題。
環(huán)境 (Environment)
系統
硬件 GPU:Tesla V100-SXM2-16GB x 8 軟件 驅動:NVIDIA 440.33.01 系統:Ubuntu 16.04 CUDA:10.2 cuDNN:7.6.5
NGC 容器
系統:Ubuntu 18.04 CUDA 10.2.89 cuDNN 7.6.5 NCCL:2.5.6 PyTorch:1.5.0a0+8f84ded OpenMPI 3.1.4 DALI 0.19.0 Python:3.6.9 更多容器細節(jié)請參考 NVIDIA Container Support Matrix。
Feature support matrix
| Feature | ResNet50 v1.5 PyTorch |
|---|---|
| Multi-gpu training | Yes |
| Multi-node training | Yes |
| NVIDIA DALI | Yes |
| Automatic mixed precision (AMP) | Yes |
相同環(huán)境結果復現,然后比 NVIDIA 增加了多機運行(Multi-node training)。
NVIDIA/DeepLearningExamples 踩坑
為了解決 torch 分布式遇到的問題,我去扒了 PyTorch 官方分布式相關內容,翻譯詳見
https://www.yuque.com/go/doc/14358835
實際上,在處理 NVIDIA 腳本的時候,主要難度在使用盡可能少的改動運行多機分布式上,因為大范圍邏輯修改會引入潛在的性能變化,并增加用戶復現的復雜度,代碼版本管理也容易變得混亂。因此,我還是希望只在代碼上稍作修改,這樣既可以方便操作,同時盡可能地保留其原本的性能表現。當然,測試過程于我而言,是個學習過程,而學如逆水行舟,前期百般不得進,可能是因為我菜(劃掉)退了。學習 DISTRIBUTED COMMUNICATION PACKAGE - TORCH.DISTRIBUTED · 語雀實際上,在處理 NVIDIA 腳本的時候,主要難度在使用盡可能少的改動運行多機分布式上,因為大范圍邏輯修改會引入潛在的性能變化,并增加用戶復現的復雜度,代碼版本管理也容易變得混亂。因此,我還是希望只在代碼上稍作修改,這樣既可以方便操作,同時盡可能地保留其原本的性能表現。當然,測試過程于我而言,是個學習過程,而學如逆水行舟,前期百般不得進,可能是因為我菜【劃掉】退了。
大致跑通難易度如下:
ResNet v1.5
| ResNet50_v1.5 | 單機 | 多機 |
|---|---|---|
| 容器 | 正常按文檔跑就行 | NVIDIA 魔改的 PyTorch 多機跑通之難,難于上青天 |
| 物理機 | 安裝依賴后即可運行 | 較容器里網絡問題更易解決 |
BERT
| BERT | 單機 | 多機 |
|---|---|---|
| 容器 | 正常按文檔跑就行 | 極易修改 |
物理環(huán)境運行
物理環(huán)境中也可運行該倉庫,bert 需要提前準備數據集,而 rn50 原圖輸入即可。NVIDIA 大佬魔改了容器里的 pytorch,物理機上安裝官方 pytorch 使用容器依賴測試,可以對比差異,更好地定位優(yōu)化。
安裝依賴
python3 -m pip install --user -i https://pypi.tuna.tsinghua.edu.cn/simple h5py tqdm boto3
pip3 install --no-cache -r requirement /DeepLearningExamples/PyTorch/LanguageModeling/BERT/requirements.txt
apex 包
此包異常傲嬌,必須用單獨小標題拉出來特別對待。
假如你用最普通的安裝方式,python3 \-m pip install \--user \-i https://pypi.tuna.tsinghua.edu.cn/simple apex 或者 pip3 install apex,那么在運行 bash scripts/run_pretraining.sh 時會報錯:
Traceback (most recent call last):
  File "/home/sunxue/DeepLearningExamples/PyTorch/LanguageModeling/BERT/run_pretraining.py", line 37, in <module>
    from apex import amp
  File "/home/sunxue/.local/lib/python3.6/site-packages/apex/__init__.py", line 18, in <module>
    from apex.interfaces import (ApexImplementation,
  File "/home/sunxue/.local/lib/python3.6/site-packages/apex/interfaces.py", line 10, in <module>
    class ApexImplementation(object):
  File "/home/sunxue/.local/lib/python3.6/site-packages/apex/interfaces.py", line 14, in ApexImplementation
    implements(IApex)
  File "/home/sunxue/.local/lib/python3.6/site-packages/zope/interface/declarations.py", line 706, in implements
    raise TypeError(_ADVICE_ERROR % 'implementer')
TypeError: Class advice impossible in Python3.  Use the @implementer class decorator instead.
這是 apex 使用這種方式安裝版本不對,應該使用 https://www.github.com/nvidia/apex 倉庫的安裝,因此
pip uninstall apex
git clone https://www.github.com/nvidia/apex
cd apex-master
python3 setup.py install
重新運行 bash scripts/run_pretraining.sh,報錯
import amp_C
ModuleNotFoundError: No module named 'amp_C'
根據 https://github.com/NVIDIA/apex/issues/573 中介紹,issue 573 已更新,但需要使用如下命令安裝
apex $ git pull
apex $ pip uninstall apex # repeat until you're sure it's gone
apex $ pip install -v --no-cache-dir --global-option="--cpp_ext" --global-option="--cuda_ext" ./
執(zhí)行后,報錯
Traceback (most recent call last):
      File "<string>", line 1, in <module>
      File "/tmp/pip-req-build-m4qm554e/setup.py", line 152, in <module>
        check_cuda_torch_binary_vs_bare_metal(torch.utils.cpp_extension.CUDA_HOME)
      File "/tmp/pip-req-build-m4qm554e/setup.py", line 106, in check_cuda_torch_binary_vs_bare_metal
        "https://github.com/NVIDIA/apex/pull/323#discussion_r287021798.  "
    RuntimeError: Cuda extensions are being compiled with a version of Cuda that does not match the version used to compile Pytorch binaries.  Pytorch binaries were compiled with Cuda 10.2.
調試放在了金山云上。這是由于金山云 2 號機上的 cuda-10.2 是由 rpm 安裝的,并沒有在/ usr/local/ 路徑下留有 /cuda-10.2 等頭文件或源文件,可安裝 cuda-10.2 到 /home/user/ 路徑。
按照 https://www.cnblogs.com/li-minghao/p/13089405.html 安裝cuda10.2 到/home/user/
重新安裝 apex,出現 warnning
/home/sunxue/.local/lib/python3.6/site-packages/torch/utils/cpp_extension.py:335: UserWarning: Attempted to use ninja as the BuildExtension backend but we could not find ninja.. Falling back to using the slow distutils backend.
      warnings.warn(msg.format('we could not find ninja.'))
    /home/sunxue/.local/lib/python3.6/site-packages/torch/utils/cpp_extension.py:277: UserWarning:

                                   !! WARNING !!

!!!!!!!!!!!!!!!!!!!!!!!!!!!!!!!!!!!!!!!!!!!!!!!!!!!!!!!!!!!!!!!!!!!!!!!!!!!!!!!
    Your compiler (g++ 4.8.5) may be ABI-incompatible with PyTorch!
    Please use a compiler that is ABI-compatible with GCC 5.0 and above.
    See https://gcc.gnu.org/onlinedocs/libstdc++/manual/abi.html.

    See https://gist.github.com/goldsborough/d466f43e8ffc948ff92de7486c5216d6
    for instructions on how to install GCC 5 or higher.
    !!!!!!!!!!!!!!!!!!!!!!!!!!!!!!!!!!!!!!!!!!!!!!!!!!!!!!!!!!!!!!!!!!!!!!!!!!!!!!!

                                  !! WARNING !!

      warnings.warn(ABI_INCOMPATIBILITY_WARNING.format(compiler))
此時后續(xù)會出現錯誤
building 'apex_C' extension
    creating build/temp.linux-x86_64-3.6
    creating build/temp.linux-x86_64-3.6/csrc
    gcc -pthread -Wno-unused-result -Wsign-compare -DNDEBUG -O2 -g -pipe -Wall -Wp,-D_FORTIFY_SOURCE=2 -fexceptions -fstack-protector-strong --param=ssp-buffer-size=4 -grecord-gcc-switches -m64 -mtune=generic -D_GNU_SOURCE -fPIC -fwrapv -fPIC -I/home/sunxue/.local/lib/python3.6/site-packages/torch/include -I/home/sunxue/.local/lib/python3.6/site-packages/torch/include/torch/csrc/api/include -I/home/sunxue/.local/lib/python3.6/site-packages/torch/include/TH -I/home/sunxue/.local/lib/python3.6/site-packages/torch/include/THC -I/usr/include/python3.6m -c csrc/flatten_unflatten.cpp -o build/temp.linux-x86_64-3.6/csrc/flatten_unflatten.o -DTORCH_API_INCLUDE_EXTENSION_H -DTORCH_EXTENSION_NAME=apex_C -D_GLIBCXX_USE_CXX11_ABI=0 -std=c++14
    gcc: error: unrecognized command line option ‘-std=c++14’
    error: command 'gcc' failed with exit status 1
這是因為它要求使用 gcc 5.x,但是機器上是 gcc 4.8.5。
原本希望在不升級的情況下湊合用用,但是將-std=c++14 替換為 -std=c++1y 后,仍會編譯失敗,應該是還有其他問題。
所以,不要心存僥幸心理了,還是需要換 gcc 5.x,此處選用 gcc 5.5(實測 5.4 亦可),本地安裝 gcc 5.5 后,重新安裝 apex,
apex $ git pull
apex $ pip uninstall apex # repeat until you're sure it's gone
apex $ pip install -v --no-cache-dir --global-option="--cpp_ext" --global-option="--cuda_ext" ./
即可安裝成功。
修改 run_pretraining.sh 腳本的 --json-summary 路徑,./result/dllogger.json ---> ./dllogger.json,即可運行成功,并成功打印 log:
Iteration:   3%|▎         | 127/4420 [00:16<08:53,  8.05it/s]DLL 2020-08-10 21:03:36.178776 - PARAMETER loss_scale : 524288.0
DLL 2020-08-10 21:03:36.182556 - Training Epoch: 0 Training Iteration: 0  average_loss : 11.1544189453125  step_loss : 10.8203125  learning_rate : 2.9986455118223097e-06
Iteration:   6%|▌         | 255/4420 [00:35<09:11,  7.55it/s]DLL 2020-08-10 21:03:55.047705 - PARAMETER loss_scale : 262144.0
DLL 2020-08-10 21:03:55.051043 - Training Epoch: 0 Training Iteration: 0  average_loss : 11.14263916015625  step_loss : 10.75  learning_rate : 2.9986455118223097e-06
Iteration:   9%|▊         | 383/4420 [00:54<09:43,  6.92it/s]DLL 2020-08-10 21:04:13.038226 - PARAMETER loss_scale : 131072.0
DLL 2020-08-10 21:04:13.041031 - Training Epoch: 0 Training Iteration: 0  average_loss : 11.17144775390625  step_loss : 10.7421875  learning_rate : 2.9986455118223097e-06
Iteration:  12%|█▏        | 511/4420 [01:13<09:24,  6.93it/s]DLL 2020-08-10 21:04:32.085152 - PARAMETER loss_scale : 65536.0
DLL 2020-08-10 21:04:32.087935 - Training Epoch: 0 Training Iteration: 0  average_loss : 11.1295166015625  step_loss : 11.4375  learning_rate : 2.9986455118223097e-06
物理機單機 bert rn50 done。rn50 在物理機上先安裝依賴
python3 -m pip install --no-cache -r requirement
apex 安裝解決后其他問題不大,直接按腳本跑就可以,多機運行是在容器踩坑之后,該填的都填上了,所以也較為順利。
容器環(huán)境運行
調試的時候用的是 20.06 容器,參考 BERT For PyTorch 的 Quick Start Guide 操作,容器大小其實還可以,就是國網內一旦要下外面的東西就很 emmm,因此下載構建就需要很長時間,這是正常的,最好能有梯子翻墻。
bash scripts/docker/build.sh報錯:
After this operation, 33.8 kB of additional disk space will be used.
Get:1 http://archive.ubuntu.com/ubuntu bionic/universe amd64 libb64-0d amd64 1.2-4 [9276 B]
debconf: unable to initialize frontend: Dialog
debconf: (TERM is not set, so the dialog frontend is not usable.)
debconf: falling back to frontend: Readline
debconf: unable to initialize frontend: Readline
debconf: (This frontend requires a controlling tty.)
debconf: falling back to frontend: Teletype
dpkg-preconfigure: unable to re-open stdin:
忽略,繼續(xù) bash scripts/docker/launch.sh,報錯
ERROR: This container was built for NVIDIA Driver Release 450.36 or later, but
       version 440.64 was detected and compatibility mode is UNAVAILABLE.
需要升級驅動至 450.36 及以上。驅動升級后,容器啟動正常。NGC 20.03 使用原驅動可正常運行。
多機血淚史
自古以來,分布式就是計算機架構理論與基礎不可分割的一部分,同時在使用效果的性價比上也爭議頗多。但這不是重點,重點是光是使用起來就很復雜。一般的機器學習框架,pytorch、mxnet、tensoflow 等都是使用第三方工具實現分布式計算,這其實就需要你具有 openmpi、horovod、nccl 的預備知識,當它們和 docker 結合可能就更~~~~
docker 容器連通問題

如果是在 docker 容器中進行多機訓練,需要保證 docker 容器之間互相可以通過指定端口 ssh 免密登錄。即:在10.11.0.2 節(jié)點的 docker 容器內通過 ssh [email protected] \-p 10001 可以直接登錄 10.11.0.3 節(jié)點的 docker 容器,無需輸入密碼。對于 docker 容器,用戶可以使用 docker run \--network none 完全禁用網絡,禁用所有網絡傳入和傳出, 僅通過文件或 STDIN 和 STDOUT 執(zhí)行 I/O。而多機分布式運行當然需要相互之間可以通信的容器,官方有 4 種實現方式:
**bridge 模式:**在默認 橋接器上創(chuàng)建一個網絡堆棧 **host 模式:**在容器內使用主機的網絡堆棧。 **container: <name|id> 模式:**重用另一個容器的網絡堆棧,過其名稱或 id 指定。 **<network-name>|<network-id> 模式:**連接到用戶定義的網絡
此處網絡堆棧指的是容器用來存儲網絡相關參數配置的堆棧。可以使用 docke inspect 容器id 來查看具體信息。
1.docker 的 bridge 模式
即 docker 的默認模式。該模式下,容器內部和物理機的端口是隔離的。當 docker 進程啟動時,會在主機上創(chuàng)建一個名為 docker0 的虛擬網橋,此主機上啟動的 docker 容器會連接到這個虛擬網橋上。虛擬網橋的工作方式和物理交換機類似,這樣主機上的所有容器就通過交換機連在了一個二層網絡中。
從 docker0 子網中分配一個 IP 給容器使用,并設置 docker0 的 IP 地址為容器的默認網關。在主機上創(chuàng)建一對虛擬網卡 veth pair 設備,docker 將 veth pair 設備的一端放在新創(chuàng)建的容器中,并命名為 eth0(容器的網卡),另一端放在主機中,以 vethxxx 這樣類似的名字命名,并將這個網絡設備加入到 docker0 網橋中。可以通過 brctl show 命令查看。
不寫 --net(現在新版應該是 --network)參數,就是 docker 的默認網絡模式,bridge 模式。使用 docker run \-p 時,docker 實際是在 iptables 做了 DNAT 規(guī)則,實現端口轉發(fā)功能。可以使用 iptables \-t nat \-vnL 查看。通過 docker run 增加參數如:-p 9000:9000 進行端口映射,表明物理機 9000 端口映射到容器內 9000 端口,docker 容器多機時即可指定 9000 端口進行通信。
2. docker 的 host 模式
如果啟動容器的時候使用 host 模式,那么這個容器將不會獲得一個獨立的 Network Namespace,而是和宿主機共用一個 Network Namespace。容器將不會虛擬出自己的網卡,配置自己的IP等,而是使用宿主機的 IP 和端口。但是,容器的其他方面,如文件系統、進程列表等還是和宿主機隔離的。host 模式,需要通過 docker run 時添加參數 --network=host 指定,該模式下表示容器使用主機的網絡堆棧,和物理機共用端口(沒有隔離),需要修改容器內 ssh 服務的通信端口號(vim /etc/ssh/sshd_config,需安裝 openssh-server),用于 docker 容器多機通訊。
3. docker 的 container:<name|id> 模式
這個模式指定新創(chuàng)建的容器和已經存在的一個容器共享一個 Network Namespace,而不是和宿主機共享。新創(chuàng)建的容器不會創(chuàng)建自己的網卡,配置自己的 IP,而是和一個指定的容器共享 IP、端口范圍等。同樣,兩個容器除了網絡方面,其他的如文件系統、進程列表等還是隔離的。兩個容器的進程可以通過 lo 網卡設備通信。Docker 默認的網絡環(huán)境下,單臺主機上的 Docker 容器可以通過 docker0 網橋直接通信,而不同主機上的 Docker 容器之間只能通過在主機上做端口映射進行通信。再加上考慮到各種測試環(huán)境的網絡復雜性,本次并未采用該方式進行容器互聯。
4. docker的 <network-name>|<network-id> 模式
用戶可以使用 docker 網絡驅動程序或外部網絡驅動程序插件創(chuàng)建網絡, 建立并使用自己的 bridge 網絡或 overlay 網絡。但考慮到各種測試環(huán)境的網絡復雜性,本次并未采用該方式進行容器互聯。
最后選用的是暴露集群上容器之間的端口進行 ssh 通信,要使本機開放 ssh 服務,host/bridge 兩種方式都可以,只需要安裝 openssh-server,設置完相應參數后重啟 ssh 服務即可,詳情見 NVIDIA/DeepLearningExamples PyTorch BERT 測評。
IB 驅動
參考 How-to: Deploy RDMA accelerated Docker container over InfiniBand fabric 一文,即使物理機安裝了 IB 驅動,仍然需要在容器內安裝 Mellanox 軟硬件組件,因此容器內調用 nccl 走 IB 需要重新安裝 IB 驅動,否則只會使用 socket 通信。對于 torch,tf 等主力使用 nccl 或 horovod(也是優(yōu)先使用 nccl)的框架速度影響比較大,對于使用 openmpi 的mxnet,百兆 socket 和 IB 之間區(qū)別沒那么顯著。對于模型,bert 的增益遠比 rn50 明顯。
rn50
NVIDIA 大佬們并沒有直接使用 torch.multiprocessing ,而是自己寫了 multiproc.py 去根據配置的 nnode, node_rank, nproc_per_node, master_addr, master_port 起線程,以實現單機多卡運行。在此基礎上修改為多機運行,根據
一文中 torch 的官方敘述,在使用了 GPU 的架構場景下,測試性價比最低的是使用 openmpi(因為需要源碼編譯 torch 和 openmpi,這當中顯而易見地會遇到很多依賴問題),gloo 也并不鼓勵,最為推薦的是 nccl,速度快,同時對源碼修改最少,是性能測試首當其沖的選擇。問題來了,直接傳參給 multiproc.py,以 2 機 16 卡為例, 執(zhí)行
python ./multiproc.py --nnodes 2 --nproc_per_node 8 --master ./main.py --arch resnet50 -c fanin --label-smoothing 0.1 <path to imagenet>
報錯
RuntimeError: CUDA error: out of memory
顯然這個代碼就是只為單機訓練定制的,我設想的單機 8 卡運行無法通過修改這個參數直接實現,8 張卡的 gpu 內存會集中分配到 0 號卡上,頓時 oom。由于項目初期的規(guī)劃不清晰,當初在這里還遭遇了是否要統一使用 mpi 實現多機運行或者是否直接使用 torch.distributed.launch 而不復用 multiproc.py 等等問題,這樣一來,實驗成本就大大增加了。因此,悲催地遇到了調試 mpi 時線程不完全結束、多種協議使用或者腳本和環(huán)境變量交叉使用帶來的端口沖突,或者顯存占用沒釋放等每個小白都會遇到的分布式使用問題。horovod 也是一樣,同時會因為引入的新框架造成工作量笛卡爾積式增加。

兩害相權取其輕,比下來還是用原腳本解決內存問題會比較好。現在看來,解決的思路很清晰,但這個結論來得并不輕松,正所謂山窮水復疑無路,原地返回是正途。
假如改使用 torch.distributed.launch,運行 main.py 又會報錯
RuntimeError: Address already in use
......
相反,看下 bert 的 NVIDIA 腳本,因為直接使用了 python \-m,將庫模塊作為腳本運行,在不增刪 py 文件情況下使用 torch.distributed.launch,非常方便修改進程分布式參數,只需要注意多機 docker 之間的 ssh 互聯即可。
因此對于 torch, 最方便快捷的分布式實現是使用 python3 \-m torch.distributed.launch,不過這只是解決了多機分布式問題,還要注意計算邏輯,正確使用 allreduce 和 allgather 等集合通信計算~~否則即使是行為藝術,也不推薦跑幾個禮拜只為得到我正在訓練的幻覺和一個錯誤結果。
同時因為 torch 調用 nccl 需要手動在每臺機器上啟動進程,需要自己寫 ssh 遠程執(zhí)行腳本來完成自動化。
混合精度
相對與多機運行帶來的麻煩,混合精度只需要注意選項的效果,so sweeeeeeeeet! 當你使用 --fp16 選項運行,非常貼心地提示
Warning:  FP16_Optimizer is deprecated and dangerous, and will be deleted soon.
If it still works, you're probably getting lucky.
For mixed precision, use the documented API https://nvidia.github.io/apex/amp.html,
with opt_level=O1.
因此,最好別用這個選項,而是通過修改 apex.amp 的 opt_level 值來進行復合精度的測試。
| opt_level | Precision |
|---|---|
| O0 | FP32 training |
| O1 | Mixed Precision (recommended for typical use) |
| O2 | “Almost FP16” Mixed Precision |
| O3 | FP16 training |
可以根據自己的測試需求修改源碼。
PyTorch Official examples/imagenet/ 踩坑
官方倉庫只有 resnet50_v1.5,沒有 bert 網絡,因此物理機上只測試了 resnet50_v1.5 網絡的單機多機結果。
| resnet50_v1.5 | 單機 | 多機 |
|---|---|---|
| 容器 | 正常按文檔跑就行 | 稍作修改 |
| 物理機 | 正常按文檔跑就行 | 稍作修改 |
并添加 DALI 數據處理方式。后續(xù)還會增加 AMP 哦~
安裝 NVIDIA DALI
使用 NGC 容器中使用的 dali 0.19.0,參考官網文檔 。
由于這版本比較舊,所以選擇的是 nvidia dali,直接根據 python 版本去鏡像下載 whl 包
curl nvidia_dali-0.19.0-1119077-cp37-cp37m-manylinux1_x86_64.whl
python -m pip install nvidia_dali-0.19.0-1119077-cp37-cp37m-manylinux1_x86_64.whl
即可。
對于 dali 包,目前最快速,成功率最高的方式就是確認好需要安裝的版本后,直接下載對應版本的 whl 包然后 pip 安裝,如果直接根據 daili 官網的文檔,使用
pip install --extra-index-url https://developer.download.nvidia.com/compute/redist --upgrade nvidia-dali-cuda110
等命令安裝,實際使用時可能會遇到報錯
Traceback (most recent call last):

  File "/export/nfs/sunxue/DeepLearningExamples/PyTorch/Classification/ConvNets/mnasnet/training/FP32/../../../launch.py", line 7, in <module>

    from main import main, add_parser_arguments, available_models

  File "/export/nfs/sunxue/DeepLearningExamples/PyTorch/Classification/ConvNets/main.py", line 49, in <module>

    from image_classification.dataloaders import *

  File "/export/nfs/sunxue/DeepLearningExamples/PyTorch/Classification/ConvNets/image_classification/dataloaders.py", line 79, in <module>

    class HybridTrainPipe(Pipeline):

NameError: name 'Pipeline' is not defined
但這并不是 python 包 import 不當造成的問題,設置環(huán)境變量并不能解決,還是請安裝合適版本。
Q&A
報錯
packages/nvidia/dali/pipeline.py", line 410, in share_outputs
    return self._pipe.ShareOutputs()
RuntimeError: Critical error in pipeline: CUDA allocation failed
Current pipeline object is no longer valid.
這通常是因為 CUDA 內存不夠,可能是 GPU 沒全可見,可以試著
export CUDA_VISIBLE_DEVICES=0,1,2,3,4,5,6,7報錯
報錯
RuntimeError: cuDNN error: CUDNN_STATUS_INTERNAL_ERROR
這通常可能是因為 GPU 顯存不夠,或者與其他 GPU 正在運行的程序撞車了。
報錯
RuntimeError: CUDA tensor detected and the MPI used doesn't have CUDA-aware MPI support
假如你和你最后的倔強堅持想要使用 openmpi,并且遇此報錯,請不要抱僥幸心理,源碼編譯安裝支持 GPU 的 openmpi 和 pytorch 吧,詳情可參考 Segfault using cuda with openmpi 和 Distributed Communication with openmpi fails。
當初因為時間限制和性能考慮,測試時并沒有過多考慮 openMPI 的使用,但是現在了解到 openMPI 的多線程特性,后續(xù)使用過也會給出這方面的踩坑小結。
報錯
There are not enough slots available in the system to satisfy the 16
slots that were requested by the application:

  10.11.0.4:8

Either request fewer slots for your application, or make more slots
available for use.

A "slot" is the Open MPI term for an allocatable unit where we can
launch a process.  The number of slots available are defined by the
environment in which Open MPI processes are run:

  1. Hostfile, via "slots=N" clauses (N defaults to number of
     processor cores if not provided)
  2. The --host command line parameter, via a ":N" suffix on the
     hostname (N defaults to 1 if not provided)
  3. Resource manager (e.g., SLURM, PBS/Torque, LSF, etc.)
  4. If none of a hostfile, the --host command line parameter, or an
     RM is present, Open MPI defaults to the number of processor cores

In all the above cases, if you want Open MPI to default to the number
of hardware threads instead of the number of processor cores, use the
--use-hwthread-cpus option.

Alternatively, you can use the --oversubscribe option to ignore the
number of available slots when deciding the number of processes to
launch.
這通常是因為兩個 host 之間用了空格連接(×),換成用逗號(√),再次運行即可。
報錯
RuntimeError: Expected tensor for argument #1 'input' to have the same device as tensor for argument #2 'weight'; but device 0 does not equal 1 (while checking arguments for cudnn_convolution)
這通常是腳本只在一臺機器上更改了計算,導致輸出數據與其他機器上預留的輸出內存大小不符,查找到改動的地方,要么在所有機器上的腳本里修改,要么別改。
使用 nccl 時 GPU 顯存有約 220M 左右的分配,但遲遲無動靜
ssh 連接有問題,沒有通訊成功。
報錯
RuntimeError: CUDA out of memory. Tried to allocate 74.00 MiB (GPU 0; 15.78 GiB total capacity; 0 bytes already allocated; 55.44 MiB free; 0 bytes reserved in total by PyTorch)
多機多卡時所有內存都被分配到了第一張卡上。需要梳理邏輯,找到顯存分配的地方進行修改。同時,自己寫腳本時,應避免使用
運行 NVIDIA BERT 報錯
Traceback (most recent call last):
  File "/home/leinao/DeepLearningExamples/PyTorch/LanguageModeling/BERT/run_pretraining.py", line 678, in <module>
    args, final_loss, train_time_raw, global_step = main()
  File "/home/leinao/DeepLearningExamples/PyTorch/LanguageModeling/BERT/run_pretraining.py", line 506, in main
    model, optimizer, lr_scheduler, checkpoint, global_step, criterion = prepare_model_and_optimizer(args, device)
  File "/home/leinao/DeepLearningExamples/PyTorch/LanguageModeling/BERT/run_pretraining.py", line 359, in prepare_model_and_optimizer
    args.resume_step = max([int(x.split('.pt')[0].split('_')[1].strip()) for x in model_names])
ValueError: max() arg is an empty sequence
這通常是數據集路徑錯誤,導致無數據讀入,更換正確的數據集路徑。
運行 NVIDIA BERT 報錯
Traceback (most recent call last):
  File "/home/leinao/DeepLearningExamples/PyTorch/LanguageModeling/BERT/run_pretraining.py", line 678, in <module>
    args, final_loss, train_time_raw, global_step = main()
  File "/home/leinao/DeepLearningExamples/PyTorch/LanguageModeling/BERT/run_pretraining.py", line 502, in main
    device, args = setup_training(args)
  File "/home/leinao/DeepLearningExamples/PyTorch/LanguageModeling/BERT/run_pretraining.py", line 303, in setup_training
    torch.distributed.init_process_group(backend='nccl', init_method='env://')
  File "/home/leinao/anaconda3/lib/python3.7/site-packages/torch/distributed/distributed_c10d.py", line 422, in init_process_group
    store, rank, world_size = next(rendezvous_iterator)
  File "/home/leinao/anaconda3/lib/python3.7/site-packages/torch/distributed/rendezvous.py", line 172, in _env_rendezvous_handler
    store = TCPStore(master_addr, master_port, world_size, start_daemon, timeout)
ValueError: host not found: Name or service not known
端口錯誤,更換空閑的非特殊端口即可。
使用 multiproc.py 報錯
Traceback (most recent call last):
  File "main.py", line 540, in <module>
    main(args)
  File "main.py", line 311, in main
    dist.init_process_group(backend="nccl", init_method="env://")
  File "/opt/conda/lib/python3.6/site-packages/torch/distributed/distributed_c10d.py", line 393, in init_process_group
    store, rank, world_size = next(rendezvous_iterator)
  File "/opt/conda/lib/python3.6/site-packages/torch/distributed/rendezvous.py", line 172, in _env_rendezvous_handler
    store = TCPStore(master_addr, master_port, world_size, start_daemon, timeout)
RuntimeError: Address already in use
改變端口仍然報錯,此時需檢查環(huán)境變量,一旦設置了 torch 分布式的環(huán)境變量,即使都是 nccl 通信,也會地址沖突。
報錯
RuntimeError: NCCL error in: ../torch/lib/c10d/ProcessGroupNCCL.cpp:514, unhandled system error, NCCL version 2.6.3
或者死鎖,表現為長時間 log 不打印等,通常是集群內個節(jié)點上的文件修改不同步,因此腳本不一致導致錯誤。Modify scripts together or never!
報錯
[[INVALID],INVALID] ORTE_ERROR_LOG: Not found in file ess_env_module.c at line 367
 [[INVALID],INVALID]-[[59225,0],0] mca_oob_tcp_peer_try_connect: connect to 255.255.255.255:51754 failed: Network is unreachable (101)
--------------------------------------------------------------------------
ORTE was unable to reliably start one or more daemons.
This usually is caused by:

* not finding the required libraries and/or binaries on
  one or more nodes. Please check your PATH and LD_LIBRARY_PATH
  settings, or configure OMPI with --enable-orterun-prefix-by-default

* lack of authority to execute on one or more specified nodes.
  Please verify your allocation and authorities.

* the inability to write startup files into /tmp (--tmpdir/orte_tmpdir_base).
  Please check with your sys admin to determine the correct location to use.

*  compilation of the orted with dynamic libraries when static are required
  (e.g., on Cray). Please check your configure cmd line and consider using
  one of the contrib/platform definitions for your system type.

* an inability to create a connection back to mpirun due to a
  lack of common network interfaces and/or no route found between
  them. Please check network connectivity (including firewalls
  and network routing requirements).
在確保了每臺機器安裝的 openmpi 版本相同時,這多半是 ssh 免密授權沒配置好,如 ssh 公鑰更新,但 authorized_keys 文件沒更新。
By the way
安裝 Paddle-DALI-plugin
因為 Paddle 沒有對外放出官網所說的 支持了 DALI 優(yōu)化的容器,所以我就自己裝了一下,讓它在物理機上跑下試試可以提升多少,然而......
https://www.yuque.com/go/doc/14336512
當然,該倉庫將會持續(xù)更新,后面很快會有 InsightFace,mask rcnn 等等~
語雀地址:
PyTorch 分布式測試踩坑小結:https://www.yuque.com/docs/share/72990b7e-87ee-4113-8b74-a86a1c881aba%3F%23
更多詳情可移步:
NVIDIA/DeepLearningExamples PyTorch ResNet50 v1.5 測評:https://github.com/Oneflow-Inc/DLPerf/tree/master/PyTorch/resnet50v1.5
PyTorch ResNet50 v1.5 測評:https://github.com/Oneflow-Inc/DLPerf/tree/master/PyTorch/resnet50v1.5
參考:
https://github.com/pytorch/pytorch/issues/20200
https://www.cnblogs.com/yy-cxd/p/6553624.html
推薦閱讀
國產小眾瀏覽器因屏蔽視頻廣告,被索賠100萬(后續(xù))
年輕人“不講武德”:因看黃片上癮,把網站和786名女主播起訴了
關于程序員大白
程序員大白是一群哈工大,東北大學,西湖大學和上海交通大學的碩士博士運營維護的號,大家樂于分享高質量文章,喜歡總結知識,歡迎關注[程序員大白],大家一起學習進步!