
Java快速接入 GitHub、QQ 第三方登錄方式
點擊關(guān)注公眾號,Java干貨及時送達

本文提及第三方登錄涉及到 OAuth2.0,關(guān)于 OAuth2.0 的理論基礎(chǔ)參考阮一峰老師的《理解 OAuth 2.0》,其中關(guān)于授權(quán)碼模式就是本篇文章的重點,如想看這篇理論基礎(chǔ)自行百度即可。
本文著重于代碼,關(guān)于理論不再贅述,關(guān)于不同公司的三方登錄流程,只要遵循 OAuth2.0 規(guī)范,都大同小異。本文介紹 GitHub 和 QQ 兩種,因為這兩種無需審核,即可食用。歷史也發(fā)布過 Spring Boot 的其他實戰(zhàn),可以關(guān)注微信公眾號「Java后端」回復「666」下載技術(shù)棧手冊。
一、GitHub 登錄
1.1 注冊應用
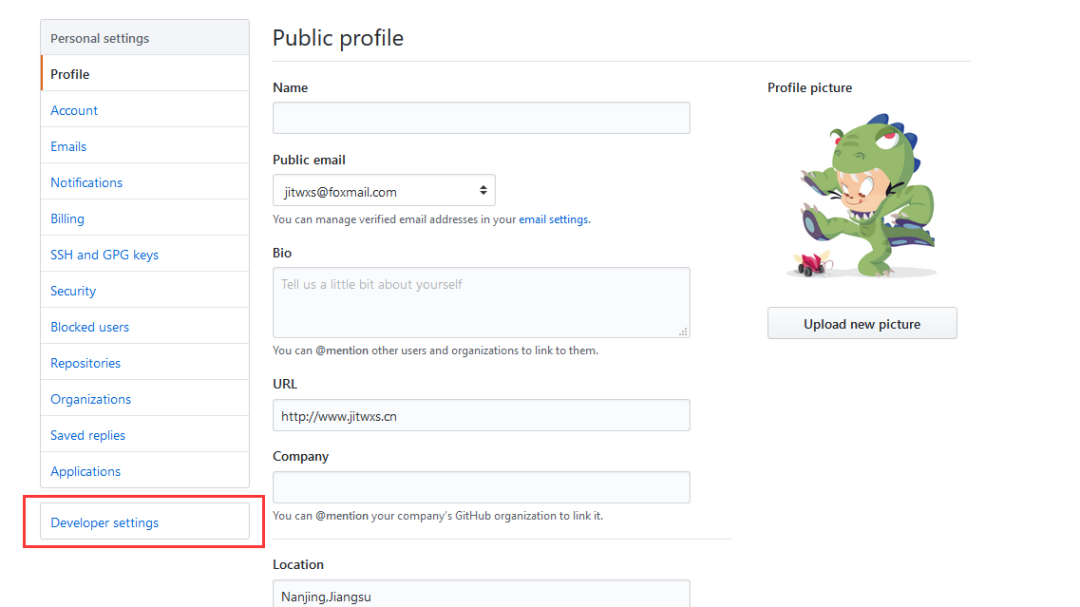
進入 Github 的 Setting 頁面,點擊 Developer settings,如圖所示:
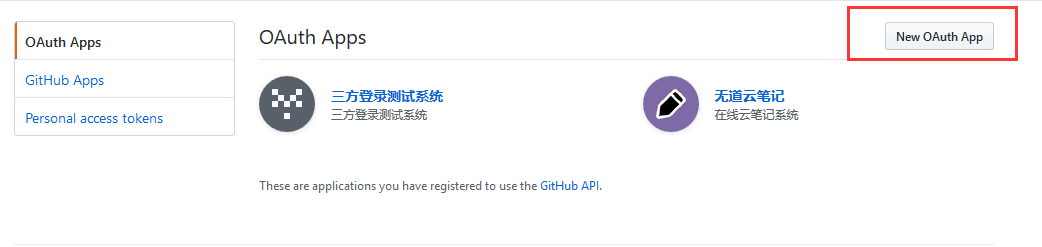
進入后點擊 New Oauth App,如圖所示:
主頁 URL 和 回調(diào) URL,回調(diào) URL 尤為重要,如果不太明白可以先和我一致。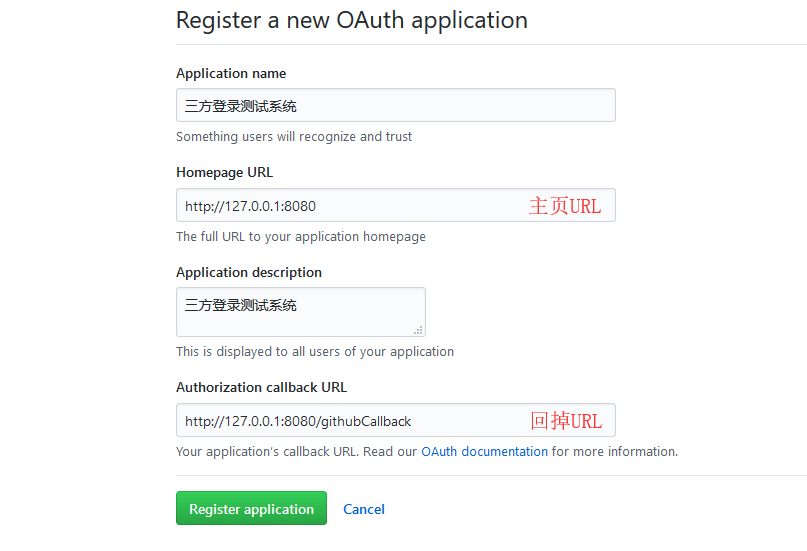
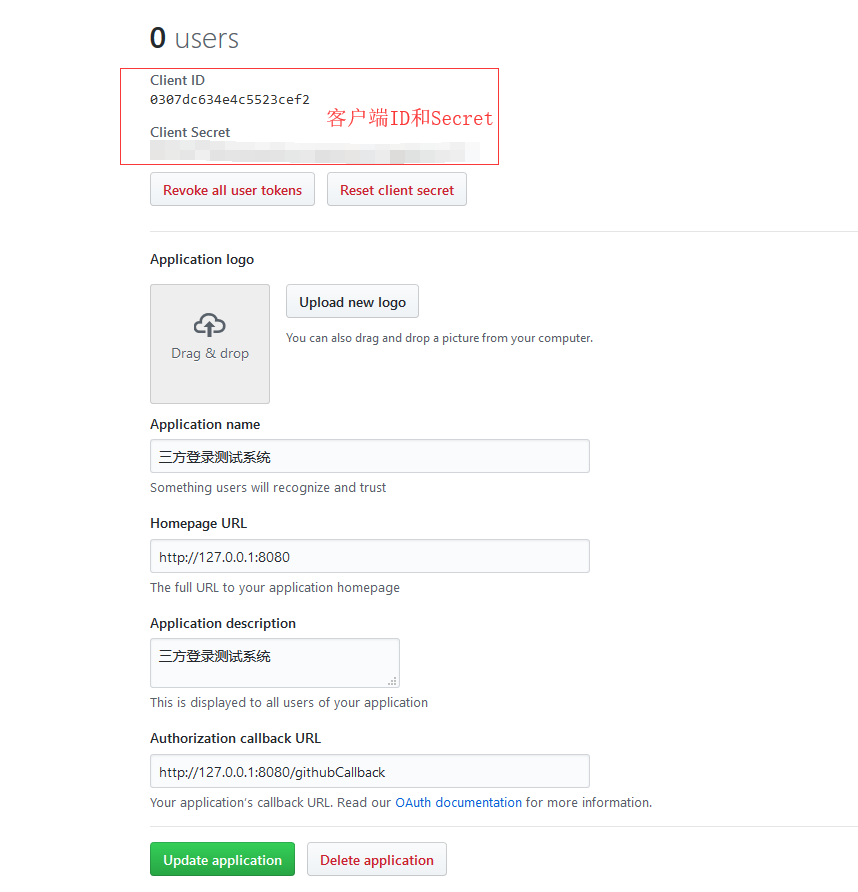
點擊注冊后,上方會生成 Client ID 和 Client Secret,這兩個后面要用到。
1.2 HTML 頁面
<!DOCTYPE html>
<html lang="en">
<head>
    <meta charset="UTF-8">
    <title>三方登錄</title>
</head>
<body>
    <h1>三方登錄Demo</h1>
    <div>
        <a href="/githubLogin">GitHub登錄</a>
        <a href="/qqLogin">QQ登錄</a>
    </div>
</body>
</html>
1.3 Github 登錄方法
response_type:對于授權(quán)碼模式,該值固定為codeclient_id:注冊應用時的 Client IDstate:回調(diào)時會原樣返回redirect_uri: 回調(diào) URL,注冊應用時填寫的
這里的 state 參數(shù)我要額外說明下,因為該參數(shù)會在后面的回調(diào) URL 中被原樣攜帶回來,絕大多數(shù)的開發(fā)者會忽略該字段,阮一峰老師的文章也沒有著重提及這一點。但是忽略該參數(shù)是會導致 CSRF攻擊的,在回調(diào)函數(shù)中應當對該字段進行校驗!
關(guān)于如何校驗,我一開始的想法是使用 session 來存儲 state 進行校驗的,但是我發(fā)現(xiàn)使用重定向后 session 不是同一個 session,方案一失敗。 然后我想通過 ajax 請求,在頁面中使用 window.location.href方法跳轉(zhuǎn)到認證服務器,使用 session 存儲,但是很不幸這樣也不是同一個 session,方案二失敗。最后我的解決辦法是使用 redis 緩存,使用 set 存儲,回調(diào)時判斷是否存在。當然你也可以用 HashMap 來存儲,這也是一個解決辦法。 關(guān)于 Redis,可以參考:https://jitwxs.cn/e331e26a.html
private static String GITHUB_CLIENT_ID = "0307dc634e4c5523cef2";
private static String GITHUB_CLIENT_SECRET = "707647176eb3bef1d4c2a50fcabf73e0401cc877";
private static String GITHUB_REDIRECT_URL = "http://127.0.0.1:8080/githubCallback";

@RequestMapping("/githubLogin")
public void githubLogin(HttpServletResponse response) throws Exception {
  // Github認證服務器地址
  String url = "https://github.com/login/oauth/authorize";
  // 生成并保存state,忽略該參數(shù)有可能導致CSRF攻擊
  String state = oauthService.genState();
  // 傳遞參數(shù)response_type、client_id、state、redirect_uri
  String param = "response_type=code&" + "client_id=" + GITHUB_CLIENT_ID + "&state=" + state
          + "&redirect_uri=" + GITHUB_REDIRECT_URL;

  // 1、請求Github認證服務器
  response.sendRedirect(url + "?" + param);
}
1.4 Github 回調(diào)方法
state 與發(fā)送時是否一致,如果不一致,可能遭遇了 CSRF 攻擊。code,向 GitHub 認證服務器申請令牌(token)grant_type:授權(quán)碼模式固定為authorization_codecode:上一步中得到的coderedirect_uri:回調(diào)URLclient_id:注冊應用時的Client IDclient_secret:注冊應用時的Client Secret
access_token)和令牌類型(token_type),向GitHub資源服務器獲取資源(以 user_info 為例)access_token:令牌token_type:令牌類型
/**
* GitHub回調(diào)方法
* @param code 授權(quán)碼
* @param state 應與發(fā)送時一致
* @author jitwxs
* @since 2018/5/21 15:24
*/
@RequestMapping("/githubCallback")
public void githubCallback(String code, String state, HttpServletResponse response) throws Exception {
// 驗證state,如果不一致,可能被CSRF攻擊
if(!oauthService.checkState(state)) {
throw new Exception("State驗證失敗");
}
// 2、向GitHub認證服務器申請令牌
String url = "https://github.com/login/oauth/access_token";
// 傳遞參數(shù)grant_type、code、redirect_uri、client_id
String param = "grant_type=authorization_code&code=" + code + "&redirect_uri=" +
GITHUB_REDIRECT_URL + "&client_id=" + GITHUB_CLIENT_ID + "&client_secret=" + GITHUB_CLIENT_SECRET;
// 申請令牌,注意此處為post請求
String result = HttpClientUtils.sendPostRequest(url, param);
/*
* result示例:
* 失敗:error=incorrect_client_credentials&error_description=The+client_id+and%2For+client_secret+passed+are+incorrect.&
* error_uri=https%3A%2F%2Fdeveloper.github.com%2Fapps%2Fmanaging-oauth-apps%2Ftroubleshooting-oauth-app-access-token-request-errors%2F%23incorrect-client-credentials
* 成功:access_token=7c76186067e20d6309654c2bcc1545e41bac9c61&scope=&token_type=bearer
*/
Map<String, String> resultMap = HttpClientUtils.params2Map(result);
// 如果返回的map中包含error,表示失敗,錯誤原因存儲在error_description
if(resultMap.containsKey("error")) {
throw new Exception(resultMap.get("error_description"));
}
// 如果返回結(jié)果中包含access_token,表示成功
if(!resultMap.containsKey("access_token")) {
throw new Exception("獲取token失敗");
}
// 得到token和token_type
String accessToken = resultMap.get("access_token");
String tokenType = resultMap.get("token_type");
// 3、向資源服務器請求用戶信息,攜帶access_token和tokenType
String userUrl = "https://api.github.com/user";
String userParam = "access_token=" + accessToken + "&token_type=" + tokenType;
// 申請資源
String userResult = HttpClientUtils.sendGetRequest(userUrl, userParam);
// 4、輸出用戶信息
response.setContentType("text/html;charset=utf-8");
response.getWriter().write(userResult);
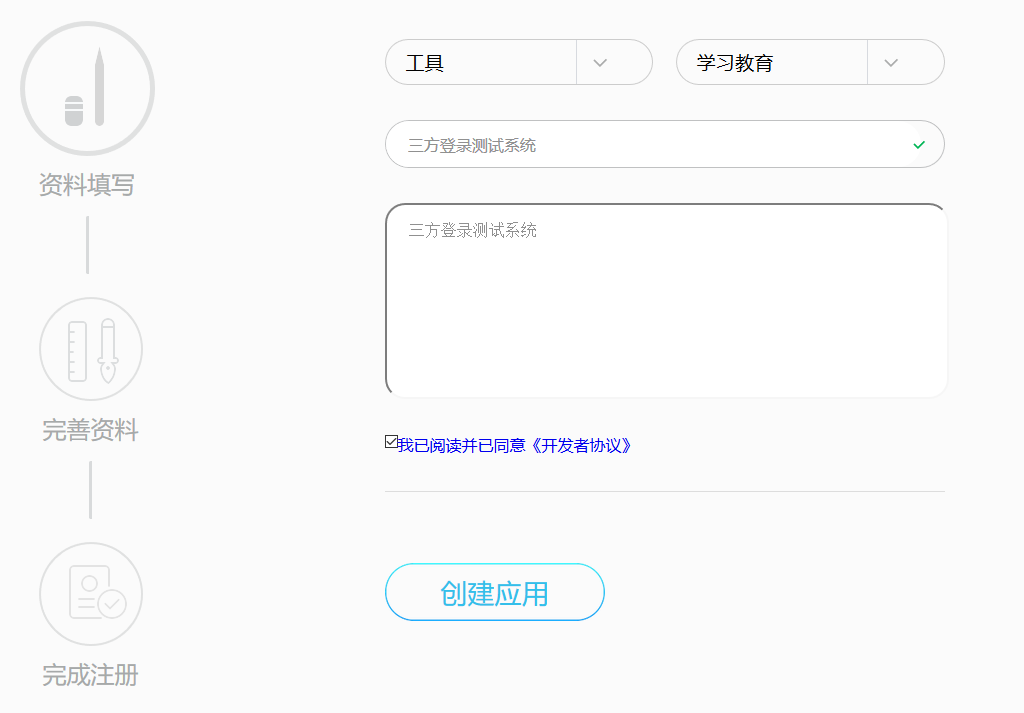
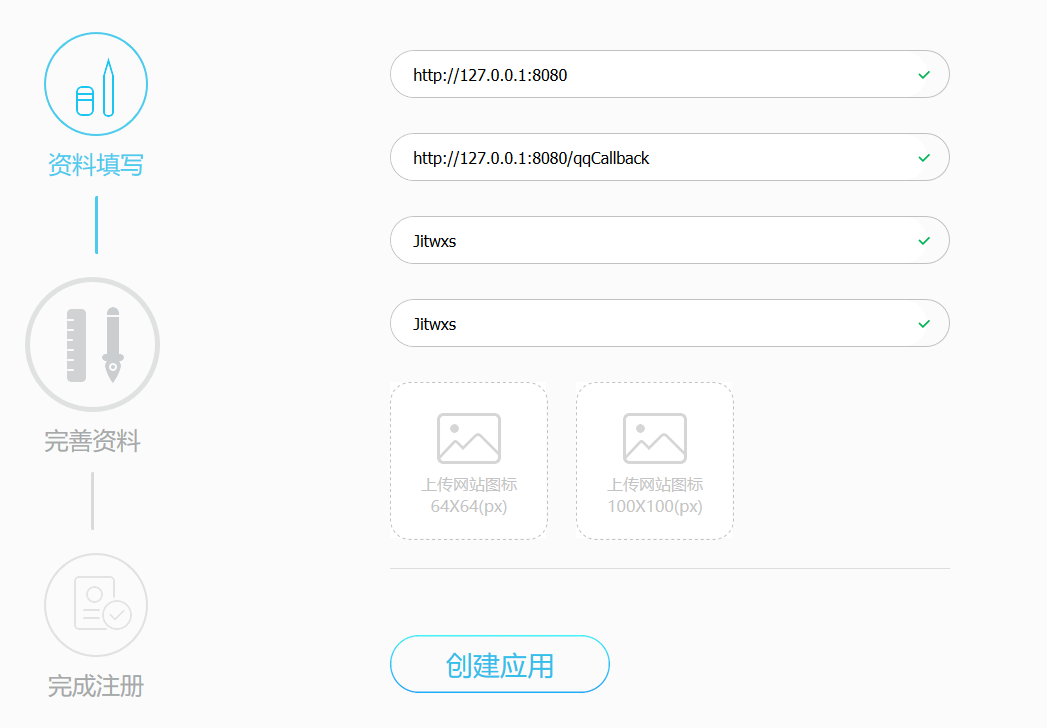
}2.1 注冊應用
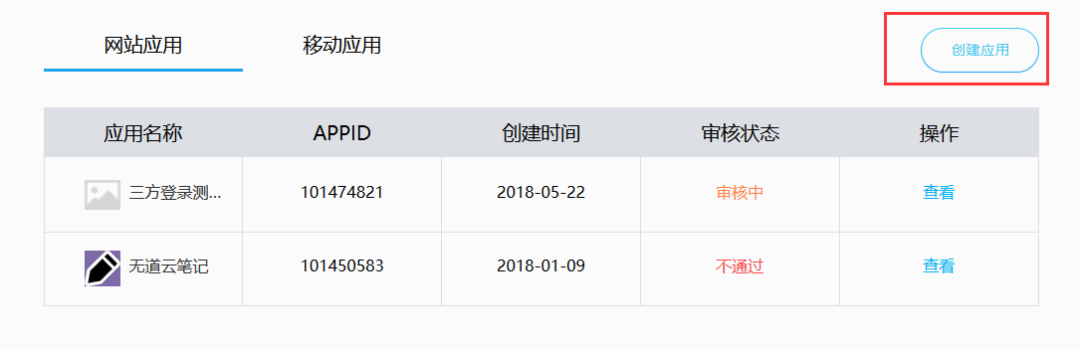
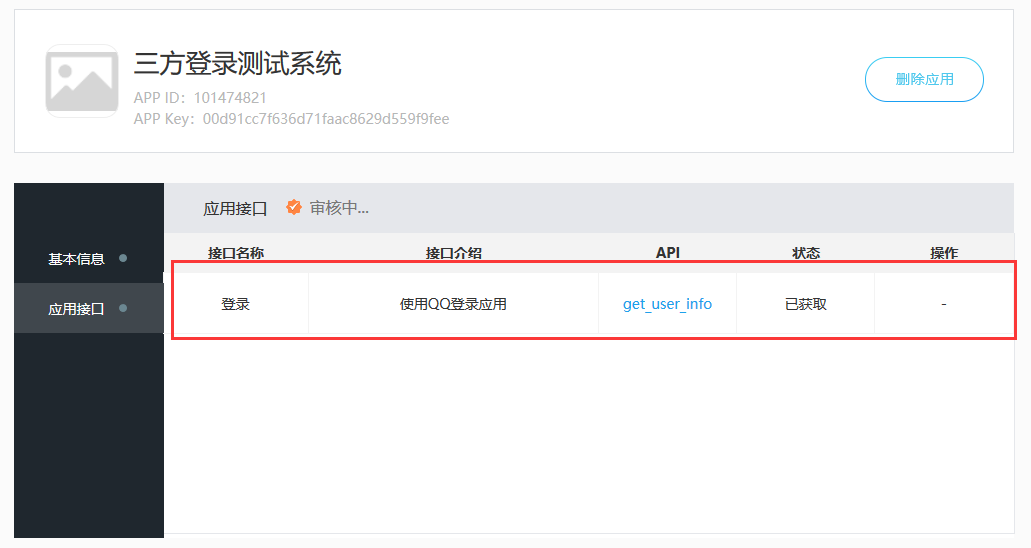
 注冊后,可以看到應用的 APP ID、APP Key,以及你被允許的接口,當然只有一個獲取用戶信息。
關(guān)注公眾號:Java項目精選,后臺回復:Java 。
注意:審核狀態(tài)為審核中和審核失敗也是可以使用的,不用擔心(只是無法實際上線而已,作為 Demo 足夠了)。
2.2 QQ 登錄方法
private static String QQ_APP_ID = "101474821";
private static String QQ_APP_KEY = "00d91cc7f636d71faac8629d559f9fee";
private static String QQ_REDIRECT_URL = "http://127.0.0.1:8080/qqCallback";

@RequestMapping("/qqLogin")
public void qqLogin(HttpServletResponse response) throws Exception {
    // QQ認證服務器地址
    String url = "https://graph.qq.com/oauth2.0/authorize";
    // 生成并保存state,忽略該參數(shù)有可能導致CSRF攻擊
    String state = oauthService.genState();
    // 傳遞參數(shù)response_type、client_id、state、redirect_uri
    String param = "response_type=code&" + "client_id=" + QQ_APP_ID + "&state=" + state
            + "&redirect_uri=" + QQ_REDIRECT_URL;

    // 1、請求QQ認證服務器
    response.sendRedirect(url + "?" + param);
}
2.3 QQ 回調(diào)方法
/**
 * QQ回調(diào)方法
 * @param code 授權(quán)碼
 * @param state 應與發(fā)送時一致
 * @author jitwxs
 * @since 2018/5/21 15:24
 */
@RequestMapping("/qqCallback")
public void qqCallback(String code, String state, HttpServletResponse response) throws Exception {
    // 驗證state,如果不一致,可能被CSRF攻擊
    if(!oauthService.checkState(state)) {
        throw new Exception("State驗證失敗");
    }

    // 2、向QQ認證服務器申請令牌
    String url = "https://graph.qq.com/oauth2.0/token";
    // 傳遞參數(shù)grant_type、code、redirect_uri、client_id
    String param = "grant_type=authorization_code&code=" + code + "&redirect_uri=" +
            QQ_REDIRECT_URL + "&client_id=" + QQ_APP_ID + "&client_secret=" + QQ_APP_KEY;

    // 申請令牌,注意此處為post請求
    // QQ獲取到的access token具有3個月有效期,用戶再次登錄時自動刷新。
    String result = HttpClientUtils.sendPostRequest(url, param);

    /*
     * result示例:
     * 成功:access_token=A24B37194E89A0DDF8DDFA7EF8D3E4F8&expires_in=7776000&refresh_token=BD36DADB0FE7B910B4C8BBE1A41F6783
     */
    Map<String, String> resultMap = HttpClientUtils.params2Map(result);
    // 如果返回結(jié)果中包含access_token,表示成功
    if(!resultMap.containsKey("access_token")) {
        throw  new Exception("獲取token失敗");
    }
    // 得到token
    String accessToken = resultMap.get("access_token");

    // 3、使用Access Token來獲取用戶的OpenID
    String meUrl = "https://graph.qq.com/oauth2.0/me";
    String meParams = "access_token=" + accessToken;
    String meResult = HttpClientUtils.sendGetRequest(meUrl, meParams);
    // 成功返回如下:callback( {"client_id":"YOUR_APPID","openid":"YOUR_OPENID"} );
    // 取出openid
    String openid = getQQOpenid(meResult);

    // 4、使用Access Token以及OpenID來訪問和修改用戶數(shù)據(jù)
    String userInfoUrl = "https://graph.qq.com/user/get_user_info";
    String userInfoParam = "access_token=" + accessToken + "&oauth_consumer_key=" + QQ_APP_ID + "&openid=" + openid;
    String userInfo = HttpClientUtils.sendGetRequest(userInfoUrl, userInfoParam);

    // 5、輸出用戶信息
    response.setContentType("text/html;charset=utf-8");
    response.getWriter().write(userInfo);
}

/**
 * 提取Openid
 * @param str 形如:callback( {"client_id":"YOUR_APPID","openid":"YOUR_OPENID"} );
 * @author jitwxs
 * @since 2018/5/22 21:37
 */
private String getQQOpenid(String str) {
    // 獲取花括號內(nèi)串
    String json = str.substring(str.indexOf("{"), str.indexOf("}") + 1);
    // 轉(zhuǎn)為Map
    Map<String, String> map = JsonUtils.jsonToPojo(json, Map.class);
    return map.get("openid");
}
三、項目源碼
文章來源:https://jitwxs.cn/33ad9e35.html
(完) 加我"微信" 獲取一份 最新Java面試題資料 請備注:666,不然不通過~
最近好文
1、Spring Boot 實現(xiàn)掃碼登錄,這種方式太香了!!
2、SpringSecurity + JWT 實現(xiàn)單點登錄
3、基于 Vue+Spring 前后端分離管理系統(tǒng)ELAdmin
最近面試BAT,整理一份面試資料《Java面試BAT通關(guān)手冊》,覆蓋了Java核心技術(shù)、JVM、Java并發(fā)、SSM、微服務、數(shù)據(jù)庫、數(shù)據(jù)結(jié)構(gòu)等等。 獲取方式:關(guān)注公眾號并回復 java 領(lǐng)取,更多內(nèi)容陸續(xù)奉上。 明天見(??ω??)??