
Spring MVC+Spring+Mybatis實(shí)現(xiàn)支付寶支付功能(圖文詳解+完整代碼)

點(diǎn)擊上方“java學(xué)習(xí)”,選擇“置頂公眾號(hào)”
干貨、福利第一時(shí)間送達(dá)!


前言
本教程詳細(xì)介紹了如何使用ssm框架實(shí)現(xiàn)支付寶支付功能。本文章分為兩大部分,分別是「支付寶測(cè)試環(huán)境代碼測(cè)試」和「將支付寶支付整合到ssm框架」,詳細(xì)的代碼和圖文解釋,自己實(shí)踐的時(shí)候一定仔細(xì)閱讀相關(guān)文檔,話不多說(shuō)我們開(kāi)始。
支付寶測(cè)試環(huán)境代碼測(cè)試
源代碼
https://github.com/OUYANGSIHAI/sihai-maven-ssm-alipay
1.下載電腦網(wǎng)站的官方demo:
下載:https://docs.open.alipay.com/270/106291/
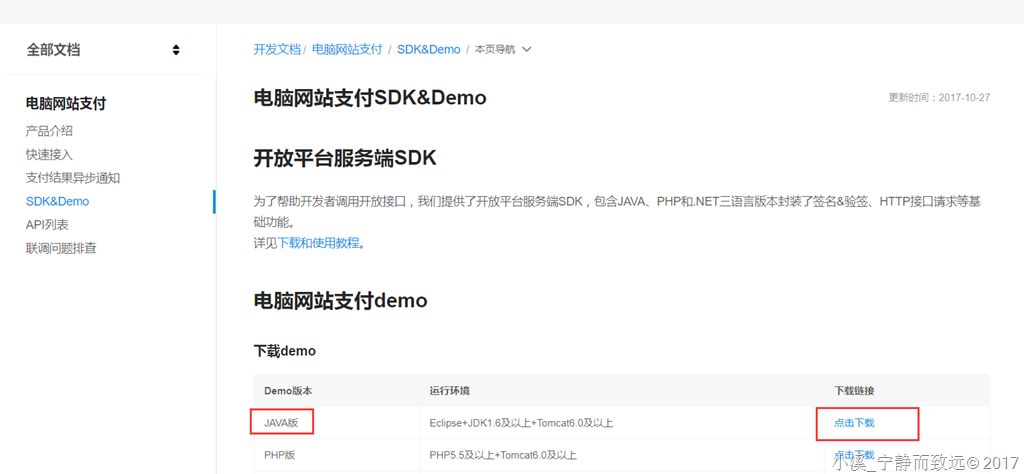
2.下載解壓導(dǎo)入eclipse
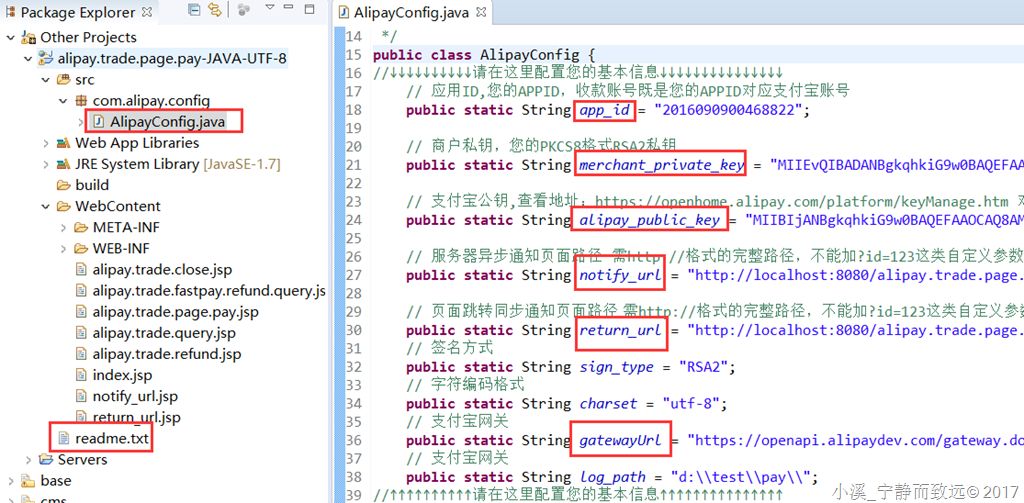
readme.txt請(qǐng)好好看一下。
只有一個(gè)Java配置類,其余都是JSP。
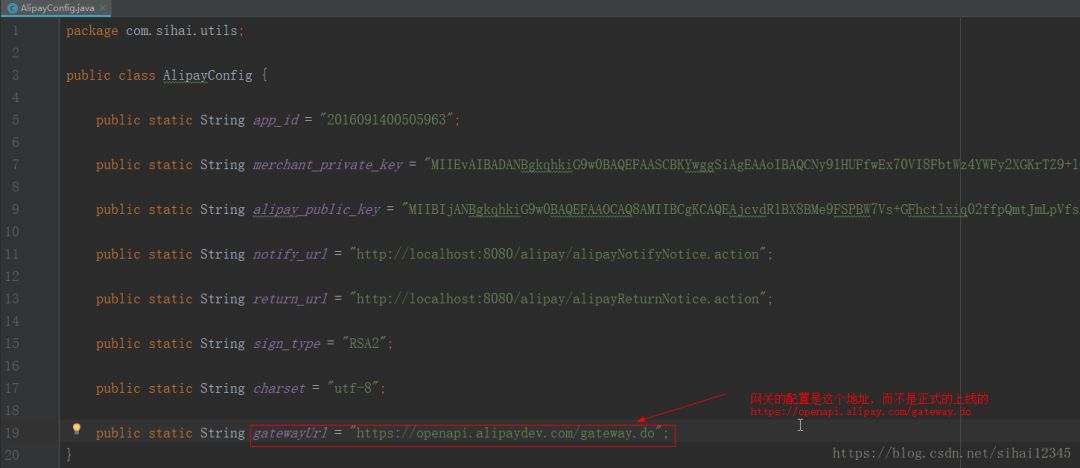
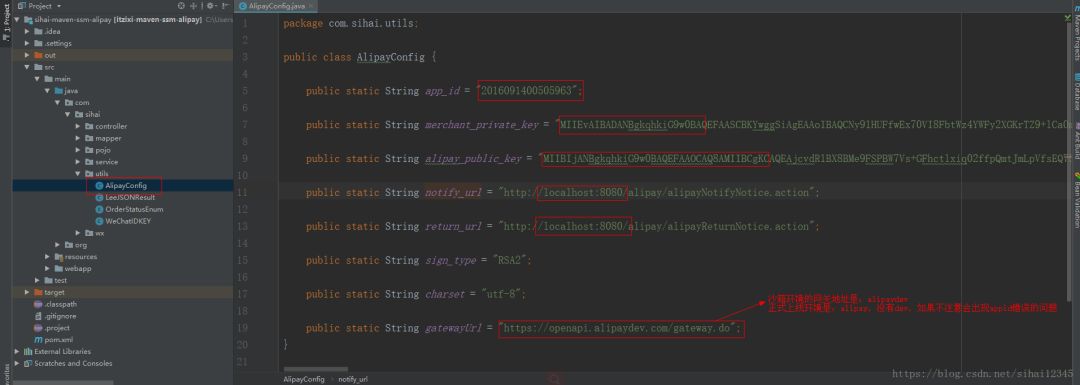
3.配置AlipayConfig
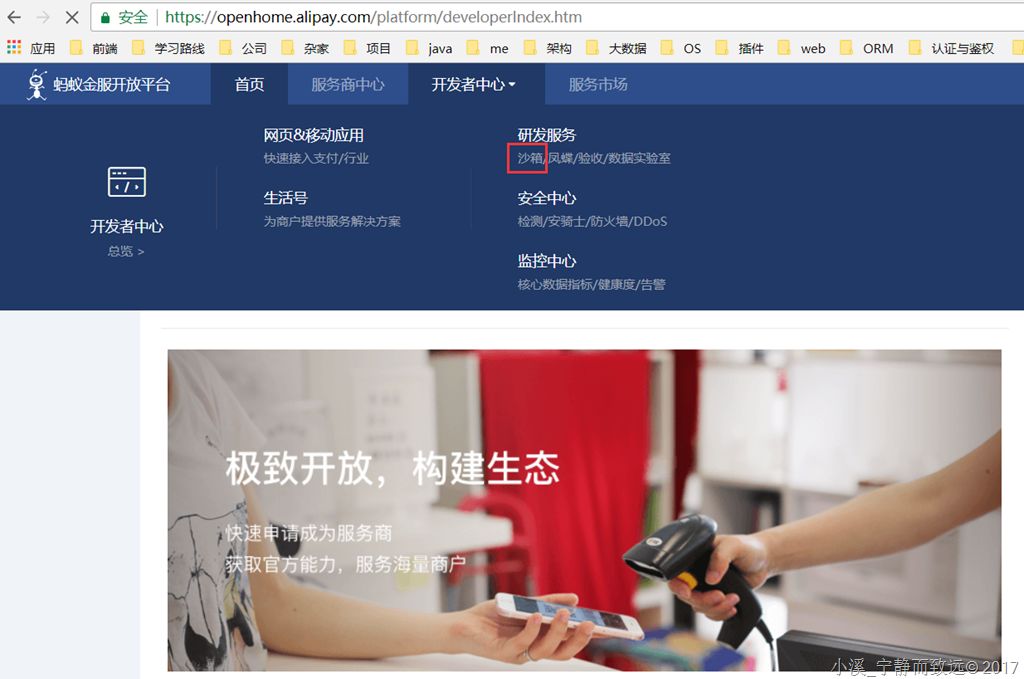
(1) 注冊(cè)螞蟻金服開(kāi)發(fā)者賬號(hào)(免費(fèi),不像蘋(píng)果會(huì)收取費(fèi)用)
注冊(cè)地址:https://open.alipay.com ,用你的支付寶賬號(hào)掃碼登錄,完善個(gè)人信息,選擇服務(wù)類型(我選的是自研)。
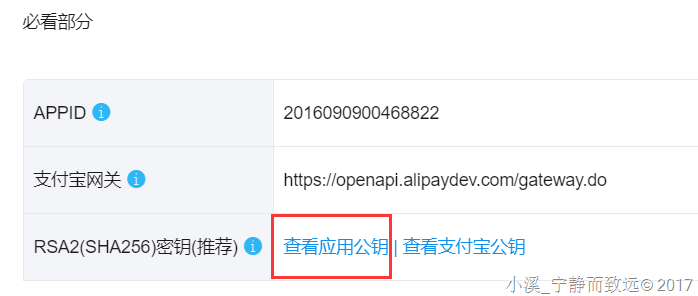
(2) 設(shè)置app_id和gatewayUrl
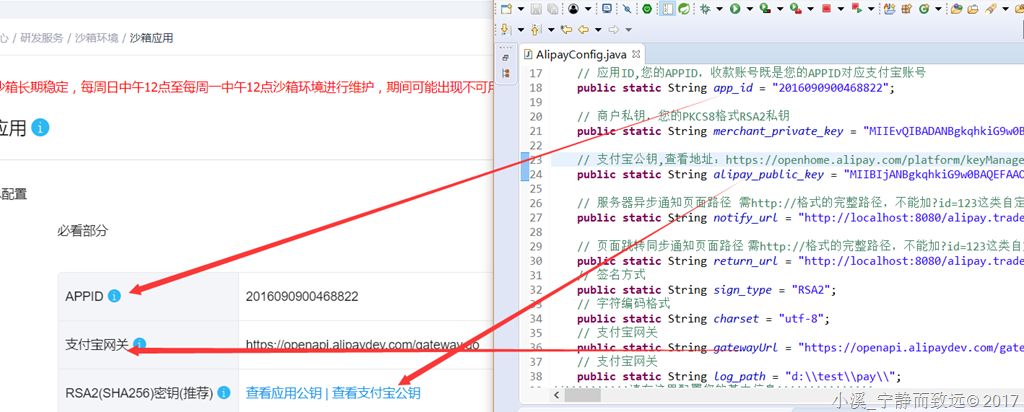
其中密鑰需要自己生成,appID和支付寶網(wǎng)關(guān)是已經(jīng)給好的,網(wǎng)關(guān)有dev字樣,表明是用于開(kāi)發(fā)測(cè)試。
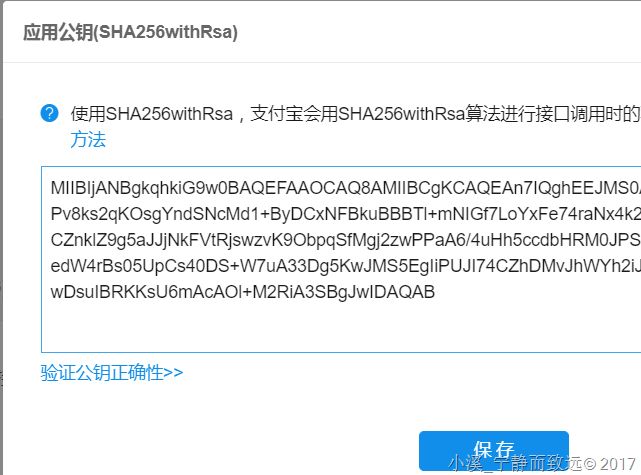
(3) 設(shè)置密鑰

點(diǎn)擊“生成方法”,打開(kāi)界面如下:
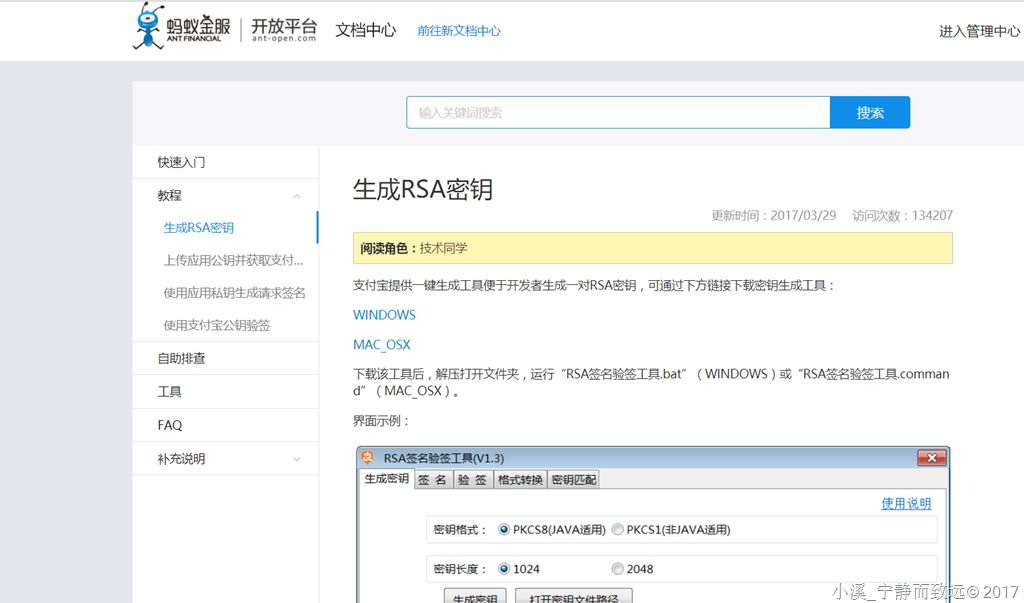
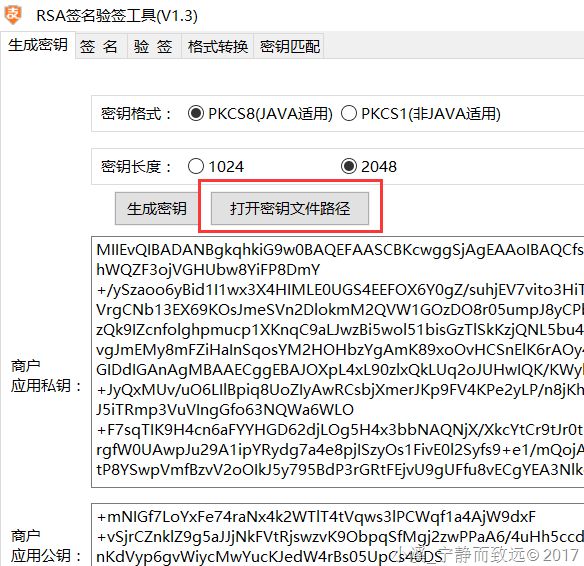
下載密鑰生成工具,解壓打開(kāi)后,選擇2048位生成密鑰:

如果沒(méi)有設(shè)置過(guò),此時(shí)顯示文本是"設(shè)置應(yīng)用公鑰",我這里是已經(jīng)設(shè)置過(guò)得。
設(shè)置方法,"打開(kāi)密鑰文件路徑":
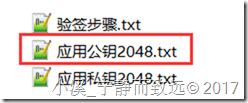
復(fù)制應(yīng)用公鑰2048.txt中的內(nèi)容到點(diǎn)擊"設(shè)置應(yīng)用公鑰"的彈出框中,保存:
商戶私鑰(merchant_private_key)
復(fù)制 應(yīng)用私鑰2048.txt 中的內(nèi)容到merchant_private_key中。
支付寶公鑰(alipay_public_key)
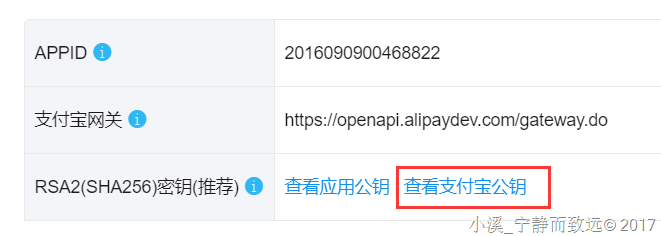
點(diǎn)擊如上圖鏈接,復(fù)制彈出框里面的內(nèi)容到alipay_public_key。
如果這個(gè)設(shè)置不對(duì),結(jié)果是:支付成功,但是驗(yàn)簽失敗。
如果是正式環(huán)境,需要上傳到對(duì)應(yīng)的應(yīng)用中:

(4) 服務(wù)器異步通知頁(yè)面路徑(notify_url)
如果沒(méi)有改名,修改IP和端口號(hào)就可以了,我自己的如下:
http://localhost:8080/alipay.trade.page.pay-JAVA-UTF-8/notify_url.jsp
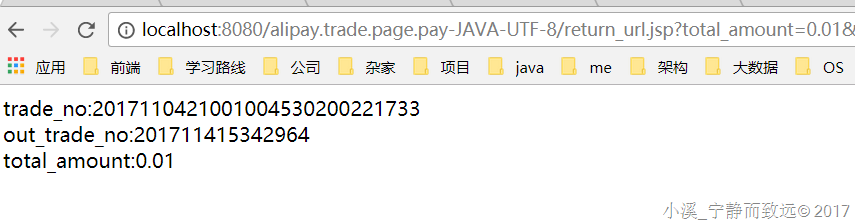
(5) 頁(yè)面跳轉(zhuǎn)同步通知頁(yè)面的路徑(return_url)
http://localhost:8080/alipay.trade.page.pay-JAVA-UTF-8/return_url.jsp
4.測(cè)試運(yùn)行
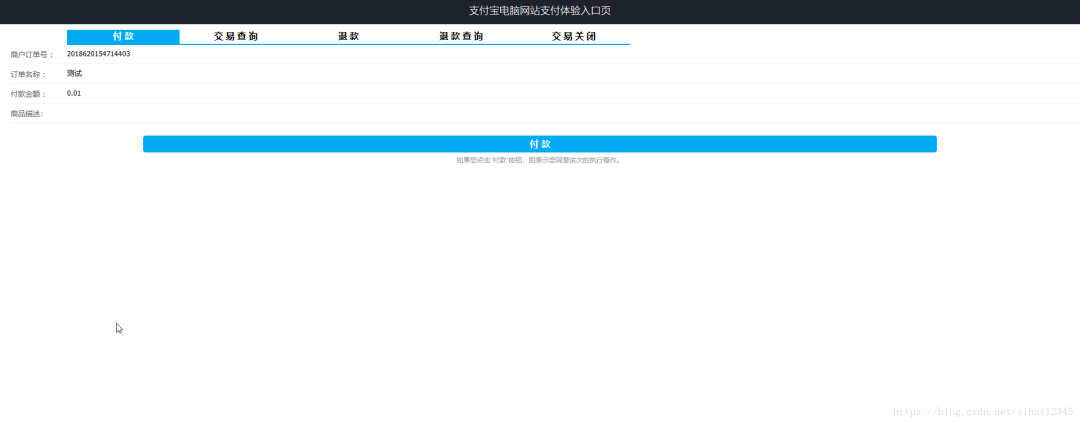
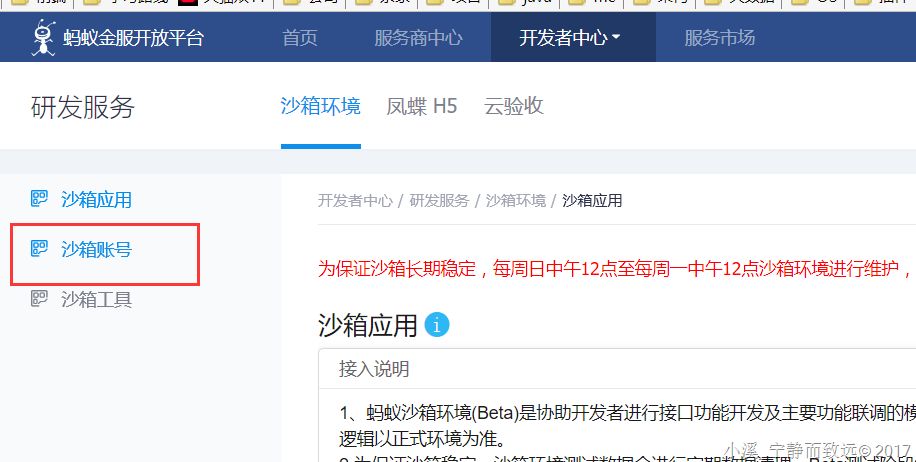
測(cè)試用的支付寶買家賬戶可以在"沙箱賬"這個(gè)頁(yè)面可以找到:
支付成功后,驗(yàn)簽結(jié)果:
問(wèn)題解決
由于我們使用的是沙箱測(cè)試環(huán)境,測(cè)試環(huán)境和正式上線的環(huán)境的網(wǎng)關(guān)是不一樣的,如果配置錯(cuò)誤,會(huì)出現(xiàn),appid錯(cuò)誤的問(wèn)題。配置如下:
源代碼下載
鏈接: https://pan.baidu.com/s/1n6GbEJiMzoGWJrSw0bb2Cg 密碼: zd9e將支付寶支付整合到ssm框架
1、項(xiàng)目架構(gòu)
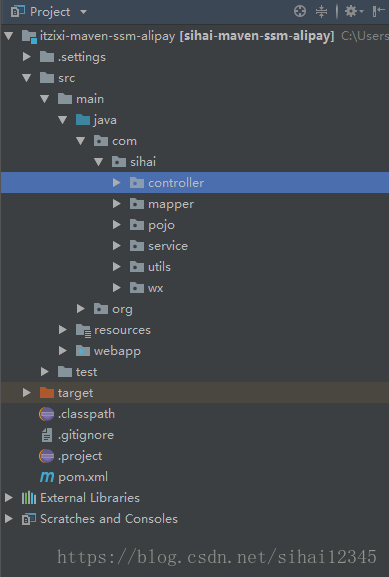
項(xiàng)目架構(gòu):spring+springmvc+mybatis
數(shù)據(jù)庫(kù):mysql
部署環(huán)境:tomcat9.0
開(kāi)發(fā)環(huán)境:jdk9、idea
支付:支付寶、微信
整合到ssm一樣,我們需要像沙箱測(cè)試環(huán)境一樣,需要修改支付的配置信息
2、數(shù)據(jù)庫(kù)代碼
主要包括以下的數(shù)據(jù)庫(kù)表:
user:用戶表
order:支付產(chǎn)生的訂單
flow:流水賬
product:商品表:用于模擬購(gòu)買商品。
drop table if exists user;

/*==============================================================*/
/* Table: user                                                  */
/*==============================================================*/
create table user
(
   id                   varchar(20) not null,
   username             varchar(128),
   sex                  varchar(20),
   primary key (id)
);

alter table user comment '用戶表';


CREATE TABLE `flow` (
  `id` varchar(20) NOT NULL,
  `flow_num` varchar(20) DEFAULT NULL COMMENT '流水號(hào)',
  `order_num` varchar(20) DEFAULT NULL COMMENT '訂單號(hào)',
  `product_id` varchar(20) DEFAULT NULL COMMENT '產(chǎn)品主鍵ID',
  `paid_amount` varchar(11) DEFAULT NULL COMMENT '支付金額',
  `paid_method` int(11) DEFAULT NULL COMMENT '支付方式\r\n            1:支付寶\r\n            2:微信',
  `buy_counts` int(11) DEFAULT NULL COMMENT '購(gòu)買個(gè)數(shù)',
  `create_time` datetime DEFAULT NULL COMMENT '創(chuàng)建時(shí)間',
  PRIMARY KEY (`id`)
) ENGINE=InnoDB DEFAULT CHARSET=utf8mb4 COMMENT='流水表';


CREATE TABLE `orders` (
  `id` varchar(20) NOT NULL,
  `order_num` varchar(20) DEFAULT NULL COMMENT '訂單號(hào)',
  `order_status` varchar(20) DEFAULT NULL COMMENT '訂單狀態(tài)\r\n            10:待付款\r\n            20:已付款',
  `order_amount` varchar(11) DEFAULT NULL COMMENT '訂單金額',
  `paid_amount` varchar(11) DEFAULT NULL COMMENT '實(shí)際支付金額',
  `product_id` varchar(20) DEFAULT NULL COMMENT '產(chǎn)品表外鍵ID',
  `buy_counts` int(11) DEFAULT NULL COMMENT '產(chǎn)品購(gòu)買的個(gè)數(shù)',
  `create_time` datetime DEFAULT NULL COMMENT '訂單創(chuàng)建時(shí)間',
  `paid_time` datetime DEFAULT NULL COMMENT '支付時(shí)間',
  PRIMARY KEY (`id`)
) ENGINE=InnoDB DEFAULT CHARSET=utf8mb4 COMMENT='訂單表';


CREATE TABLE `product` (
  `id` varchar(20) NOT NULL,
  `name` varchar(20) DEFAULT NULL COMMENT '產(chǎn)品名稱',
  `price` varchar(11) DEFAULT NULL COMMENT '價(jià)格',
  PRIMARY KEY (`id`)
) ENGINE=InnoDB DEFAULT CHARSET=utf8mb4 COMMENT='產(chǎn)品表 ';
3、dao數(shù)據(jù)接口層
這里就不介紹了,這個(gè)只包括簡(jiǎn)單的curd,可以使用`通用mapper`,或者`逆向工程`就行。以訂單order為例給出:
public interface OrdersMapper {
    int countByExample(OrdersExample example);

    int deleteByExample(OrdersExample example);

    int deleteByPrimaryKey(String id);

    int insert(Orders record);

    int insertSelective(Orders record);

    List<Orders> selectByExample(OrdersExample example);

    Orders selectByPrimaryKey(String id);

    int updateByExampleSelective(@Param("record") Orders record, @Param("example") OrdersExample example);

    int updateByExample(@Param("record") Orders record, @Param("example") OrdersExample example);

    int updateByPrimaryKeySelective(Orders record);

    int updateByPrimaryKey(Orders record);
}
注意:源代碼最后給出
4、service層
同上,最后在項(xiàng)目源代碼里可見(jiàn)。以訂單order為例給出:
/**
 * 訂單操作 service
 * @author ibm
 *
 */
public interface OrdersService {

    /**
     * 新增訂單
     * @param order
     */
    public void saveOrder(Orders order);

    /**
     *
     * @Title: OrdersService.java
     * @Package com.sihai.service
     * @Description: 修改叮當(dāng)狀態(tài),改為 支付成功,已付款; 同時(shí)新增支付流水
     * Copyright: Copyright (c) 2017
     * Company:FURUIBOKE.SCIENCE.AND.TECHNOLOGY
     *
     * @author sihai
     * @date 2017年8月23日 下午9:04:35
     * @version V1.0
     */
    public void updateOrderStatus(String orderId, String alpayFlowNum, String paidAmount);

    /**
     * 獲取訂單
     * @param orderId
     * @return
     */
    public Orders getOrderById(String orderId);

}
4、支付寶支付controller(支付流程)
支付流程圖
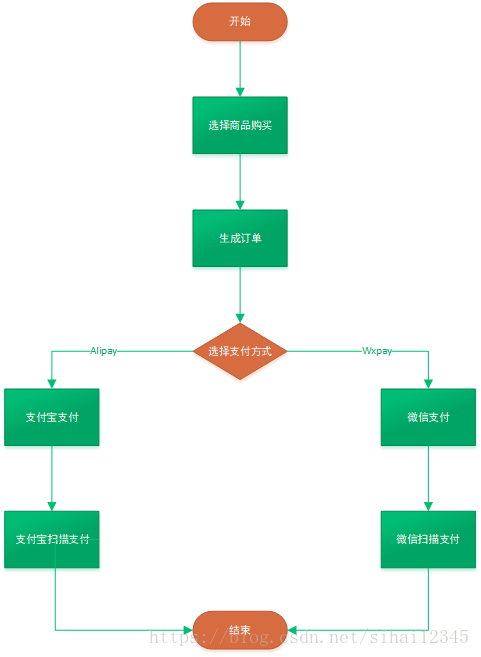
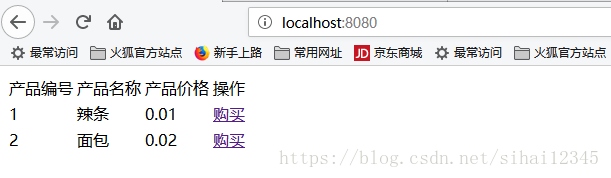
首先,啟動(dòng)項(xiàng)目后,輸入http://localhost:8080/,會(huì)進(jìn)入到商品頁(yè)面,如下:
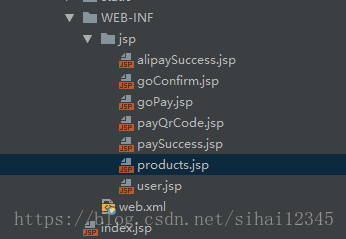
下面是頁(yè)面代碼
商品頁(yè)面(products.jsp)
代碼實(shí)現(xiàn):
<%@ page language="java" contentType="text/html; charset=UTF-8" pageEncoding="UTF-8"%>
<%@ taglib prefix="c" uri="http://java.sun.com/jsp/jstl/core" %>
<%@ taglib uri="http://java.sun.com/jsp/jstl/functions" prefix="fn" %>
<script src="<%=request.getContextPath() %>/static/js/jquery.min.js" type="text/javascript"></script>

<html>

    <head>

    </head>

    <body>

        <table>
            <tr>
                <td>
                    產(chǎn)品編號(hào)
                </td>
                <td>
                    產(chǎn)品名稱
                </td>
                <td>
                    產(chǎn)品價(jià)格
                </td>
                <td>
                    操作
                </td>
            </tr>
            <c:forEach items="${pList }" var="p">
                <tr>
                    <td>
                        ${p.id }
                    </td>
                    <td>
                        ${p.name }
                    </td>
                    <td>
                        ${p.price }
                    </td>
                    <td>
                        <a href="<%=request.getContextPath() %>/alipay/goConfirm.action?productId=${p.id }">購(gòu)買</a>
                    </td>
                </tr>

            </c:forEach>
        </table>

        <input type="hidden" id="hdnContextPath" name="hdnContextPath" value="<%=request.getContextPath() %>"/>
    </body>

</html>


<script type="text/javascript">

    $(document).ready(function() {

        var hdnContextPath = $("#hdnContextPath").val();


    });


</script>
點(diǎn)擊上面的購(gòu)買,進(jìn)入到訂單頁(yè)面
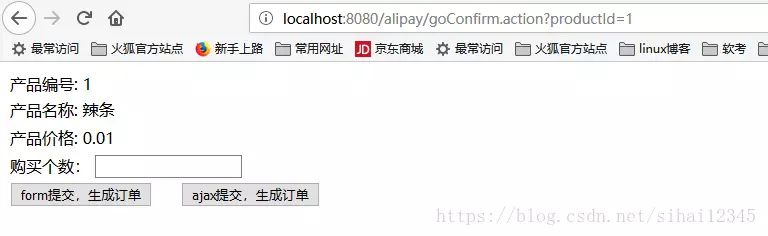
填寫(xiě)個(gè)數(shù),然后點(diǎn)擊生成訂單,調(diào)用如下代碼
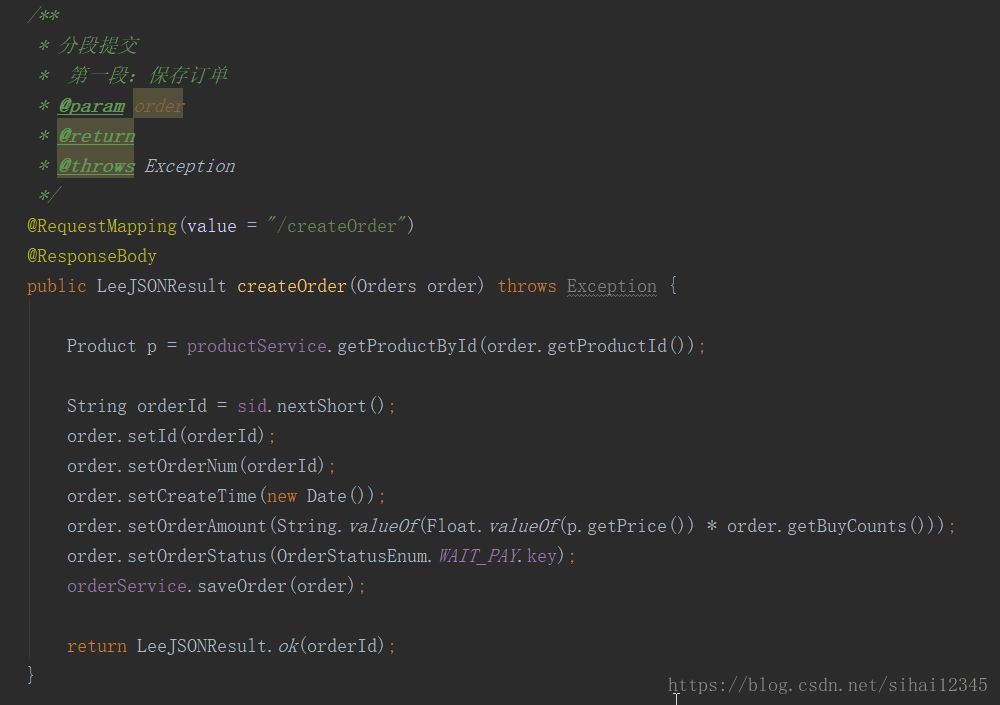
根據(jù)SID(生成id的工具)等信息生成訂單,保存到數(shù)據(jù)庫(kù)。
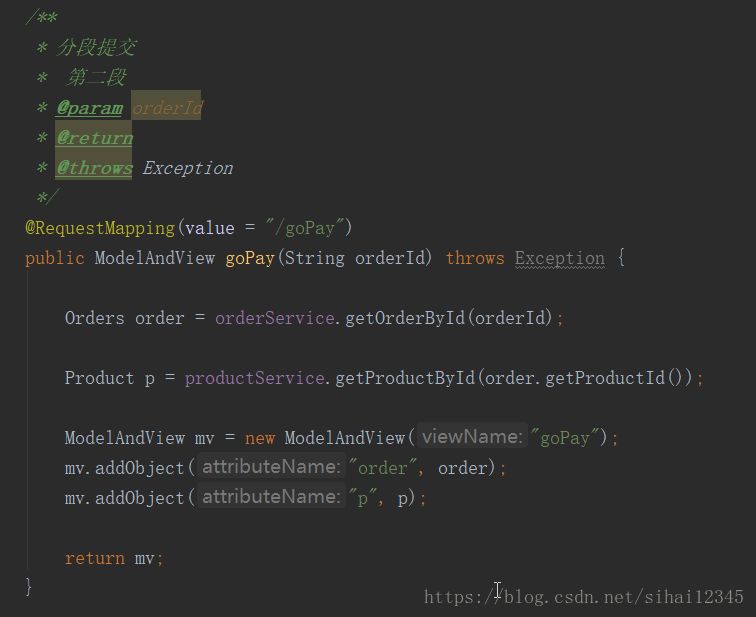
進(jìn)入到選擇支付頁(yè)面
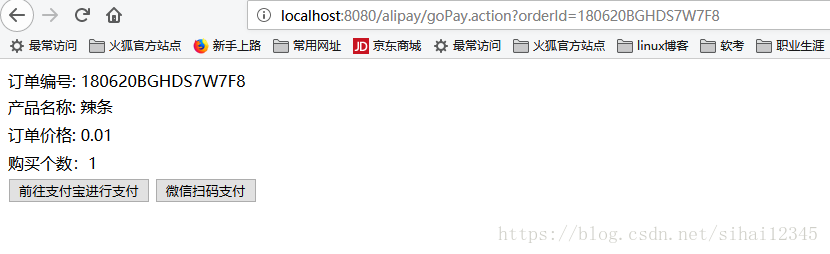
調(diào)用了如下代碼:
然后,我們選擇支付寶支付,進(jìn)入到了我們支付的頁(yè)面了,大功告成!
調(diào)用了如下代碼:
/**
     *
     * @Title: AlipayController.java
     * @Package com.sihai.controller
     * @Description: 前往支付寶第三方網(wǎng)關(guān)進(jìn)行支付
     * Copyright: Copyright (c) 2017
     * Company:FURUIBOKE.SCIENCE.AND.TECHNOLOGY
     *
     * @author sihai
     * @date 2017年8月23日 下午8:50:43
     * @version V1.0
     */
    @RequestMapping(value = "/goAlipay", produces = "text/html; charset=UTF-8")
    @ResponseBody
    public String goAlipay(String orderId, HttpServletRequest request, HttpServletRequest response) throws Exception {

        Orders order = orderService.getOrderById(orderId);

        Product product = productService.getProductById(order.getProductId());

        //獲得初始化的AlipayClient
        AlipayClient alipayClient = new DefaultAlipayClient(AlipayConfig.gatewayUrl, AlipayConfig.app_id, AlipayConfig.merchant_private_key, "json", AlipayConfig.charset, AlipayConfig.alipay_public_key, AlipayConfig.sign_type);

        //設(shè)置請(qǐng)求參數(shù)
        AlipayTradePagePayRequest alipayRequest = new AlipayTradePagePayRequest();
        alipayRequest.setReturnUrl(AlipayConfig.return_url);
        alipayRequest.setNotifyUrl(AlipayConfig.notify_url);

        //商戶訂單號(hào),商戶網(wǎng)站訂單系統(tǒng)中唯一訂單號(hào),必填
        String out_trade_no = orderId;
        //付款金額,必填
        String total_amount = order.getOrderAmount();
        //訂單名稱,必填
        String subject = product.getName();
        //商品描述,可空
        String body = "用戶訂購(gòu)商品個(gè)數(shù):" + order.getBuyCounts();

        // 該筆訂單允許的最晚付款時(shí)間,逾期將關(guān)閉交易。取值范圍:1m~15d。m-分鐘,h-小時(shí),d-天,1c-當(dāng)天(1c-當(dāng)天的情況下,無(wú)論交易何時(shí)創(chuàng)建,都在0點(diǎn)關(guān)閉)。該參數(shù)數(shù)值不接受小數(shù)點(diǎn), 如 1.5h,可轉(zhuǎn)換為 90m。
        String timeout_express = "1c";

        alipayRequest.setBizContent("{\"out_trade_no\":\""+ out_trade_no +"\","
                + "\"total_amount\":\""+ total_amount +"\","
                + "\"subject\":\""+ subject +"\","
                + "\"body\":\""+ body +"\","
                + "\"timeout_express\":\""+ timeout_express +"\","
                + "\"product_code\":\"FAST_INSTANT_TRADE_PAY\"}");

        //請(qǐng)求
        String result = alipayClient.pageExecute(alipayRequest).getBody();

        return result;
    }
這段代碼都可以在阿里支付的demo里面找到的,只需要復(fù)制過(guò)來(lái),然后改改,整合到ssm環(huán)境即可。
上面就是將阿里支付寶支付整合到ssm的全過(guò)程了。
怎么接私活?這個(gè)渠道你100%有用!請(qǐng)收藏!
喜歡文章,點(diǎn)個(gè)在看

