
TensorFlow和Pytorch中的音頻增強(qiáng)

來源:Deephub Imba 本文約2100字,建議閱讀9分鐘
本文將介紹如何將增強(qiáng)應(yīng)用到 TensorFlow 中的數(shù)據(jù)集的兩種方法。
直接音頻增強(qiáng)
import librosa
import tensorflow as tf

def build_artificial_dataset(num_samples: int):
? data = []
? sampling_rates = []

? for i in range(num_samples):
? ? ? y, sr = librosa.load(librosa.ex('nutcracker'))
? ? ? data.append(y)
? ? ? sampling_rates.append(sr)
? features_dataset = tf.data.Dataset.from_tensor_slices(data)
? labels_dataset = tf.data.Dataset.from_tensor_slices(sampling_rates)
? dataset = tf.data.Dataset.zip((features_dataset, labels_dataset))

? return dataset

ds = build_artificial_dataset(10)
from audiomentations import Compose, AddGaussianNoise, PitchShift, Shift

augmentations_pipeline = Compose(
? [
? ? ? AddGaussianNoise(min_amplitude=0.001, max_amplitude=0.015, p=0.5),
? ? ? PitchShift(min_semitones=-4, max_semitones=4, p=0.5),
? ? ? Shift(min_fraction=-0.5, max_fraction=0.5, p=0.5),
? ]
)
def apply_pipeline(y, sr):
? shifted = augmentations_pipeline(y, sr)
? return shifted


@tf.function
def tf_apply_pipeline(feature, sr, ):
? """
? Applies the augmentation pipeline to audio files
? @param y: audio data
? @param sr: sampling rate
? @return: augmented audio data
? """
? augmented_feature = tf.numpy_function(
? ? ? apply_pipeline, inp=[feature, sr], Tout=tf.float32, name="apply_pipeline"
? )

? return augmented_feature, sr


def augment_audio_dataset(dataset: tf.data.Dataset):
? dataset = dataset.map(tf_apply_pipeline)

? return dataset
ds = augment_audio_dataset(ds)
ds = ds.map(lambda y, sr: (tf.expand_dims(y, axis=-1), sr))
前向傳播期間進(jìn)行音頻增強(qiáng)
我們可以在例如超參數(shù)搜索期間優(yōu)化頻譜圖生成的參數(shù),從而無需重復(fù)將音頻生成頻譜圖。
轉(zhuǎn)換直接在 GPU 上進(jìn)行,因此在原始轉(zhuǎn)換速度和設(shè)備內(nèi)存放置方面都會(huì)更快。
import kapre

input_layer = tf.keras.layers.Input(shape=input_shape, dtype=tf.float32)

melspectrogram = kapre.composed.get_melspectrogram_layer(
? n_fft=1024,
? return_decibel=True,
? n_mels=256,
? input_data_format='channels_last',
? output_data_format='channels_last')(input_layer)
from spec_augment import SpecAugment

spec_augment = SpecAugment(freq_mask_param=27, # F in paper
? ? ? ? ? ? ? ? ? ? ? ? ? time_mask_param=100, # T in paper
? ? ? ? ? ? ? ? ? ? ? ? ? n_freq_mask=1, # mF in paper
? ? ? ? ? ? ? ? ? ? ? ? ? n_time_mask=2, # mT in paper
? ? ? ? ? ? ? ? ? ? ? ? ? mask_value=-1, )(melspectrogram)
spec_augment = tf.keras.applications.resnet_v2.preprocess_input(spec_augment)
core = tf.keras.applications.resnet_v2.ResNet152V2(
? ? ? input_tensor=spec_augment,
? ? ? include_top=False,
? ? ? pooling="avg",
? ? ? weights=None,
? )
core = core.output

output = tf.keras.layers.Dense(units=10)(core)

resnet_model = tf.keras.Model(inputs=[input_layer], outputs=[output], name="audio_model")
torchaudio
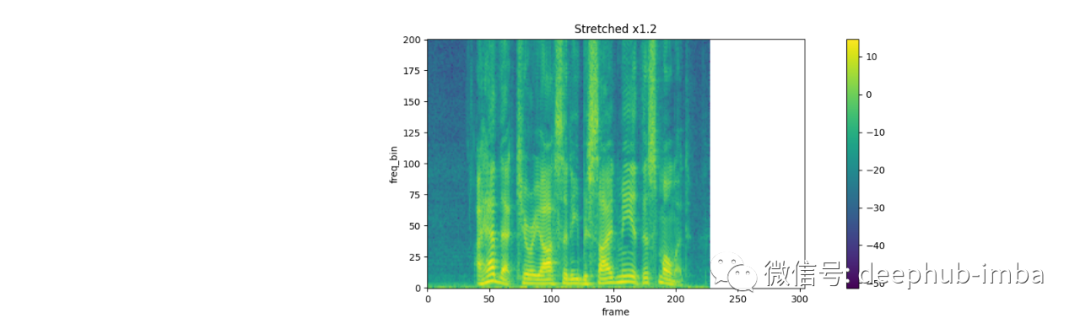
spec = get_spectrogram(power=None)
strech = T.TimeStretch()

rate = 1.2
spec_ = strech(spec, rate)
plot_spectrogram(spec_[0].abs(), title=f"Stretched x{rate}", aspect='equal', xmax=304)

plot_spectrogram(spec[0].abs(), title="Original", aspect='equal', xmax=304)

rate = 0.9
spec_ = strech(spec, rate)
plot_spectrogram(spec_[0].abs(), title=f"Stretched x{rate}", aspect='equal', xmax=304)
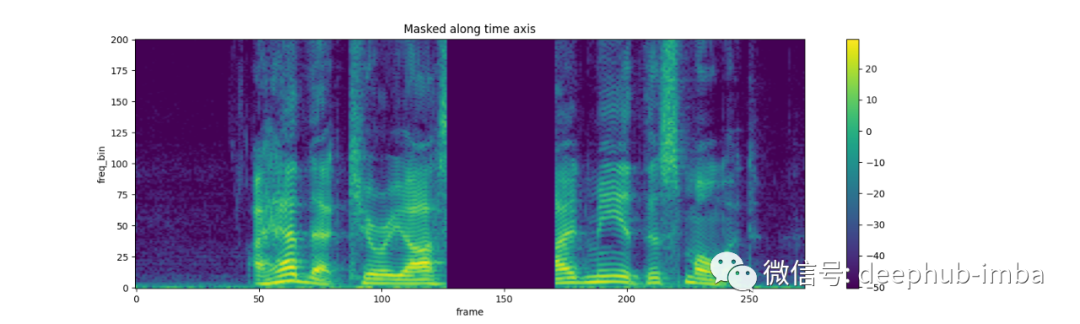
torch.random.manual_seed(4)

spec = get_spectrogram()
plot_spectrogram(spec[0], title="Original")

masking = T.TimeMasking(time_mask_param=80)
spec = masking(spec)

plot_spectrogram(spec[0], title="Masked along time axis")
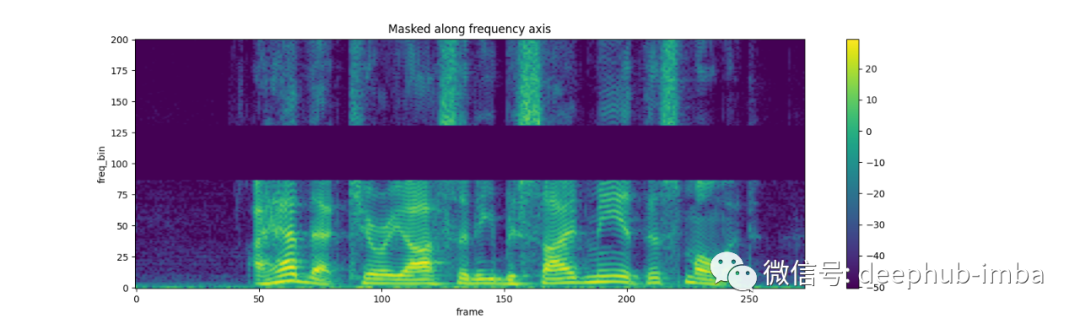
FrequencyMasking:
torch.random.manual_seed(4)

spec = get_spectrogram()
plot_spectrogram(spec[0], title="Original")

masking = T.FrequencyMasking(freq_mask_param=80)
spec = masking(spec)

plot_spectrogram(spec[0], title="Masked along frequency axis")
總結(jié)
引用
[1] Park et al., Specaugment: A simple data augmentation method for automatic speech recognition, 2019, Proc. Interspeech 2019
https://ai.googleblog.com/2019/04/specaugment-new-data-augmentation.html
編輯:王菁
評(píng)論
圖片
表情