
Java之定時任務全家桶
定時任務應用非常廣泛,Java提供的現(xiàn)有解決方案有很多。
本次主要講schedule、quartz、xxl-job、shedlock等相關的代碼實踐。
一、SpringBoot使用Schedule
核心代碼:
1 | @Component |
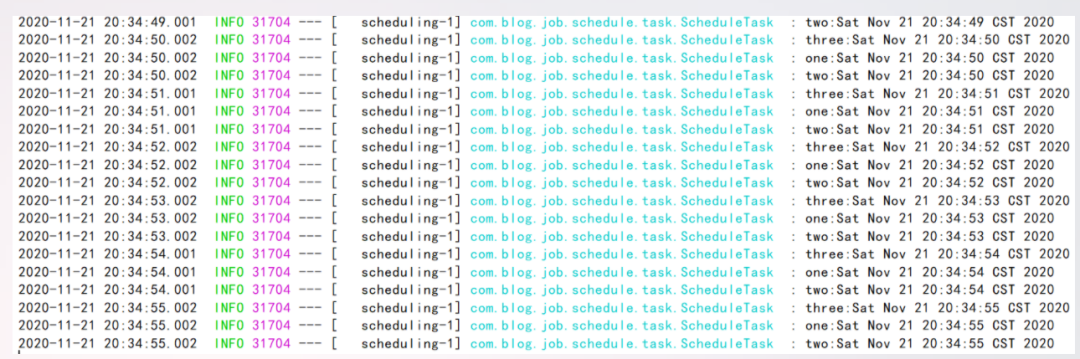
運行效果如下:
除此之外還可以這樣實現(xiàn),核心代碼:
1 | @PropertySource(value = { |
有朋友或許很疑惑,為什么要寫這么一大堆,這個與前面的代碼又有何區(qū)別呢?
區(qū)別是多線程并行。其實多線程并行也可以不用這么寫,只需寫一段核心配置類代碼即可。
定時任務多線程配置類:
1 | @Configuration |
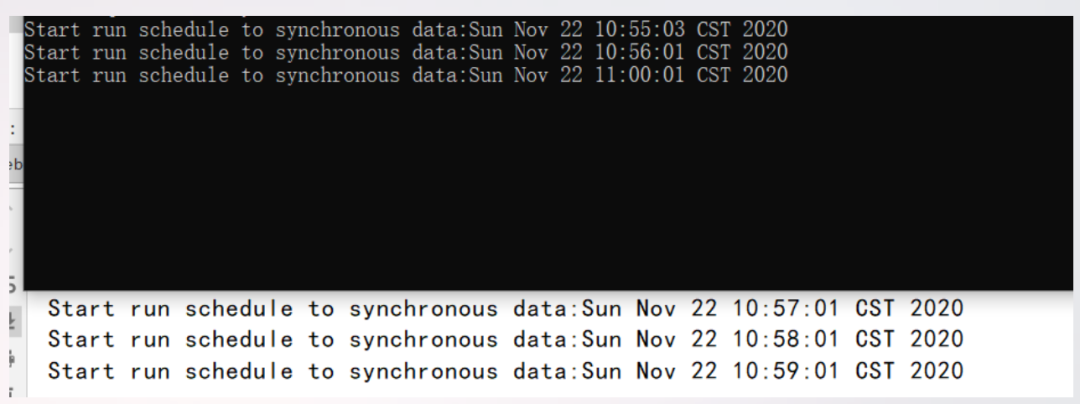
再次啟動,查看效果,如下:
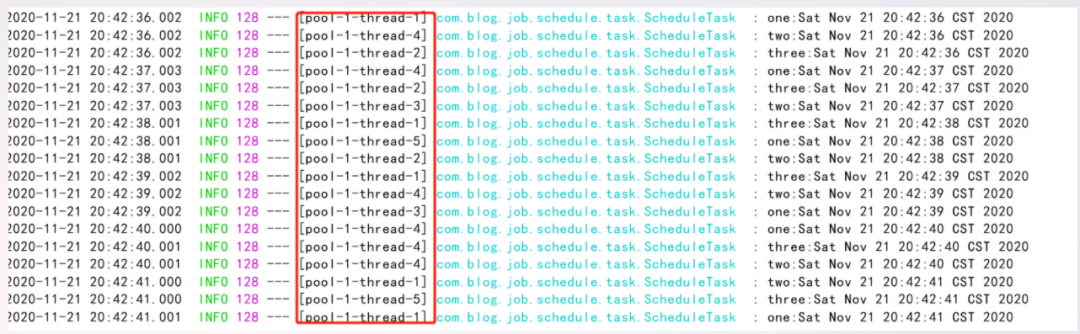
由此看出走不同的線程執(zhí)行,不同的線程執(zhí)行的好處是,如果某一個線程掛掉后,并不會阻塞導致其它定時任務無法執(zhí)行。
另外如果要想并發(fā)執(zhí)行,前面的配置可以不要,直接用SpringBoot提供的現(xiàn)成注解即可,核心代碼如下:
1 | @Component |
除此外,還有基于schedule動態(tài)定時任務(所謂動態(tài)只不過是指cron表達式放在對應的數(shù)據(jù)表里),簡單示例代碼:
1 | @Configuration |
核心配置文件(application.yml):
1 | spring: |
SQL腳本:
1 | DROP DATABASE IF EXISTS `test`; |
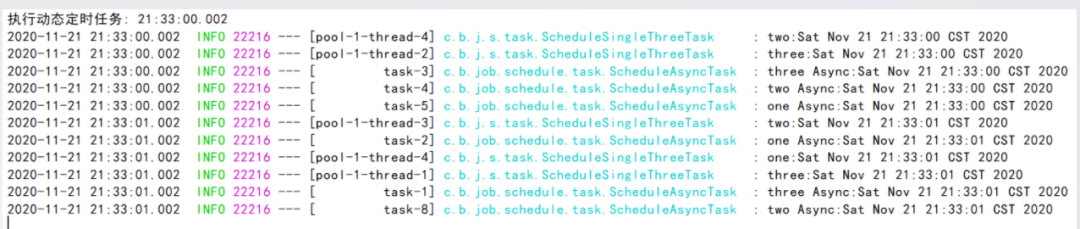
運行效果如下:
二、SpringBoot使用Quartz
1.Maven依賴
1 | |
2.配置文件
1 | spring: |
3.啟動類
1 | @SpringBootApplication |
4.配置類
1 | @Configuration |
5.定時任務類
1 | public class CouponTimeOutJob extends QuartzJobBean { |
6.啟動成功不報錯
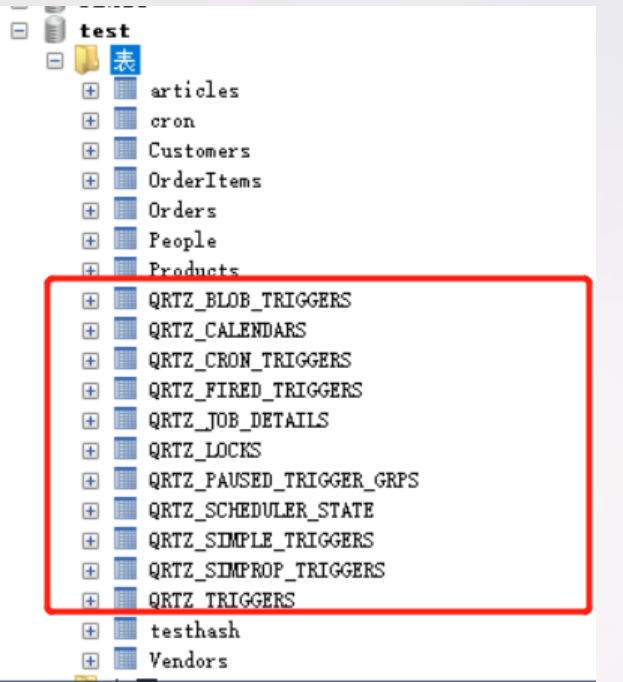
(1)對應的數(shù)據(jù)庫會生成定時任務相關的數(shù)據(jù)表
(2)控制臺不斷輸出定時任務執(zhí)行日志

三、SpringBoot使用xxl-job
之前寫過一樣的例子,如今簡化了下。
關于xxl-job使用詳情,可以參考我的這篇文章:
SpringBoot整合Xxl-Job
1.Maven依賴
1 | |
2.配置類
1 | @Configuration |
3.配置文件內(nèi)容
1 | # web port |
4.定時任務類
1 | @Component |
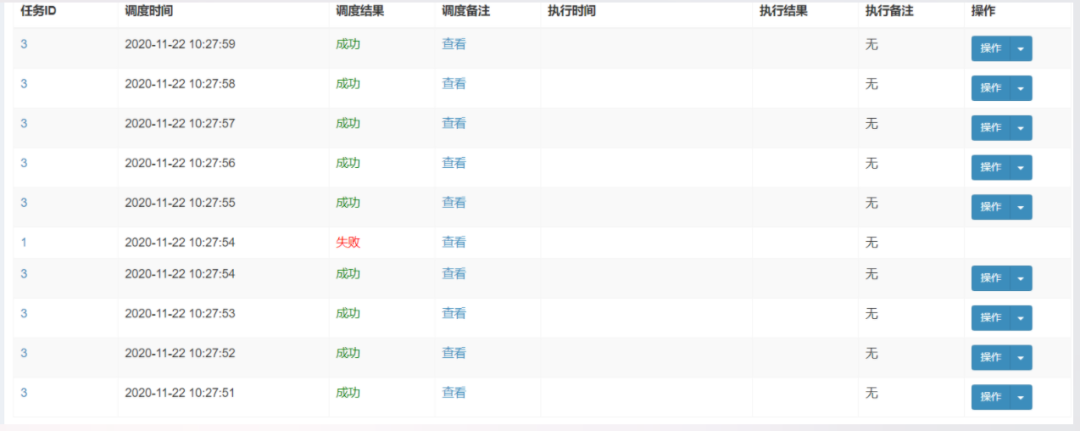
5.執(zhí)行效果
分別如下所示:

四、SpringBoot使用ShedLock
1.導入Maven依賴
1 | |
2.編寫配置類
1 | @Configuration |
3.編寫具體的定時任務
1 | @Component |
4.編寫啟動類
1 | @SpringBootApplication |
5.配置文件
1 | server: |
6.測試
我之所以用shedlock是因為確保在集群環(huán)境下各微服務的定時任務只執(zhí)行一個,而不是全部都運行相同的定時任務。
本次測試效果如下:
本次代碼例子已放至我的GitHub:
https://github.com/developers-youcong/blog-job
source:?https://developers-youcong.github.io/2020/11/21/Java之定時任務全家桶/
喜歡,在看
評論
圖片
表情