
使用Python+OpenCV+dlib為人臉生成口罩
點(diǎn)擊上方“小白學(xué)視覺”,選擇加"星標(biāo)"或“置頂”
重磅干貨,第一時(shí)間送達(dá)
推薦閱讀


安裝所需的軟件包
    #requirements_facemask.txt
numpy == 1.18.5
pip == 20.2.2
imutils == 0.5.3
python >=3.7
dlib == 19.21.0
cmake == 3.18.0
opencv-python == 4.4.0
導(dǎo)入庫
    # 必要的導(dǎo)入
import cv2
import dlib
import numpy as np
import os
import imutils
    # 設(shè)置目錄
os.chdir('PATH_TO_DIR')
path = 'IMAGE_PATH'

# 初始化顏色 [color_type] = (Blue, Green, Red)
color_blue = (239,207,137)
color_cyan = (255,200,0)
color_black = (0, 0, 0)
圖像預(yù)處理
    # 加載圖像并調(diào)整大小,將其轉(zhuǎn)換為灰度
img= cv2.imread('image_path')
img = imutils.resize(img, width = 500)
gray=cv2.cvtColor(img, cv2.COLOR_BGR2GRAY)
使用dlib、OpenCV和Python檢測和提取人臉關(guān)鍵點(diǎn)
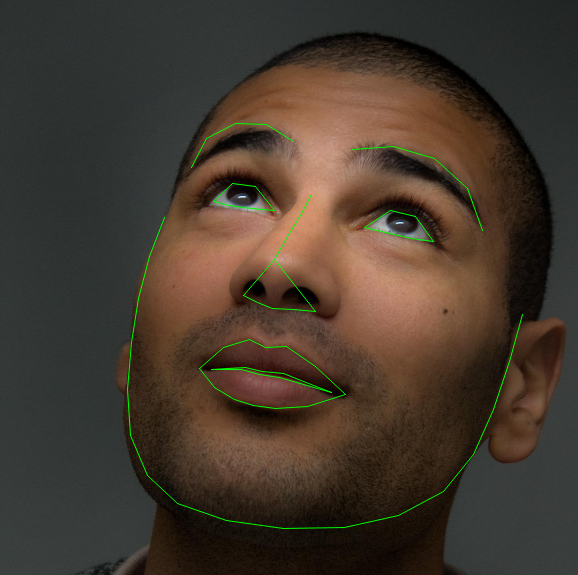
人臉關(guān)鍵點(diǎn)檢測被定義為檢測臉上的關(guān)鍵標(biāo)志點(diǎn)并跟蹤它們(對由于頭部運(yùn)動和面部表情而導(dǎo)致的剛性和非剛性面部變形具有魯棒性)[來源]
什么是人臉關(guān)鍵點(diǎn)?
-
定位圖像中檢測到的人臉。 -
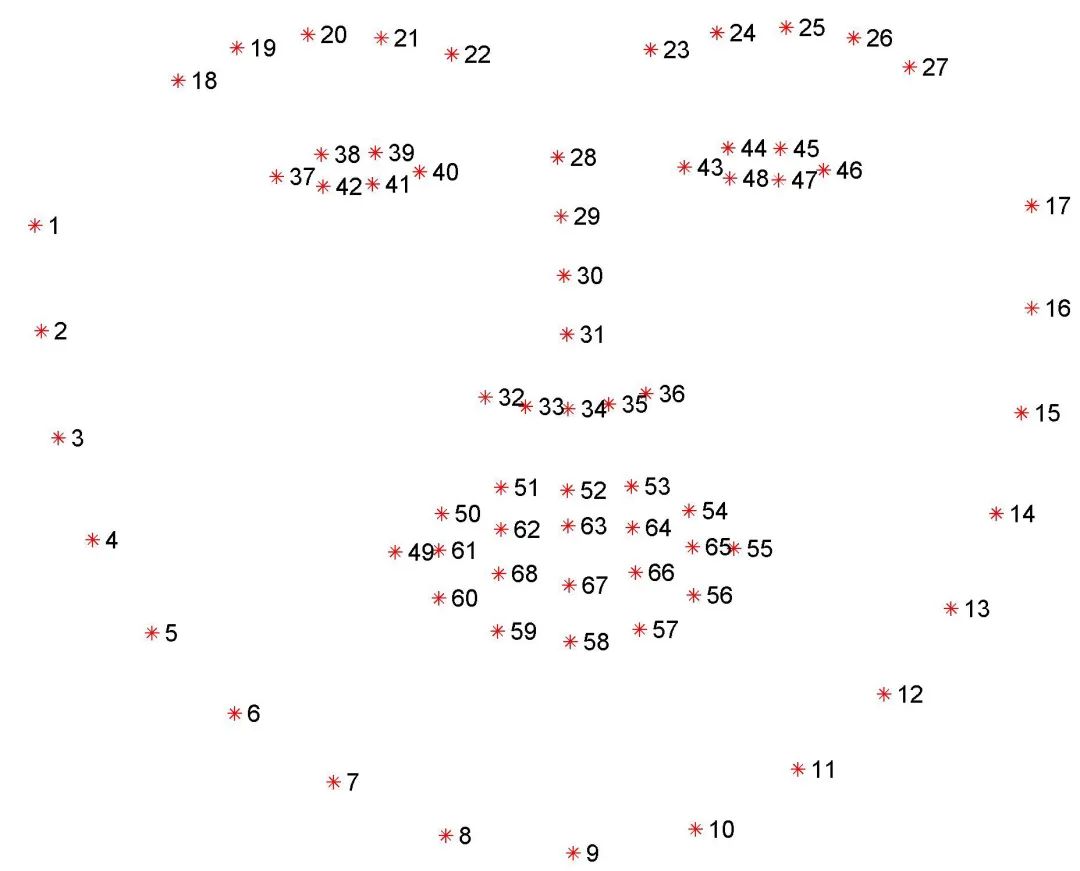
面部關(guān)鍵點(diǎn)的檢測
-
鼻子 -
下顎線 -
左眼和右眼 -
左右眉 -
嘴
-
左眼:點(diǎn)[42,47] -
嘴:點(diǎn)[48,67] -
左眉:點(diǎn)[22,26] -
鼻子:點(diǎn)[27,34] -
右眉:點(diǎn)[17,21] -
右眼:點(diǎn)[36,41] -
下顎線:點(diǎn)[0,16]
人臉檢測與人臉關(guān)鍵點(diǎn)檢測
    # 初始化dlib的人臉檢測器
detector = dlib.get_frontal_face_detector()

"""
在灰度圖像中檢測人臉并創(chuàng)建一個(gè)對象-存儲邊界矩形的坐標(biāo)列表
第二個(gè)參數(shù)中的“1”表示應(yīng)該向上采樣圖像1次。
這會使圖像變得更大,并允許我們檢測更多的面孔
"""

faces = detector(gray, 1)

# 打印邊界矩形的坐標(biāo)
print(faces)
print("Number of faces detected: ", len(faces))

"""
# 使用for循環(huán)來提取特定坐標(biāo)(x1,x2,y1,y2)
for face in faces:
  x1 = face.left()
  y1 = face.top()
  x2 = face.right()
  y2 = face.bottom()
  # 在檢測到的臉部周圍畫一個(gè)矩形
  cv2.rectangle(img, (x1,y1), (x2,y2),(0,255,0),3)
cv2.imshow("image", img)
cv2.waitKey(0)
cv2.destroyAllWindows()
"""
    # 文件路徑
p = "shape_predictor_68_face_landmarks.dat"
# 初始化dlib的預(yù)測器
predictor = dlib.shape_predictor(p)

# 使用預(yù)測器獲取外形

for face in faces:
    landmarks = predictor(gray, face)

    # for n in range(0,68):
    #     x = landmarks.part(n).x
    #     y = landmarks.part(n).y
    #     img_landmark = cv2.circle(img, (x, y), 4, (0, 0, 255), -1)
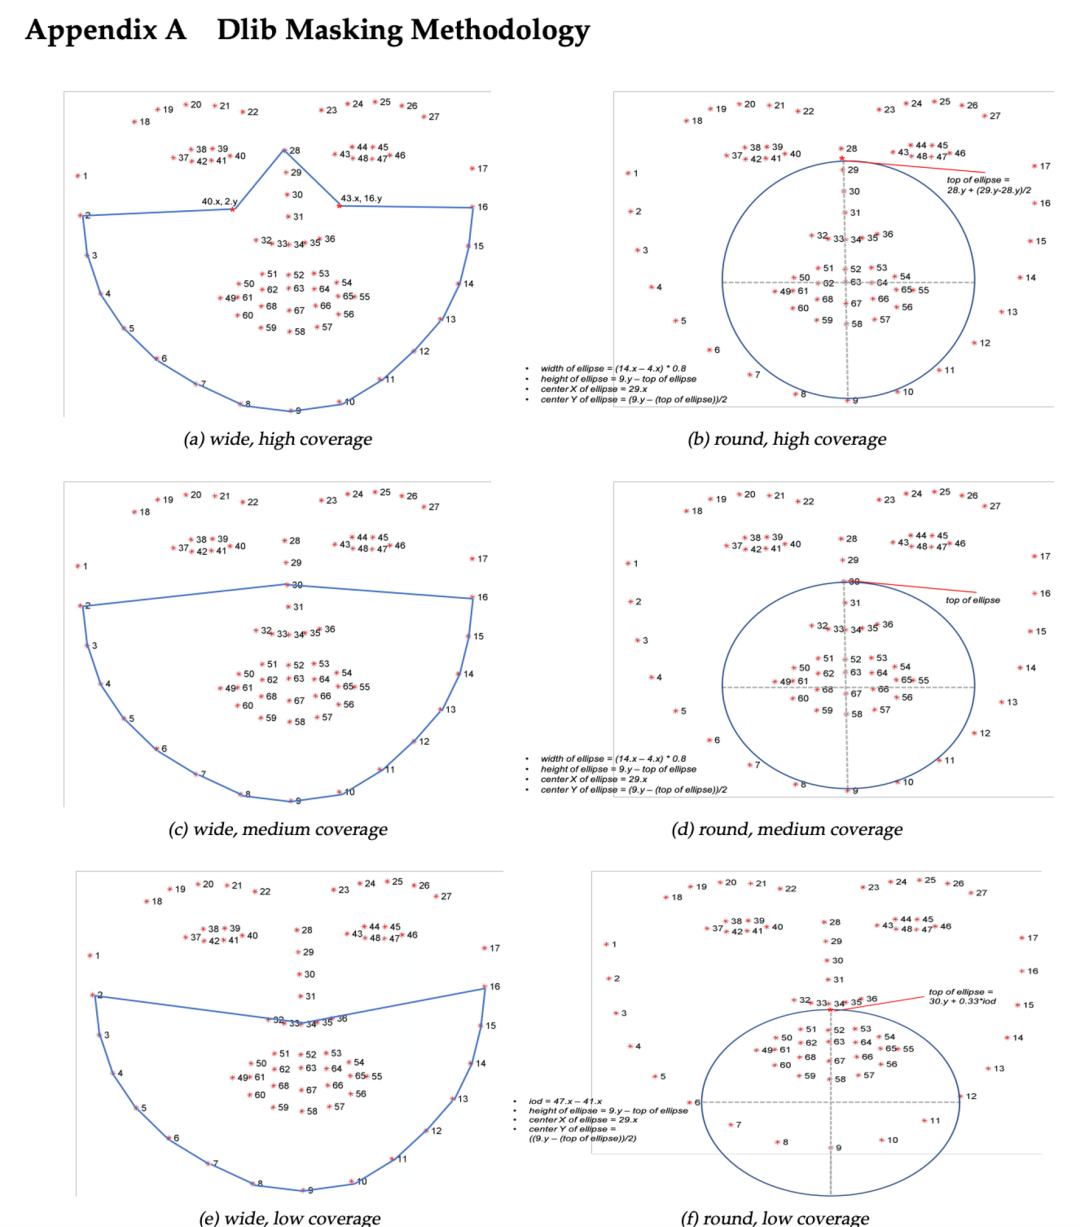
Dlib口罩方法
points = []
for i in range(1, 16):
point = [landmarks.part(i).x, landmarks.part(i).y]
points.append(point)
# print(points)
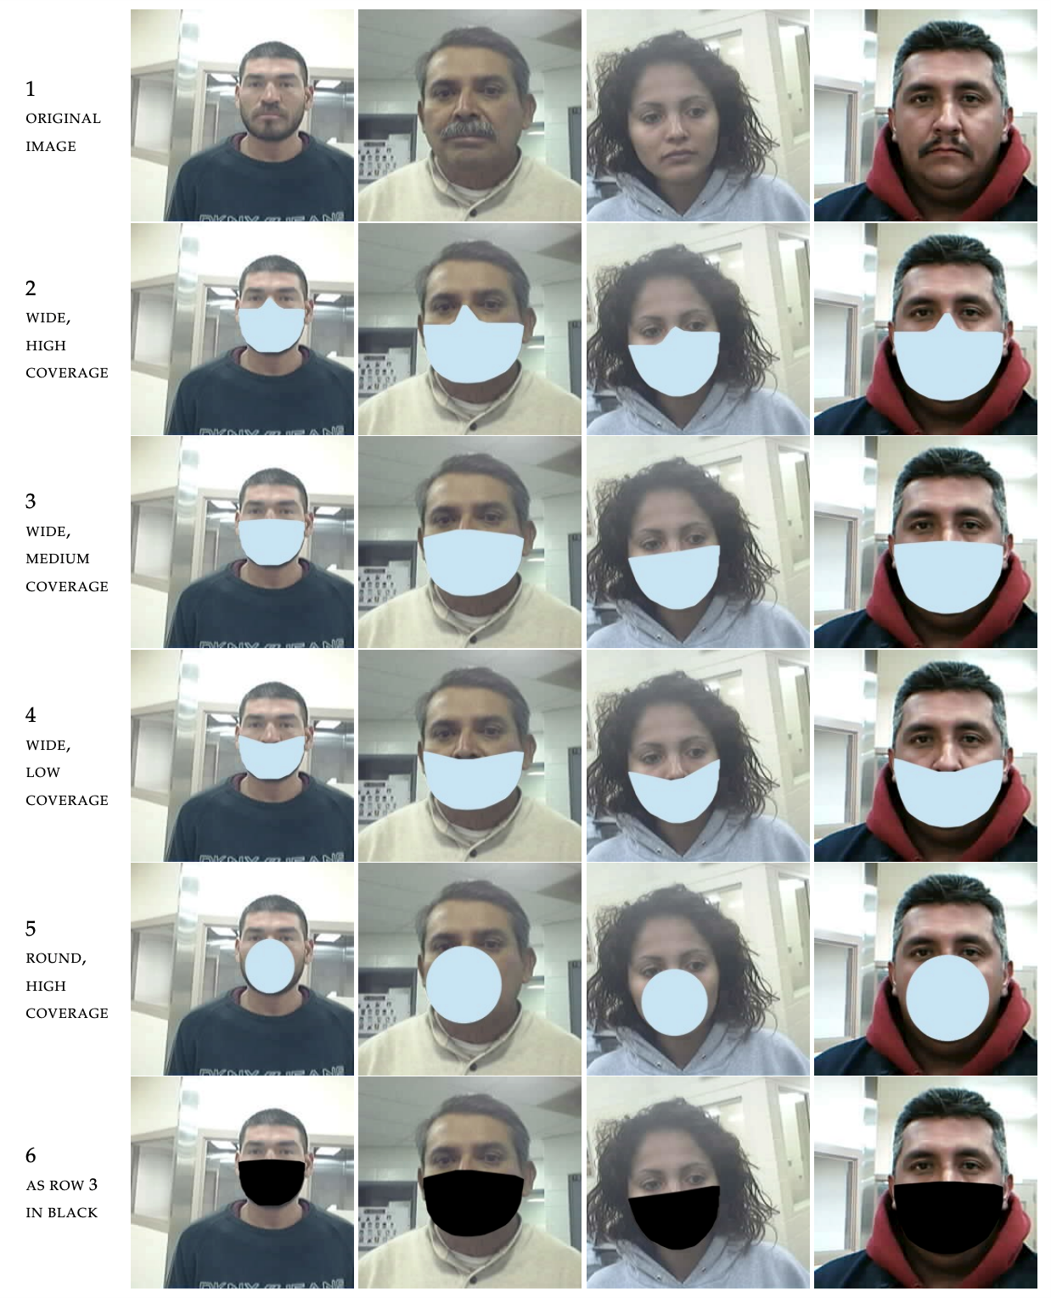
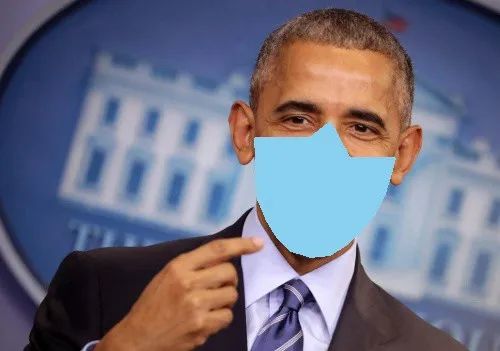
# 寬,高覆蓋口罩
mask_a = [((landmarks.part(42).x), (landmarks.part(15).y)),
((landmarks.part(27).x), (landmarks.part(27).y)),
((landmarks.part(39).x), (landmarks.part(1).y))]
# 寬,中覆蓋口罩
mask_c = [((landmarks.part(29).x), (landmarks.part(29).y))]
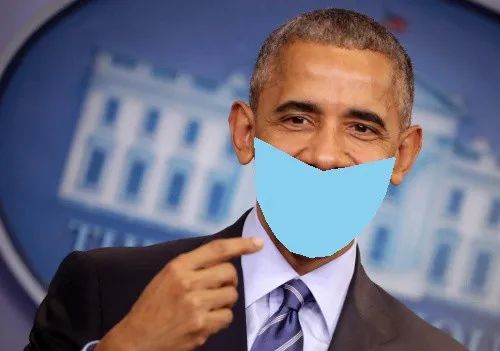
# 寬、低覆蓋口罩
mask_e = [((landmarks.part(35).x), (landmarks.part(35).y)),
((landmarks.part(34).x), (landmarks.part(34).y)),
((landmarks.part(33).x), (landmarks.part(33).y)),
((landmarks.part(32).x), (landmarks.part(32).y)),
((landmarks.part(31).x), (landmarks.part(31).y))]
fmask_a = points + mask_a
fmask_c = points + mask_c
fmask_e = points + mask_e
# mask_type = {1: fmask_a, 2: fmask_c, 3: fmask_e}
# mask_type[choice2]
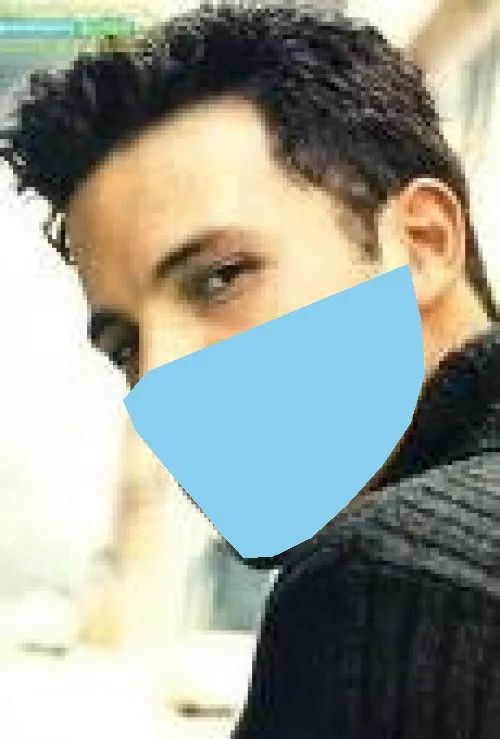
# 使用Python OpenCV - cv2.polylines()方法為[mask_type]繪制口罩輪廓:
# fmask_a = wide, high coverage mask,
# fmask_c = wide, medium coverage mask,
# fmask_e = wide, low coverage mask
fmask_a = np.array(fmask_a, dtype=np.int32)
fmask_c = np.array(fmask_c, dtype=np.int32)
fmask_e = np.array(fmask_e, dtype=np.int32)
mask_type = {1: fmask_a, 2: fmask_c, 3: fmask_e}
mask_type[choice2]
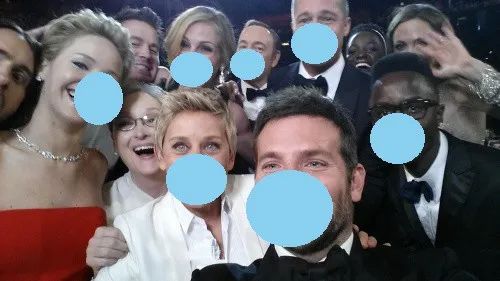
# 更改參數(shù)[mask_type]和color_type用于各種組合
img2 = cv2.polylines(img, [mask_type[choice2]], True, choice1, thickness=2, lineType=cv2.LINE_8)
# 使用Python OpenCV - cv2.fillPoly()方法填充口罩
# 更改參數(shù)[mask_type]和color_type用于各種組合
img3 = cv2.fillPoly(img2, [mask_type[choice2]], choice1, lineType=cv2.LINE_AA)
# cv2.imshow("image with mask outline", img2)
cv2.imshow("image with mask", img3)
# 為測試保存輸出文件
outputNameofImage = "output/imagetest.jpg"
print("Saving output image to", outputNameofImage)
cv2.imwrite(outputNameofImage, img3)
        points = []
    for i in range(1, 16):
        point = [landmarks.part(i).x, landmarks.part(i).y]
        points.append(point)
    # print(points)

    # 橢圓參數(shù)為高,圓形是覆蓋口罩
    top_ellipse = landmarks.part(27).y + (landmarks.part(28).y - landmarks.part(27).y) / 2
    centre_x = landmarks.part(28).x
    centre_y = landmarks.part(8).y - ((landmarks.part(8).y - (top_ellipse)) / 2)
    # 橢圓高度
    axis_major = (landmarks.part(8).y - top_ellipse) / 2
    # 橢圓寬度
    axis_minor = ((landmarks.part(13).x - landmarks.part(3).x) * 0.8) / 2

    centre_x = int(round(centre_x))
    centre_y = int(round(centre_y))
    axis_major = int(round(axis_major))
    axis_minor = int(round(axis_minor))

    centre = (centre_x, centre_y)
    axes = (axis_major, axis_minor)

    # 使用Python OpenCV - cv2.ellipse()方法繪制口罩輪廓
    # 更改最后一個(gè)參數(shù)- line thickness和color_type為各種組合
    img_2 = cv2.ellipse(img, centre, axes, 0, 0, 360, color_type, thickness=2)


    # 使用Python OpenCV - cv2.ellipse()方法繪制口罩輪廓
    # 更改最后一個(gè)參數(shù)-line thickness為負(fù)數(shù)用于填充,color_type用于各種組合
    img_3 = cv2.ellipse(img, centre, axes, 0, 0, 360, color_type, thickness=-1)

# cv2.imshow("image with mask outline", img_2)
cv2.imshow("image with mask", img_3)
# 使用input()函數(shù)根據(jù)用戶需求獲取口罩類型和口罩顏色
choice1 = input("Please select the choice of mask color\nEnter 1 for blue\nEnter 2 for black:\n")
choice1 = int(choice1)
if choice1 == 1:
choice1 = color_blue
print('You selected mask color = blue')
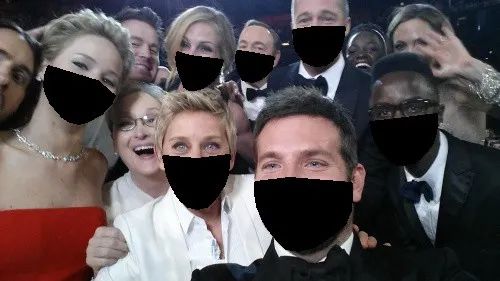
elif choice1 == 2:
choice1 = color_black
print('You selected mask color = black')
else:
print("invalid selection, please select again.")
input("Please select the choice of mask color\nEnter 1 for blue\nEnter 2 for black :\n")
choice2 = input("Please enter choice of mask type coverage \nEnter 1 for high \nEnter 2 for medium \nEnter 3 for low :\n")
choice2 = int(choice2)
if choice2 == 1:
# choice2 = fmask_a
print(f'You chosen wide, high coverage mask')
elif choice2 == 2:
# choice2 = fmask_c
print(f'You chosen wide, medium coverage mask')
elif choice2 == 3:
# choice2 = fmask_e
print(f'You chosen wide, low coverage mask')
else:
print("invalid selection, please select again.")
input("Please enter choice of mask type coverage \nEnter 1 for high \nEnter 2 for medium \nEnter 3 for low :\n")
# print(choice2)
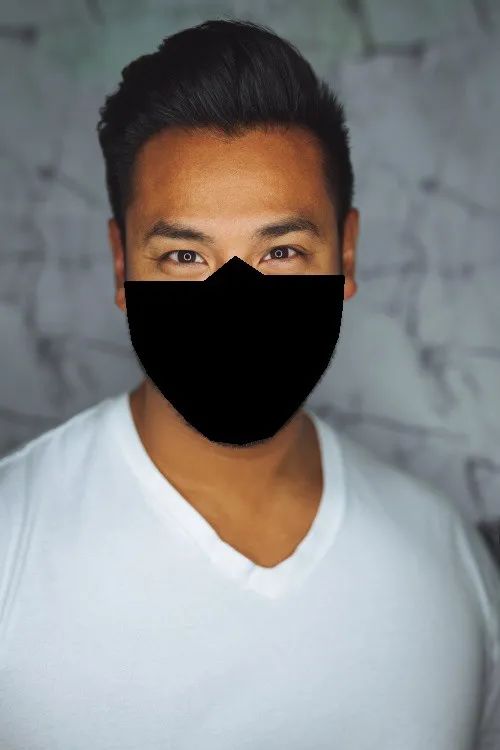
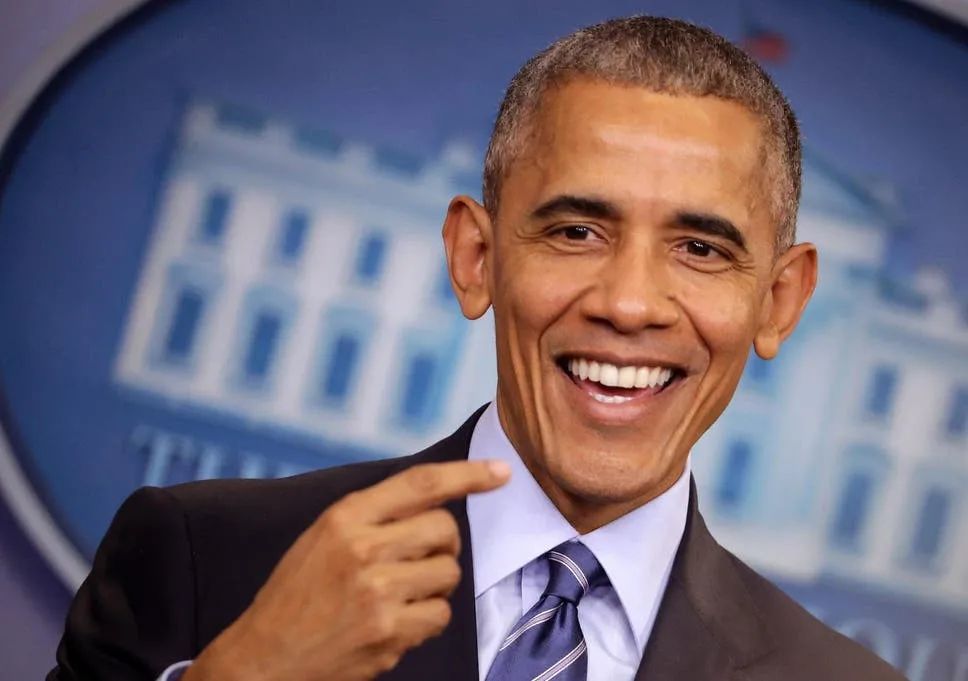
結(jié)果


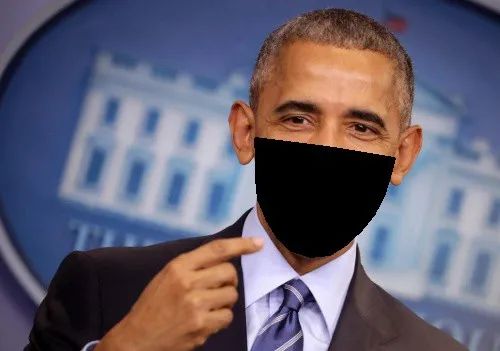
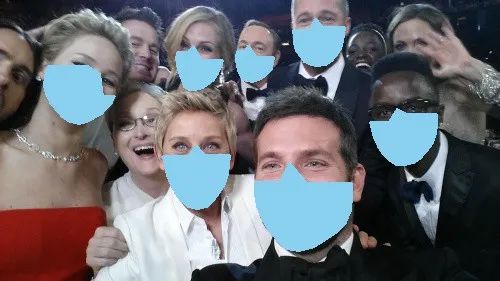

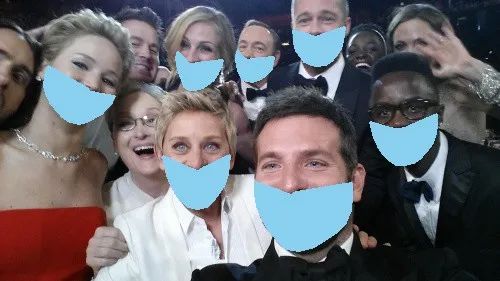


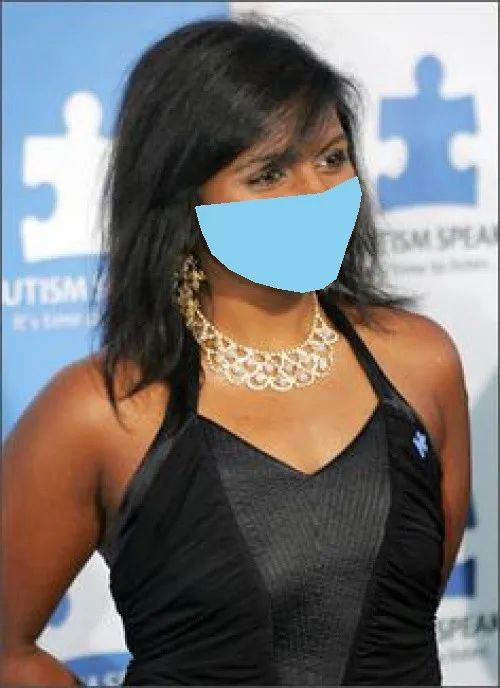
結(jié)論
參考文獻(xiàn):
-
Facial landmarks with dlib, OpenCV, and Python(https://www.pyimagesearch.com/2017/04/03/facial-landmarks-dlib-opencv-python/) -
Facial point annotations(https://ibug.doc.ic.ac.uk/resources/facial-point-annotations/) -
Real-Time Face Pose Estimation(http://blog.dlib.net/2014/08/real-time-face-pose-estimation.html) -
Drawing Functions in OpenCV(https://docs.opencv.org/master/dc/da5/tutorial_py_drawing_functions.html) -
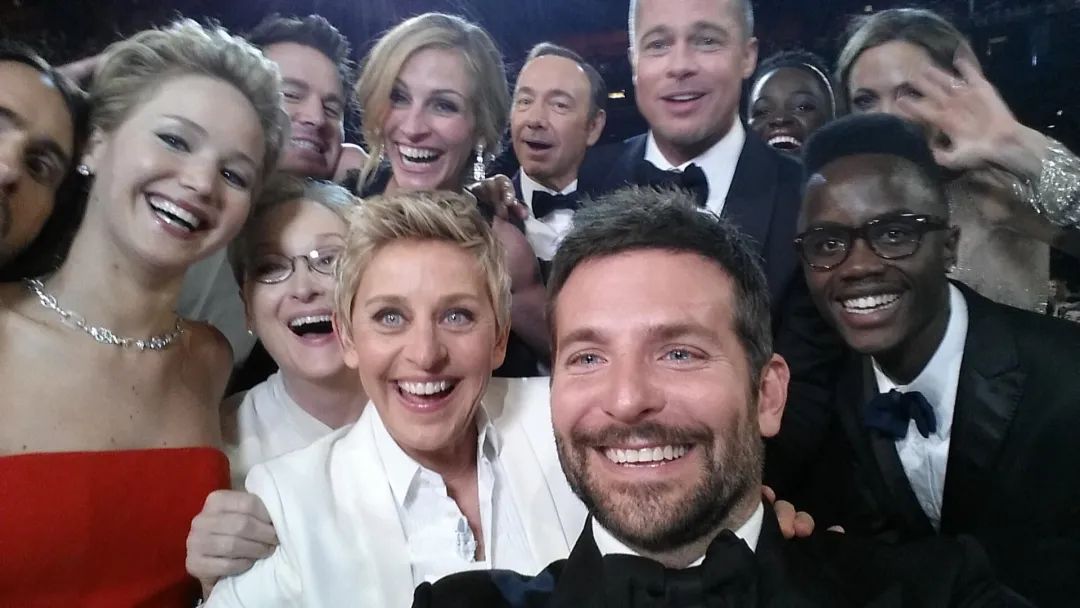
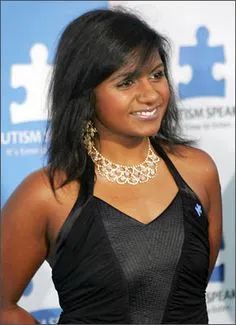
Sources of images — open source and https://www.kaggle.com/dansbecker/5-celebrity-faces-dataset
交流群
歡迎加入公眾號讀者群一起和同行交流,目前有SLAM、三維視覺、傳感器、自動駕駛、計(jì)算攝影、檢測、分割、識別、醫(yī)學(xué)影像、GAN、算法競賽等微信群(以后會逐漸細(xì)分),請掃描下面微信號加群,備注:”昵稱+學(xué)校/公司+研究方向“,例如:”張三 + 上海交大 + 視覺SLAM“。請按照格式備注,否則不予通過。添加成功后會根據(jù)研究方向邀請進(jìn)入相關(guān)微信群。請勿在群內(nèi)發(fā)送廣告,否則會請出群,謝謝理解~
評論
圖片
表情