
深度學(xué)習(xí)模型在FPGA上的部署
編輯丨阿chai帶你學(xué)AI
我是來(lái)自山區(qū)、樸實(shí)、不偷電瓶的AI算法工程師阿chai,給大家分享人工智能、自動(dòng)駕駛、機(jī)器人、3D感知相關(guān)的知識(shí)
 。
。
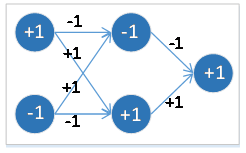
FPGA與“迷宮”
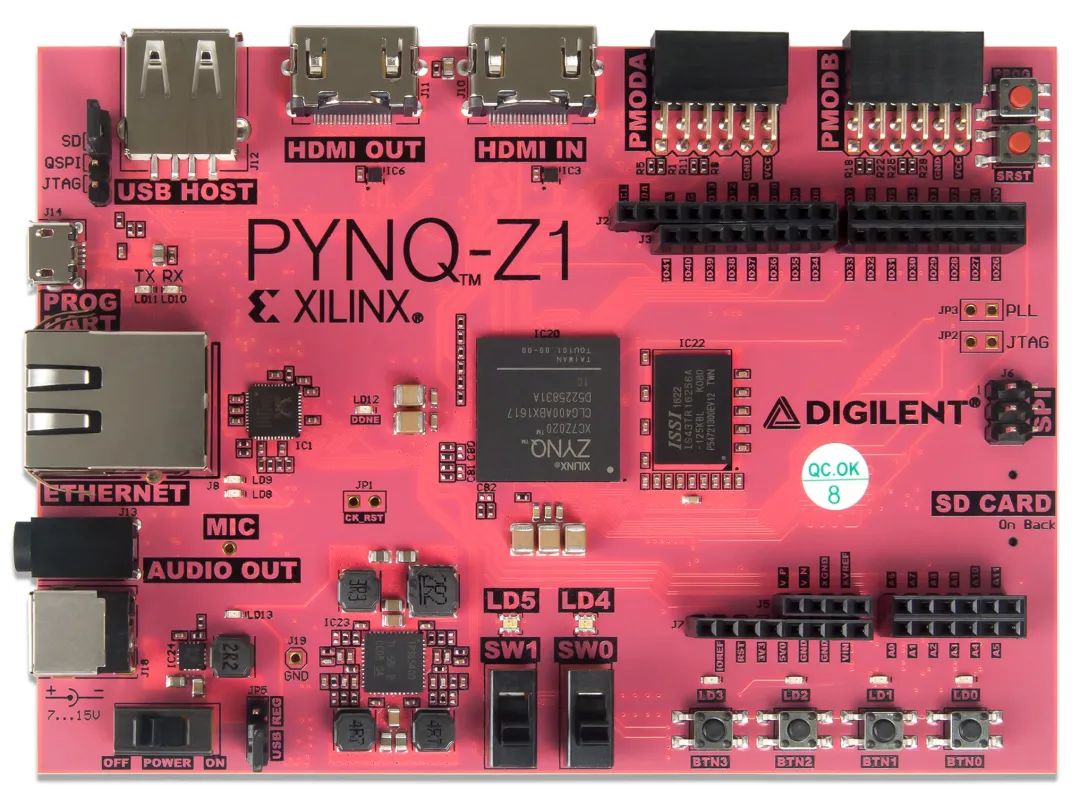
小白入門A:PYNQ
import bnn

hw_classifier = bnn.CnvClassifier(bnn.NETWORK_CNVW1A1,'cifar10',bnn.RUNTIME_HW)
sw_classifier = bnn.CnvClassifier(bnn.NETWORK_CNVW1A1,'cifar10',bnn.RUNTIME_SW)
from IPython.display import display

im = Image.open('car.png')
im.thumbnail((64, 64), Image.ANTIALIAS)
display(im)
car_class = hw_classifier.classify_image_details(im)
print("{: >10}{: >13}".format("[CLASS]","[RANKING]"))
for i in range(len(car_class)):
    print("{: >10}{: >10}".format(hw_classifier.classes[i],car_class[i]))
%matplotlib inline
import matplotlib.pyplot as plt

x_pos = np.arange(len(car_class))
fig, ax = plt.subplots()
ax.bar(x_pos - 0.25, (car_class/100.0), 0.25)
ax.set_xticklabels(hw_classifier.classes, rotation='vertical')
ax.set_xticks(x_pos)
ax.set
plt.show()
小白入門B:DPU

git clone https://github.com/Xilinx/DPU-PYNQ.git
cd DPU-PYNQ/upgrade
make
pip install pynq-dpu
pynq get-notebooks pynq-dpu -p .
make BOARD=<Board>
支持國(guó)產(chǎn)框架:Paddle-Lite
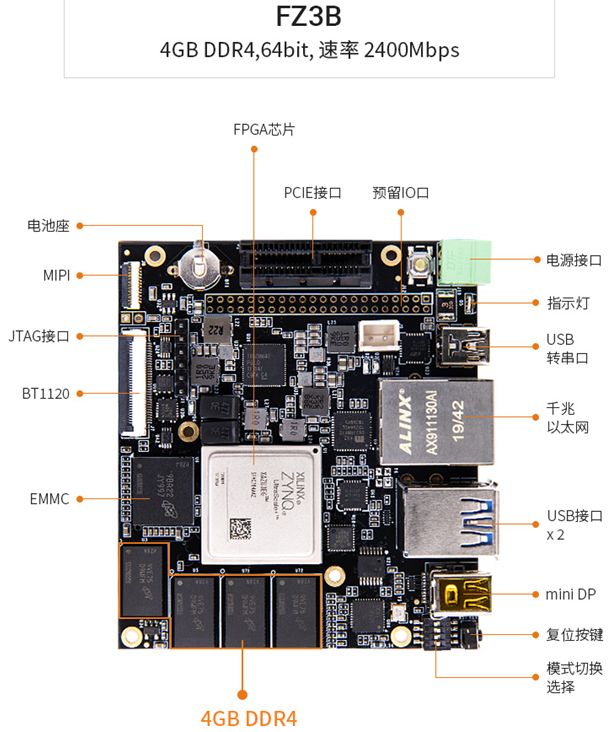
其實(shí)部署的思路小伙伴們應(yīng)該有一些眉目了,就是將自己訓(xùn)練的深度學(xué)習(xí)模型轉(zhuǎn)換成Paddle Lite模型,然后移植到EdgeBoard開發(fā)板上進(jìn)行測(cè)試。接下來(lái)我們簡(jiǎn)單看看是怎樣操作的。
{
 "model":"測(cè)試的模型",
 "combined_model":true,
 "input_width":224,
 "input_height":224,
 "image":"測(cè)試的路徑",
 "mean":[104,117,124],
 "scale":1,
 "format":"BGR"
    "threshold":0.5
}
1.安裝測(cè)試
LITE_WITH_FPGA=ON和LITE_WITH_ARM=ON,問就是我們都用到。對(duì)應(yīng)的FPGA的編譯腳本是lite/tools/build_FPGA.sh,我們執(zhí)行即可。sh ./lite/tools/build_fpga.sh
make publish_inference -j2
# classification
cd /home/root/workspace/sample/classification/
mkdir build
cd build
cmake ..
make
./image_classify_fpga_preprocess ../configs/resnet50/drink.json
2.可調(diào)用的接口
C++
預(yù)處理接口主要是使用FPGA完成圖片的縮放、顏色空間轉(zhuǎn)換和mean/std操作。 預(yù)測(cè)庫(kù)接口主要完成模型的初始化、輸入?yún)?shù)構(gòu)造、預(yù)測(cè)和結(jié)果獲取。
/**
  * 判斷輸入圖像是否是wc 16對(duì)齊
  * width 輸入圖像寬度
  * channel 輸入圖像高度
  **/
 bool img_is_align(int width, int channel);

 /**
  * 對(duì)齊后的大小
  * width 輸入圖像寬度
  * channel 輸入圖像高度
  **/
 int align_size(int width, int channel);

 /**
  * 分配存放圖片的內(nèi)存,析構(gòu)函數(shù)會(huì)自動(dòng)釋放 (目前支持BGR->RGB RGB->BGR YUV422->BGR YUV->RGB) 圖像最大分辨率支持1080p
  * height 輸入圖像的框
  * width 輸入圖像寬度
  * in_format 輸入圖像格式 參考image_format
  * return uint8_t*  opencv Mat CV_8UC3
  **/
 uint8_t* mem_alloc(int img_height, int img_width, image_format in_format);
 std::unique_ptr<paddle_mobile::PaddlePredictor> g_predictor;
    PaddleMobileConfig config;
    std::string model_dir = j["model"];
    config.precision = PaddleMobileConfig::FP32;
    config.device = PaddleMobileConfig::kFPGA;
    config.prog_file = model_dir + "/model";
    config.param_file = model_dir + "/params";
    config.thread_num = 4;
    g_predictor = CreatePaddlePredictor<PaddleMobileConfig,
                    PaddleEngineKind::kPaddleMobile>(config);
    std::vector<PaddleTensor> paddle_tensor_feeds;
    PaddleTensor tensor;
    tensor.shape = std::vector<int>({1, 3, input_height, input_width});
    tensor.data = PaddleBuf(input, sizeof(input));
    tensor.dtype = PaddleDType::FLOAT32;
    paddle_tensor_feeds.push_back(tensor);

    PaddleTensor tensor_imageshape;
    tensor_imageshape.shape = std::vector<int>({1, 2});
    tensor_imageshape.data = PaddleBuf(image_shape, 1 * 2 * sizeof(float));
    tensor_imageshape.dtype = PaddleDType::FLOAT32;
    paddle_tensor_feeds.push_back(tensor_imageshape);

    PaddleTensor tensor_out;
    tensor_out.shape = std::vector<int>({});
    tensor_out.data = PaddleBuf();
    tensor_out.dtype = PaddleDType::FLOAT32;
    std::vector<PaddleTensor> outputs(1, tensor_out);
g_predictor->Run(paddle_tensor_feeds, &outputs);
 float *data = static_cast<float *>(outputs[0].data.data());
    int size = outputs[0].shape[0];
Python
tar -xzvf home/root/workspace/paddlemobile-0.0.1.linux-aarch64-py2.tar.gz
python api.py -j 你測(cè)試的json文件

 End
End
聲明:部分內(nèi)容來(lái)源于網(wǎng)絡(luò),僅供讀者學(xué)術(shù)交流之目的。文章版權(quán)歸原作者所有。如有不妥,請(qǐng)聯(lián)系刪除。
評(píng)論
圖片
表情