
部署一個(gè) Containerd 容器運(yùn)行時(shí)的 Kubernetes 集群
前面我們介紹了 containerd 的基本使用,也了解了如何將現(xiàn)有 docker 容器運(yùn)行時(shí)的 Kubernetes 集群切換成 containerd,接下來(lái)我們使用 kubeadm 從頭搭建一個(gè)使用 containerd 作為容器運(yùn)行時(shí)的 Kubernetes 集群,這里我們安裝最新的 v1.22.1 版本。
環(huán)境準(zhǔn)備
3個(gè)節(jié)點(diǎn),都是 Centos 7.6 系統(tǒng),內(nèi)核版本:3.10.0-1062.4.1.el7.x86_64,在每個(gè)節(jié)點(diǎn)上添加 hosts 信息:
?  ~ cat /etc/hosts
192.168.31.30 master
192.168.31.95 node1
192.168.31.215 node2
“節(jié)點(diǎn)的 hostname 必須使用標(biāo)準(zhǔn)的 DNS 命名,另外千萬(wàn)不用什么默認(rèn)的
”localhost的 hostname,會(huì)導(dǎo)致各種錯(cuò)誤出現(xiàn)的。在 Kubernetes 項(xiàng)目里,機(jī)器的名字以及一切存儲(chǔ)在 Etcd 中的 API 對(duì)象,都必須使用標(biāo)準(zhǔn)的 DNS 命名(RFC 1123)。可以使用命令hostnamectl set-hostname node1來(lái)修改 hostname。
禁用防火墻:
?  ~ systemctl stop firewalld
?  ~ systemctl disable firewalld
禁用 SELINUX:
?  ~ setenforce 0
?  ~ cat /etc/selinux/config
SELINUX=disabled
由于開啟內(nèi)核 ipv4 轉(zhuǎn)發(fā)需要加載 br_netfilter 模塊,所以加載下該模塊:
? ~ modprobe br_netfilter
創(chuàng)建/etc/sysctl.d/k8s.conf文件,添加如下內(nèi)容:
net.bridge.bridge-nf-call-ip6tables = 1
net.bridge.bridge-nf-call-iptables = 1
net.ipv4.ip_forward = 1
bridge-nf 使得 netfilter 可以對(duì) Linux 網(wǎng)橋上的 IPv4/ARP/IPv6 包過(guò)濾。比如,設(shè)置net.bridge.bridge-nf-call-iptables=1后,二層的網(wǎng)橋在轉(zhuǎn)發(fā)包時(shí)也會(huì)被 iptables的 FORWARD 規(guī)則所過(guò)濾。常用的選項(xiàng)包括:
net.bridge.bridge-nf-call-arptables:是否在 arptables 的 FORWARD 中過(guò)濾網(wǎng)橋的 ARP 包 net.bridge.bridge-nf-call-ip6tables:是否在 ip6tables 鏈中過(guò)濾 IPv6 包 net.bridge.bridge-nf-call-iptables:是否在 iptables 鏈中過(guò)濾 IPv4 包 net.bridge.bridge-nf-filter-vlan-tagged:是否在 iptables/arptables 中過(guò)濾打了 vlan 標(biāo)簽的包。
執(zhí)行如下命令使修改生效:
? ~ sysctl -p /etc/sysctl.d/k8s.conf
安裝 ipvs:
?  ~ cat > /etc/sysconfig/modules/ipvs.modules <<EOF
#!/bin/bash
modprobe -- ip_vs
modprobe -- ip_vs_rr
modprobe -- ip_vs_wrr
modprobe -- ip_vs_sh
modprobe -- nf_conntrack_ipv4
EOF
?  ~ chmod 755 /etc/sysconfig/modules/ipvs.modules && bash /etc/sysconfig/modules/ipvs.modules && lsmod | grep -e ip_vs -e nf_conntrack_ipv4
上面腳本創(chuàng)建了的/etc/sysconfig/modules/ipvs.modules文件,保證在節(jié)點(diǎn)重啟后能自動(dòng)加載所需模塊。使用lsmod | grep -e ip_vs -e nf_conntrack_ipv4命令查看是否已經(jīng)正確加載所需的內(nèi)核模塊。
接下來(lái)還需要確保各個(gè)節(jié)點(diǎn)上已經(jīng)安裝了 ipset 軟件包:
? ~ yum install ipset
為了便于查看 ipvs 的代理規(guī)則,最好安裝一下管理工具 ipvsadm:
? ~ yum install ipvsadm
同步服務(wù)器時(shí)間
?  ~ yum install chrony -y
?  ~ systemctl enable chronyd
?  ~ systemctl start chronyd
?  ~ chronyc sources
210 Number of sources = 4
MS Name/IP address         Stratum Poll Reach LastRx Last sample
===============================================================================
^+ sv1.ggsrv.de                  2   6    17    32   -823us[-1128us] +/-   98ms
^- montreal.ca.logiplex.net      2   6    17    32    -17ms[  -17ms] +/-  179ms
^- ntp6.flashdance.cx            2   6    17    32    -32ms[  -32ms] +/-  161ms
^* 119.28.183.184                2   6    33    32   +661us[ +357us] +/-   38ms
?  ~ date
Tue Aug 31 14:36:14 CST 2021
關(guān)閉 swap 分區(qū):
? ~ swapoff -a
修改/etc/fstab文件,注釋掉 SWAP 的自動(dòng)掛載,使用free -m確認(rèn) swap 已經(jīng)關(guān)閉。swappiness 參數(shù)調(diào)整,修改/etc/sysctl.d/k8s.conf添加下面一行:
vm.swappiness=0
執(zhí)行 sysctl -p /etc/sysctl.d/k8s.conf 使修改生效。
安裝 Containerd
我們已經(jīng)了解過(guò)容器運(yùn)行時(shí) containerd 的一些基本使用,接下來(lái)在各個(gè)節(jié)點(diǎn)上安裝 Containerd。
由于 containerd 需要調(diào)用 runc,所以我們也需要先安裝 runc,不過(guò) containerd 提供了一個(gè)包含相關(guān)依賴的壓縮包 cri-containerd-cni-${VERSION}.${OS}-${ARCH}.tar.gz,可以直接使用這個(gè)包來(lái)進(jìn)行安裝。首先從 release 頁(yè)面下載最新版本的壓縮包,當(dāng)前為 1.5.5 版本:
?  ~ wget https://github.com/containerd/containerd/releases/download/v1.5.5/cri-containerd-cni-1.5.5-linux-amd64.tar.gz
# 如果有限制,也可以替換成下面的 URL 加速下載
# wget https://download.fastgit.org/containerd/containerd/releases/download/v1.5.5/cri-containerd-cni-1.5.5-linux-amd64.tar.gz
直接將壓縮包解壓到系統(tǒng)的各個(gè)目錄中:
? ~ tar -C / -xzf cri-containerd-cni-1.5.5-linux-amd64.tar.gz
然后要將 /usr/local/bin 和 /usr/local/sbin 追加到 ~/.bashrc 文件的 PATH 環(huán)境變量中:
export PATH=$PATH:/usr/local/bin:/usr/local/sbin
然后執(zhí)行下面的命令使其立即生效:
? ~ source ~/.bashrc
containerd 的默認(rèn)配置文件為 /etc/containerd/config.toml,我們可以通過(guò)如下所示的命令生成一個(gè)默認(rèn)的配置:
?  ~ mkdir -p /etc/containerd
?  ~ containerd config default > /etc/containerd/config.toml
對(duì)于使用 systemd 作為 init system 的 Linux 的發(fā)行版,使用 systemd 作為容器的 cgroup driver 可以確保節(jié)點(diǎn)在資源緊張的情況更加穩(wěn)定,所以推薦將 containerd 的 cgroup driver 配置為 systemd。/etc/containerd/config.toml,在 plugins."io.containerd.grpc.v1.cri".containerd.runtimes.runc.options 配置塊下面將 SystemdCgroup 設(shè)置為 true:
[plugins."io.containerd.grpc.v1.cri".containerd.runtimes.runc]
  ...
  [plugins."io.containerd.grpc.v1.cri".containerd.runtimes.runc.options]
    SystemdCgroup = true
    ....
然后再為鏡像倉(cāng)庫(kù)配置一個(gè)加速器,需要在 cri 配置塊下面的 registry 配置塊下面進(jìn)行配置 registry.mirrors:
[plugins."io.containerd.grpc.v1.cri"]
  ...
  # sandbox_image = "k8s.gcr.io/pause:3.5"
  sandbox_image = "registry.aliyuncs.com/k8sxio/pause:3.5"
  ...
  [plugins."io.containerd.grpc.v1.cri".registry]
    [plugins."io.containerd.grpc.v1.cri".registry.mirrors]
      [plugins."io.containerd.grpc.v1.cri".registry.mirrors."docker.io"]
        endpoint = ["https://bqr1dr1n.mirror.aliyuncs.com"]
      [plugins."io.containerd.grpc.v1.cri".registry.mirrors."k8s.gcr.io"]
        endpoint = ["https://registry.aliyuncs.com/k8sxio"]
由于上面我們下載的 containerd 壓縮包中包含一個(gè) etc/systemd/system/containerd.service 的文件,這樣我們就可以通過(guò) systemd 來(lái)配置 containerd 作為守護(hù)進(jìn)程運(yùn)行了,現(xiàn)在我們就可以啟動(dòng) containerd 了,直接執(zhí)行下面的命令即可:
?  ~ systemctl daemon-reload
?  ~ systemctl enable containerd --now
啟動(dòng)完成后就可以使用 containerd 的本地 CLI 工具 ctr 和 crictl 了,比如查看版本:
?  ~ ctr version
Client:
  Version:  v1.5.5
  Revision: 72cec4be58a9eb6b2910f5d10f1c01ca47d231c0
  Go version: go1.16.6

Server:
  Version:  v1.5.5
  Revision: 72cec4be58a9eb6b2910f5d10f1c01ca47d231c0
  UUID: cd2894ad-fd71-4ef7-a09f-5795c7eb4c3b
?  ~ crictl version
Version:  0.1.0
RuntimeName:  containerd
RuntimeVersion:  v1.5.5
RuntimeApiVersion:  v1alpha2
使用 kubeadm 部署 Kubernetes
上面的相關(guān)環(huán)境配置也完成了,現(xiàn)在我們就可以來(lái)安裝 Kubeadm 了,我們這里是通過(guò)指定yum 源的方式來(lái)進(jìn)行安裝的:
?  ~ cat <<EOF > /etc/yum.repos.d/kubernetes.repo
[kubernetes]
name=Kubernetes
baseurl=https://packages.cloud.google.com/yum/repos/kubernetes-el7-x86_64
enabled=1
gpgcheck=1
repo_gpgcheck=1
gpgkey=https://packages.cloud.google.com/yum/doc/yum-key.gpg
        https://packages.cloud.google.com/yum/doc/rpm-package-key.gpg
EOF
當(dāng)然了,上面的 yum 源是需要科學(xué)上網(wǎng)的,如果不能科學(xué)上網(wǎng)的話,我們可以使用阿里云的源進(jìn)行安裝:
?  ~ cat <<EOF > /etc/yum.repos.d/kubernetes.repo
[kubernetes]
name=Kubernetes
baseurl=http://mirrors.aliyun.com/kubernetes/yum/repos/kubernetes-el7-x86_64
enabled=1
gpgcheck=0
repo_gpgcheck=0
gpgkey=http://mirrors.aliyun.com/kubernetes/yum/doc/yum-key.gpg
        http://mirrors.aliyun.com/kubernetes/yum/doc/rpm-package-key.gpg
EOF
然后安裝 kubeadm、kubelet、kubectl:
# --disableexcludes 禁掉除了kubernetes之外的別的倉(cāng)庫(kù)
?  ~ yum makecache fast
?  ~ yum install -y kubelet-1.22.1 kubeadm-1.22.1 kubectl-1.22.1 --disableexcludes=kubernetes
?  ~ kubeadm version
kubeadm version: &version.Info{Major:"1", Minor:"22", GitVersion:"v1.22.1", GitCommit:"632ed300f2c34f6d6d15ca4cef3d3c7073412212", GitTreeState:"clean", BuildDate:"2021-08-19T15:44:22Z", GoVersion:"go1.16.7", Compiler:"gc", Platform:"linux/amd64"}
可以看到我們這里安裝的是 v1.22.1 版本,然后將 master 節(jié)點(diǎn)的 kubelet 設(shè)置成開機(jī)啟動(dòng):
? ~ systemctl enable --now kubelet
“到這里為止上面所有的操作都需要在所有節(jié)點(diǎn)執(zhí)行配置。
”
初始化集群
當(dāng)我們執(zhí)行 kubelet --help 命令的時(shí)候可以看到原來(lái)大部分命令行參數(shù)都被 DEPRECATED了,這是因?yàn)楣俜酵扑]我們使用 --config 來(lái)指定配置文件,在配置文件中指定原來(lái)這些參數(shù)的配置,可以通過(guò)官方文檔 Set Kubelet parameters via a config file 了解更多相關(guān)信息,這樣 Kubernetes 就可以支持動(dòng)態(tài) Kubelet 配置(Dynamic Kubelet Configuration)了,參考 Reconfigure a Node’s Kubelet in a Live Cluster。
然后我們可以通過(guò)下面的命令在 master 節(jié)點(diǎn)上輸出集群初始化默認(rèn)使用的配置:
? ~ kubeadm config print init-defaults --component-configs KubeletConfiguration > kubeadm.yaml
然后根據(jù)我們自己的需求修改配置,比如修改 imageRepository 指定集群初始化時(shí)拉取 Kubernetes 所需鏡像的地址,kube-proxy 的模式為 ipvs,另外需要注意的是我們這里是準(zhǔn)備安裝 flannel 網(wǎng)絡(luò)插件的,需要將 networking.podSubnet 設(shè)置為10.244.0.0/16:
# kubeadm.yaml
apiVersion: kubeadm.k8s.io/v1beta3
bootstrapTokens:
- groups:
  - system:bootstrappers:kubeadm:default-node-token
  token: abcdef.0123456789abcdef
  ttl: 24h0m0s
  usages:
  - signing
  - authentication
kind: InitConfiguration
localAPIEndpoint:
  advertiseAddress: 192.168.31.30  # 指定master節(jié)點(diǎn)內(nèi)網(wǎng)IP
  bindPort: 6443
nodeRegistration:
  criSocket: /run/containerd/containerd.sock  # 使用 containerd的Unix socket 地址
  imagePullPolicy: IfNotPresent
  name: master
  taints:  # 給master添加污點(diǎn),master節(jié)點(diǎn)不能調(diào)度應(yīng)用
  - effect: "NoSchedule"
    key: "node-role.kubernetes.io/master"

---
apiVersion: kubeproxy.config.k8s.io/v1alpha1
kind: KubeProxyConfiguration
mode: ipvs  # kube-proxy 模式

---
apiServer:
  timeoutForControlPlane: 4m0s
apiVersion: kubeadm.k8s.io/v1beta3
certificatesDir: /etc/kubernetes/pki
clusterName: kubernetes
controllerManager: {}
dns: {}
etcd:
  local:
    dataDir: /var/lib/etcd
imageRepository: registry.aliyuncs.com/k8sxio
kind: ClusterConfiguration
kubernetesVersion: 1.22.1
networking:
  dnsDomain: cluster.local
  serviceSubnet: 10.96.0.0/12
  podSubnet: 10.244.0.0/16  # 指定 pod 子網(wǎng)
scheduler: {}

---
apiVersion: kubelet.config.k8s.io/v1beta1
authentication:
  anonymous:
    enabled: false
  webhook:
    cacheTTL: 0s
    enabled: true
  x509:
    clientCAFile: /etc/kubernetes/pki/ca.crt
authorization:
  mode: Webhook
  webhook:
    cacheAuthorizedTTL: 0s
    cacheUnauthorizedTTL: 0s
clusterDNS:
- 10.96.0.10
clusterDomain: cluster.local
cpuManagerReconcilePeriod: 0s
evictionPressureTransitionPeriod: 0s
fileCheckFrequency: 0s
healthzBindAddress: 127.0.0.1
healthzPort: 10248
httpCheckFrequency: 0s
imageMinimumGCAge: 0s
kind: KubeletConfiguration
cgroupDriver: systemd  # 配置 cgroup driver
logging: {}
memorySwap: {}
nodeStatusReportFrequency: 0s
nodeStatusUpdateFrequency: 0s
rotateCertificates: true
runtimeRequestTimeout: 0s
shutdownGracePeriod: 0s
shutdownGracePeriodCriticalPods: 0s
staticPodPath: /etc/kubernetes/manifests
streamingConnectionIdleTimeout: 0s
syncFrequency: 0s
volumeStatsAggPeriod: 0s
“對(duì)于上面的資源清單的文檔比較雜,要想完整了解上面的資源對(duì)象對(duì)應(yīng)的屬性,可以查看對(duì)應(yīng)的 godoc 文檔,地址: https://godoc.org/k8s.io/kubernetes/cmd/kubeadm/app/apis/kubeadm/v1beta3。
”
在開始初始化集群之前可以使用kubeadm config images pull --config kubeadm.yaml預(yù)先在各個(gè)服務(wù)器節(jié)點(diǎn)上拉取所k8s需要的容器鏡像。
配置文件準(zhǔn)備好過(guò)后,可以使用如下命令先將相關(guān)鏡像 pull 下面:
?  ~ kubeadm config images pull --config kubeadm.yaml
[config/images] Pulled registry.aliyuncs.com/k8sxio/kube-apiserver:v1.22.1
[config/images] Pulled registry.aliyuncs.com/k8sxio/kube-controller-manager:v1.22.1
[config/images] Pulled registry.aliyuncs.com/k8sxio/kube-scheduler:v1.22.1
[config/images] Pulled registry.aliyuncs.com/k8sxio/kube-proxy:v1.22.1
[config/images] Pulled registry.aliyuncs.com/k8sxio/pause:3.5
[config/images] Pulled registry.aliyuncs.com/k8sxio/etcd:3.5.0-0
failed to pull image "registry.aliyuncs.com/k8sxio/coredns:v1.8.4": output: time="2021-08-31T15:09:13+08:00" level=fatal msg="pulling image: rpc error: code = NotFound desc = failed to pull and unpack image \"registry.aliyuncs.com/k8sxio/coredns:v1.8.4\": failed to resolve reference \"registry.aliyuncs.com/k8sxio/coredns:v1.8.4\": registry.aliyuncs.com/k8sxio/coredns:v1.8.4: not found"
, error: exit status 1
To see the stack trace of this error execute with --v=5 or higher
上面在拉取 coredns 鏡像的時(shí)候出錯(cuò)了,沒有找到這個(gè)鏡像,我們可以手動(dòng) pull 該鏡像,然后重新 tag 下鏡像地址即可:
?  ~ ctr -n k8s.io i pull docker.io/coredns/coredns:1.8.4
docker.io/coredns/coredns:1.8.4:                                                  resolved       |++++++++++++++++++++++++++++++++++++++|
index-sha256:6e5a02c21641597998b4be7cb5eb1e7b02c0d8d23cce4dd09f4682d463798890:    done           |++++++++++++++++++++++++++++++++++++++|
manifest-sha256:10683d82b024a58cc248c468c2632f9d1b260500f7cd9bb8e73f751048d7d6d4: done           |++++++++++++++++++++++++++++++++++++++|
layer-sha256:bc38a22c706b427217bcbd1a7ac7c8873e75efdd0e59d6b9f069b4b243db4b4b:    done           |++++++++++++++++++++++++++++++++++++++|
config-sha256:8d147537fb7d1ac8895da4d55a5e53621949981e2e6460976dae812f83d84a44:   done           |++++++++++++++++++++++++++++++++++++++|
layer-sha256:c6568d217a0023041ef9f729e8836b19f863bcdb612bb3a329ebc165539f5a80:    exists         |++++++++++++++++++++++++++++++++++++++|
elapsed: 12.4s                                                                    total:  12.0 M (991.3 KiB/s)
unpacking linux/amd64 sha256:6e5a02c21641597998b4be7cb5eb1e7b02c0d8d23cce4dd09f4682d463798890...
done: 410.185888ms
?  ~ ctr -n k8s.io i tag docker.io/coredns/coredns:1.8.4 registry.aliyuncs.com/k8sxio/coredns:v1.8.4
然后就可以使用上面的配置文件在 master 節(jié)點(diǎn)上進(jìn)行初始化:
?  ~ kubeadm init --config kubeadm.yaml
[init] Using Kubernetes version: v1.22.1
[preflight] Running pre-flight checks
[preflight] Pulling images required for setting up a Kubernetes cluster
[preflight] This might take a minute or two, depending on the speed of your internet connection
[preflight] You can also perform this action in beforehand using 'kubeadm config images pull'
[certs] Using certificateDir folder "/etc/kubernetes/pki"
[certs] Generating "ca" certificate and key
[certs] Generating "apiserver" certificate and key
[certs] apiserver serving cert is signed for DNS names [kubernetes kubernetes.default kubernetes.default.svc kubernetes.default.svc.cluster.local master] and IPs [10.96.0.1 192.168.31.30]
[certs] Generating "apiserver-kubelet-client" certificate and key
[certs] Generating "front-proxy-ca" certificate and key
[certs] Generating "front-proxy-client" certificate and key
[certs] Generating "etcd/ca" certificate and key
[certs] Generating "etcd/server" certificate and key
[certs] etcd/server serving cert is signed for DNS names [localhost master] and IPs [192.168.31.30 127.0.0.1 ::1]
[certs] Generating "etcd/peer" certificate and key
[certs] etcd/peer serving cert is signed for DNS names [localhost master] and IPs [192.168.31.30 127.0.0.1 ::1]
[certs] Generating "etcd/healthcheck-client" certificate and key
[certs] Generating "apiserver-etcd-client" certificate and key
[certs] Generating "sa" key and public key
[kubeconfig] Using kubeconfig folder "/etc/kubernetes"
[kubeconfig] Writing "admin.conf" kubeconfig file
[kubeconfig] Writing "kubelet.conf" kubeconfig file
[kubeconfig] Writing "controller-manager.conf" kubeconfig file
[kubeconfig] Writing "scheduler.conf" kubeconfig file
[kubelet-start] Writing kubelet environment file with flags to file "/var/lib/kubelet/kubeadm-flags.env"
[kubelet-start] Writing kubelet configuration to file "/var/lib/kubelet/config.yaml"
[kubelet-start] Starting the kubelet
[control-plane] Using manifest folder "/etc/kubernetes/manifests"
[control-plane] Creating static Pod manifest for "kube-apiserver"
[control-plane] Creating static Pod manifest for "kube-controller-manager"
[control-plane] Creating static Pod manifest for "kube-scheduler"
[etcd] Creating static Pod manifest for local etcd in "/etc/kubernetes/manifests"
[wait-control-plane] Waiting for the kubelet to boot up the control plane as static Pods from directory "/etc/kubernetes/manifests". This can take up to 4m0s
[apiclient] All control plane components are healthy after 12.501933 seconds
[upload-config] Storing the configuration used in ConfigMap "kubeadm-config" in the "kube-system" Namespace
[kubelet] Creating a ConfigMap "kubelet-config-1.22" in namespace kube-system with the configuration for the kubelets in the cluster
[upload-certs] Skipping phase. Please see --upload-certs
[mark-control-plane] Marking the node master as control-plane by adding the labels: [node-role.kubernetes.io/master(deprecated) node-role.kubernetes.io/control-plane node.kubernetes.io/exclude-from-external-load-balancers]
[mark-control-plane] Marking the node master as control-plane by adding the taints [node-role.kubernetes.io/master:NoSchedule]
[bootstrap-token] Using token: abcdef.0123456789abcdef
[bootstrap-token] Configuring bootstrap tokens, cluster-info ConfigMap, RBAC Roles
[bootstrap-token] configured RBAC rules to allow Node Bootstrap tokens to get nodes
[bootstrap-token] configured RBAC rules to allow Node Bootstrap tokens to post CSRs in order for nodes to get long term certificate credentials
[bootstrap-token] configured RBAC rules to allow the csrapprover controller automatically approve CSRs from a Node Bootstrap Token
[bootstrap-token] configured RBAC rules to allow certificate rotation for all node client certificates in the cluster
[bootstrap-token] Creating the "cluster-info" ConfigMap in the "kube-public" namespace
[kubelet-finalize] Updating "/etc/kubernetes/kubelet.conf" to point to a rotatable kubelet client certificate and key
[addons] Applied essential addon: CoreDNS
[addons] Applied essential addon: kube-proxy

Your Kubernetes control-plane has initialized successfully!

To start using your cluster, you need to run the following as a regular user:

  mkdir -p $HOME/.kube
  sudo cp -i /etc/kubernetes/admin.conf $HOME/.kube/config
  sudo chown $(id -u):$(id -g) $HOME/.kube/config

Alternatively, if you are the root user, you can run:

  export KUBECONFIG=/etc/kubernetes/admin.conf

You should now deploy a pod network to the cluster.
Run "kubectl apply -f [podnetwork].yaml" with one of the options listed at:
  https://kubernetes.io/docs/concepts/cluster-administration/addons/

Then you can join any number of worker nodes by running the following on each as root:

kubeadm join 192.168.31.30:6443 --token abcdef.0123456789abcdef \
 --discovery-token-ca-cert-hash sha256:8c1f43da860b0e7bd9f290fe057f08cf7650b89e650ff316ce4a9cad3834475c
根據(jù)安裝提示拷貝 kubeconfig 文件:
?  ~ mkdir -p $HOME/.kube
?  ~ sudo cp -i /etc/kubernetes/admin.conf $HOME/.kube/config
?  ~ sudo chown $(id -u):$(id -g) $HOME/.kube/config
然后可以使用 kubectl 命令查看 master 節(jié)點(diǎn)已經(jīng)初始化成功了:
?  ~ kubectl get nodes
NAME     STATUS   ROLES                  AGE     VERSION
master   Ready    control-plane,master   2m10s   v1.22.1
添加節(jié)點(diǎn)
記住初始化集群上面的配置和操作要提前做好,將 master 節(jié)點(diǎn)上面的 $HOME/.kube/config 文件拷貝到 node 節(jié)點(diǎn)對(duì)應(yīng)的文件中,安裝 kubeadm、kubelet、kubectl(可選),然后執(zhí)行上面初始化完成后提示的 join 命令即可:
?  ~ kubeadm join 192.168.31.30:6443 --token abcdef.0123456789abcdef \
> --discovery-token-ca-cert-hash sha256:8c1f43da860b0e7bd9f290fe057f08cf7650b89e650ff316ce4a9cad3834475c
[preflight] Running pre-flight checks
[preflight] WARNING: Couldn't create the interface used for talking to the container runtime: docker is required for container runtime: exec: "docker": executable file not found in $PATH
[preflight] Reading configuration from the cluster...
[preflight] FYI: You can look at this config file with 'kubectl -n kube-system get cm kubeadm-config -o yaml'
[kubelet-start] Writing kubelet configuration to file "/var/lib/kubelet/config.yaml"
[kubelet-start] Writing kubelet environment file with flags to file "/var/lib/kubelet/kubeadm-flags.env"
[kubelet-start] Starting the kubelet
[kubelet-start] Waiting for the kubelet to perform the TLS Bootstrap...

This node has joined the cluster:
* Certificate signing request was sent to apiserver and a response was received.
* The Kubelet was informed of the new secure connection details.

Run 'kubectl get nodes' on the control-plane to see this node join the cluster.
“如果忘記了上面的 join 命令可以使用命令
”kubeadm token create --print-join-command重新獲取。
執(zhí)行成功后運(yùn)行 get nodes 命令:
?  ~ kubectl get nodes
NAME     STATUS     ROLES                  AGE   VERSION
master   Ready      control-plane,master   47m   v1.22.1
node2    NotReady   <none>                 46s   v1.22.1
可以看到是 NotReady 狀態(tài),這是因?yàn)檫€沒有安裝網(wǎng)絡(luò)插件,接下來(lái)安裝網(wǎng)絡(luò)插件,可以在文檔 https://kubernetes.io/docs/setup/production-environment/tools/kubeadm/create-cluster-kubeadm/ 中選擇我們自己的網(wǎng)絡(luò)插件,這里我們安裝 flannel:
?  ~ wget https://raw.githubusercontent.com/coreos/flannel/master/Documentation/kube-flannel.yml
# 如果有節(jié)點(diǎn)是多網(wǎng)卡,則需要在資源清單文件中指定內(nèi)網(wǎng)網(wǎng)卡
# 搜索到名為 kube-flannel-ds 的 DaemonSet,在kube-flannel容器下面
?  ~ vi kube-flannel.yml
......
containers:
- name: kube-flannel
  image: quay.io/coreos/flannel:v0.14.0
  command:
  - /opt/bin/flanneld
  args:
  - --ip-masq
  - --kube-subnet-mgr
  - --iface=eth0  # 如果是多網(wǎng)卡的話,指定內(nèi)網(wǎng)網(wǎng)卡的名稱
......
?  ~ kubectl apply -f kube-flannel.yml  # 安裝 flannel 網(wǎng)絡(luò)插件
隔一會(huì)兒查看 Pod 運(yùn)行狀態(tài):
?  ~ kubectl get pods -n kube-system
NAME                             READY   STATUS    RESTARTS   AGE
coredns-7568f67dbd-5mg59         1/1     Running   0          8m32s
coredns-7568f67dbd-b685t         1/1     Running   0          8m31s
etcd-master                      1/1     Running   0          66m
kube-apiserver-master            1/1     Running   0          66m
kube-controller-manager-master   1/1     Running   0          66m
kube-flannel-ds-dsbt6            1/1     Running   0          11m
kube-flannel-ds-zwlm6            1/1     Running   0          11m
kube-proxy-jq84n                 1/1     Running   0          66m
kube-proxy-x4hbv                 1/1     Running   0          19m
kube-scheduler-master            1/1     Running   0          66m
“當(dāng)我們部署完網(wǎng)絡(luò)插件后執(zhí)行 ifconfig 命令,正常會(huì)看到新增的
”cni0與flannel1這兩個(gè)虛擬設(shè)備,但是如果沒有看到cni0這個(gè)設(shè)備也不用太擔(dān)心,我們可以觀察/var/lib/cni目錄是否存在,如果不存在并不是說(shuō)部署有問題,而是該節(jié)點(diǎn)上暫時(shí)還沒有應(yīng)用運(yùn)行,我們只需要在該節(jié)點(diǎn)上運(yùn)行一個(gè) Pod 就可以看到該目錄會(huì)被創(chuàng)建,并且cni0設(shè)備也會(huì)被創(chuàng)建出來(lái)。
網(wǎng)絡(luò)插件運(yùn)行成功了,node 狀態(tài)也正常了:
?  ~ kubectl get nodes
NAME     STATUS   ROLES                  AGE    VERSION
master   Ready    control-plane,master   111m   v1.22.1
node2    Ready    <none>                 64m    v1.22.1
用同樣的方法添加另外一個(gè)節(jié)點(diǎn)即可。
Dashboard
v1.22.1 版本的集群需要安裝最新的 2.0+ 版本的 Dashboard:
# 推薦使用下面這種方式
?  ~ wget https://raw.githubusercontent.com/kubernetes/dashboard/v2.3.1/aio/deploy/recommended.yaml
?  ~ vi recommended.yaml
# 修改Service為NodePort類型
......
kind: Service
apiVersion: v1
metadata:
  labels:
    k8s-app: kubernetes-dashboard
  name: kubernetes-dashboard
  namespace: kubernetes-dashboard
spec:
  ports:
    - port: 443
      targetPort: 8443
  selector:
    k8s-app: kubernetes-dashboard
  type: NodePort  # 加上type=NodePort變成NodePort類型的服務(wù)
......
直接創(chuàng)建:
? ~ kubectl apply -f recommended.yaml
新版本的 Dashboard 會(huì)被默認(rèn)安裝在 kubernetes-dashboard 這個(gè)命名空間下面:
?  ~ kubectl get pods -n kubernetes-dashboard -o wide
NAME                                         READY   STATUS    RESTARTS   AGE   IP          NODE     NOMINATED NODE   READINESS GATES
dashboard-metrics-scraper-856586f554-pllvt   1/1     Running   0          24m   10.88.0.7   master   <none>           <none>
kubernetes-dashboard-76597d7df5-82998        1/1     Running   0          21m   10.88.0.2   node2    <none>           <none>
我們仔細(xì)看可以發(fā)現(xiàn)上面的 Pod 分配的 IP 段是 10.88.xx.xx,包括前面自動(dòng)安裝的 CoreDNS 也是如此,我們前面不是配置的 podSubnet 為 10.244.0.0/16 嗎?我們先去查看下 CNI 的配置文件:
?  ~ ls -la /etc/cni/net.d/
total 8
drwxr-xr-x  2 1001 docker  67 Aug 31 16:45 .
drwxr-xr-x. 3 1001 docker  19 Jul 30 01:13 ..
-rw-r--r--  1 1001 docker 604 Jul 30 01:13 10-containerd-net.conflist
-rw-r--r--  1 root root   292 Aug 31 16:45 10-flannel.conflist
可以看到里面包含兩個(gè)配置,一個(gè)是 10-containerd-net.conflist,另外一個(gè)是我們上面創(chuàng)建的 Flannel 網(wǎng)絡(luò)插件生成的配置,我們的需求肯定是想使用 Flannel 的這個(gè)配置,我們可以查看下 containerd 這個(gè)自帶的 cni 插件配置:
?  ~ cat /etc/cni/net.d/10-containerd-net.conflist
{
  "cniVersion": "0.4.0",
  "name": "containerd-net",
  "plugins": [
    {
      "type": "bridge",
      "bridge": "cni0",
      "isGateway": true,
      "ipMasq": true,
      "promiscMode": true,
      "ipam": {
        "type": "host-local",
        "ranges": [
          [{
            "subnet": "10.88.0.0/16"
          }],
          [{
            "subnet": "2001:4860:4860::/64"
          }]
        ],
        "routes": [
          { "dst": "0.0.0.0/0" },
          { "dst": "::/0" }
        ]
      }
    },
    {
      "type": "portmap",
      "capabilities": {"portMappings": true}
    }
  ]
}
可以看到上面的 IP 段恰好就是 10.88.0.0/16,但是這個(gè) cni 插件類型是 bridge 網(wǎng)絡(luò),網(wǎng)橋的名稱為 cni0:
?  ~ ip a
...
6: cni0: <BROADCAST,MULTICAST,PROMISC,UP,LOWER_UP> mtu 1500 qdisc noqueue state UP group default qlen 1000
    link/ether 9a:e7:eb:40:e8:66 brd ff:ff:ff:ff:ff:ff
    inet 10.88.0.1/16 brd 10.88.255.255 scope global cni0
       valid_lft forever preferred_lft forever
    inet6 2001:4860:4860::1/64 scope global
       valid_lft forever preferred_lft forever
    inet6 fe80::98e7:ebff:fe40:e866/64 scope link
       valid_lft forever preferred_lft forever
...
但是使用 bridge 網(wǎng)絡(luò)的容器無(wú)法跨多個(gè)宿主機(jī)進(jìn)行通信,跨主機(jī)通信需要借助其他的 cni 插件,比如上面我們安裝的 Flannel,或者 Calico 等等,由于我們這里有兩個(gè) cni 配置,所以我們需要將 10-containerd-net.conflist 這個(gè)配置刪除,因?yàn)槿绻@個(gè)目錄中有多個(gè) cni 配置文件,kubelet 將會(huì)使用按文件名的字典順序排列的第一個(gè)作為配置文件,所以前面默認(rèn)選擇使用的是 containerd-net 這個(gè)插件。
?  ~ mv /etc/cni/net.d/10-containerd-net.conflist /etc/cni/net.d/10-containerd-net.conflist.bak
?  ~ ifconfig cni0 down && ip link delete cni0
?  ~ systemctl daemon-reload
?  ~ systemctl restart containerd kubelet
然后記得重建 coredns 和 dashboard 的 Pod,重建后 Pod 的 IP 地址就正常了:
?  ~ kubectl get pods -n kubernetes-dashboard -o wide
NAME                                         READY   STATUS    RESTARTS   AGE   IP           NODE    NOMINATED NODE   READINESS GATES
dashboard-metrics-scraper-856586f554-tp8m5   1/1     Running   0          42s   10.244.1.6   node2   <none>           <none>
kubernetes-dashboard-76597d7df5-9rmbx        1/1     Running   0          66s   10.244.1.5   node2   <none>           <none>
?  ~ kubectl get pods -n kube-system -o wide -l k8s-app=kube-dns
NAME                       READY   STATUS    RESTARTS   AGE     IP           NODE    NOMINATED NODE   READINESS GATES
coredns-7568f67dbd-n7bfx   1/1     Running   0          5m40s   10.244.1.2   node2   <none>           <none>
coredns-7568f67dbd-plrv8   1/1     Running   0          3m47s   10.244.1.4   node2   <none>           <none>
查看 Dashboard 的 NodePort 端口:
?  ~ kubectl get svc -n kubernetes-dashboard
NAME                        TYPE        CLUSTER-IP      EXTERNAL-IP   PORT(S)         AGE
dashboard-metrics-scraper   ClusterIP   10.99.37.172    <none>        8000/TCP        25m
kubernetes-dashboard        NodePort    10.103.102.27   <none>        443:31050/TCP   25m
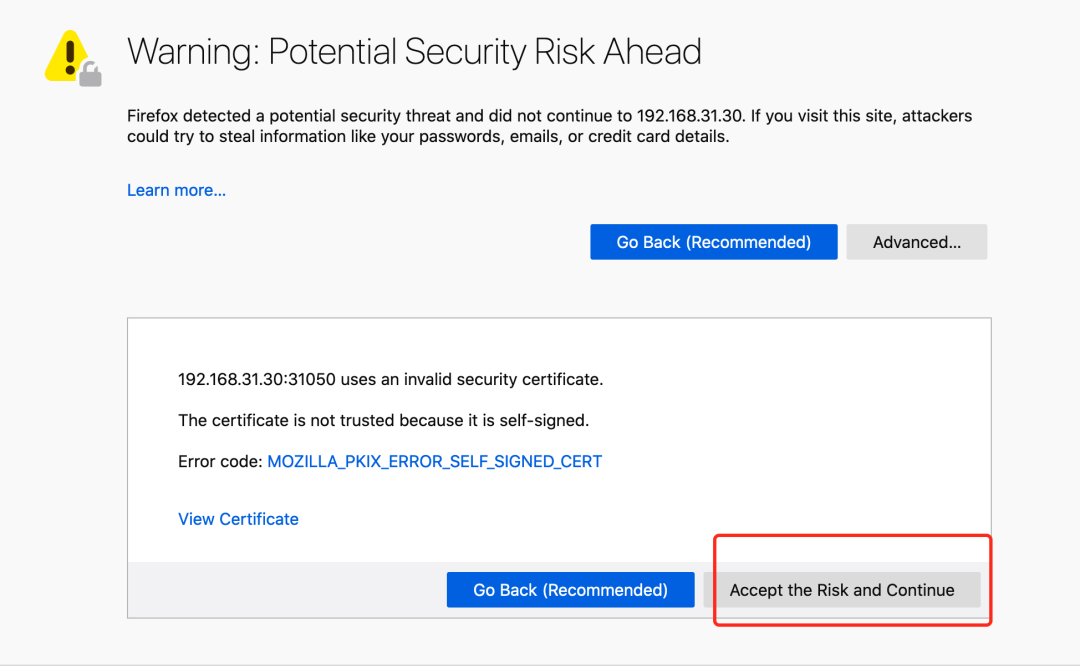
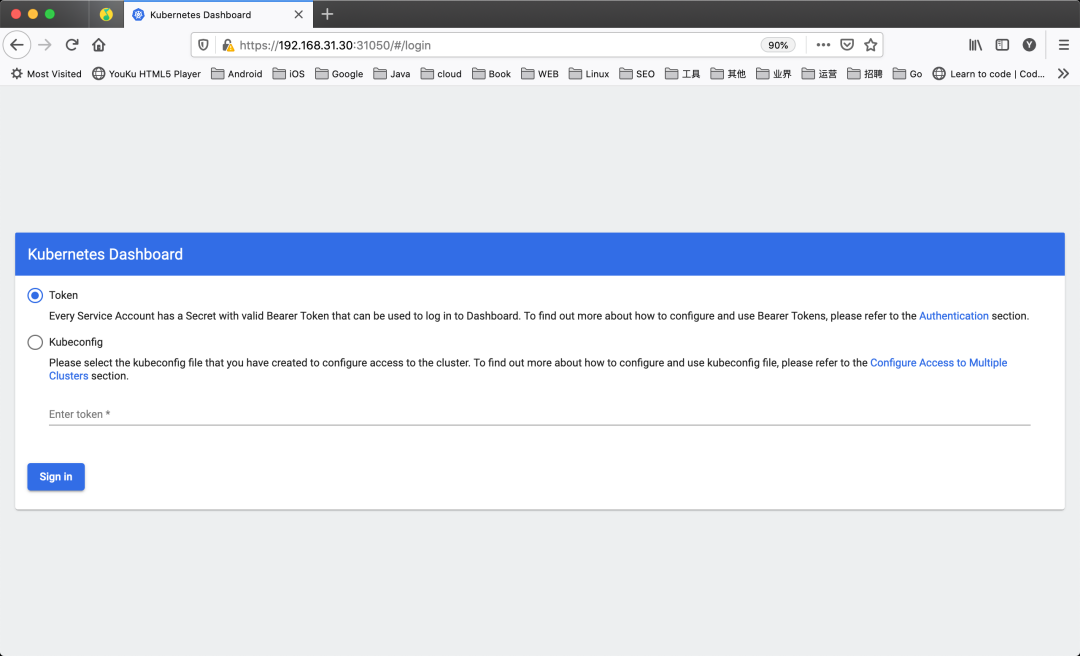
然后可以通過(guò)上面的 31050 端口去訪問 Dashboard,要記住使用 https,Chrome 不生效可以使用Firefox 測(cè)試,如果沒有 Firefox 下面打不開頁(yè)面,可以點(diǎn)擊下頁(yè)面中的信任證書即可:
信任后就可以訪問到 Dashboard 的登錄頁(yè)面了:
然后創(chuàng)建一個(gè)具有全局所有權(quán)限的用戶來(lái)登錄 Dashboard:(admin.yaml)
kind: ClusterRoleBinding
apiVersion: rbac.authorization.k8s.io/v1
metadata:
  name: admin
roleRef:
  kind: ClusterRole
  name: cluster-admin
  apiGroup: rbac.authorization.k8s.io
subjects:
- kind: ServiceAccount
  name: admin
  namespace: kubernetes-dashboard
---
apiVersion: v1
kind: ServiceAccount
metadata:
  name: admin
  namespace: kubernetes-dashboard
直接創(chuàng)建:
?  ~ kubectl apply -f admin.yaml
?  ~ kubectl get secret -n kubernetes-dashboard|grep admin-token
admin-token-lwmmx                  kubernetes.io/service-account-token   3         1d
?  ~ kubectl get secret admin-token-lwmmx -o jsonpath={.data.token} -n kubernetes-dashboard |base64 -d
# 會(huì)生成一串很長(zhǎng)的base64后的字符串
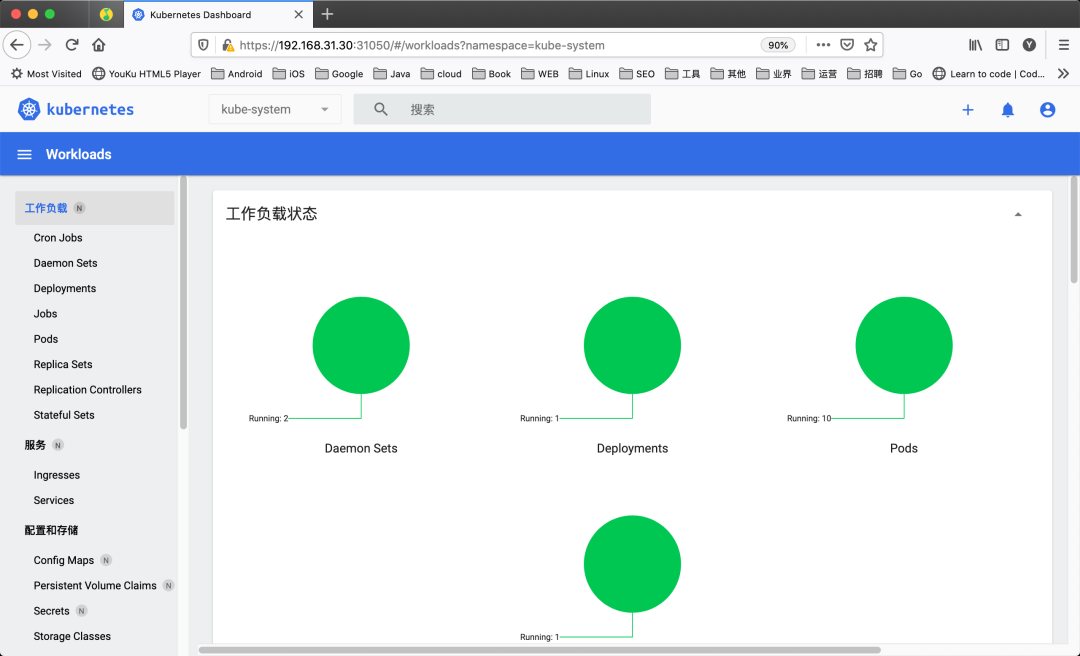
然后用上面的 base64 解碼后的字符串作為 token 登錄 Dashboard 即可,新版本還新增了一個(gè)暗黑模式:
最終我們就完成了使用 kubeadm 搭建 v1.22.1 版本的 kubernetes 集群、coredns、ipvs、flannel、containerd。
?  ~ kubectl get nodes -o wide
NAME     STATUS   ROLES                  AGE   VERSION   INTERNAL-IP      EXTERNAL-IP   OS-IMAGE                KERNEL-VERSION                CONTAINER-RUNTIME
master   Ready    control-plane,master   36m   v1.22.1   192.168.31.30    <none>        CentOS Linux 7 (Core)   3.10.0-1160.25.1.el7.x86_64   containerd://1.5.5
node2    Ready    <none>                 27m   v1.22.1   192.168.31.215   <none>        CentOS Linux 7 (Core)   3.10.0-1160.25.1.el7.x86_64   containerd://1.5.5
清理
如果你的集群安裝過(guò)程中遇到了其他問題,我們可以使用下面的命令來(lái)進(jìn)行重置:
?  ~ kubeadm reset
?  ~ ifconfig cni0 down && ip link delete cni0
?  ~ ifconfig flannel.1 down && ip link delete flannel.1
?  ~ rm -rf /var/lib/cni/
K8S 進(jìn)階訓(xùn)練營(yíng)
 點(diǎn)擊屏末 | 閱讀原文 | 即刻學(xué)習(xí)

掃描二維碼獲取
更多云原生知識(shí)
k8s 技術(shù)圈