
10 分鐘使用 Spring Boot + Vue + Antd + US3 搭建自己的圖床

網(wǎng)上已經(jīng)一些運行不錯的圖床了,比如
SM.MS https://sm.ms/ 圖殼 https://imgkr.com 路過圖床 https://imgchr.com/
那為什么我們還要自己搭建圖床呢?一來是因為碼農(nóng)總是喜歡折騰,二來是有了自己的圖床數(shù)據(jù)自己存儲更安全。那么接下來我們就搞起來。下面是演示地址,可以先看一下搭建完成的效果。
https://xiaotuwo.github.io
點擊按鈕上傳圖片,完成以后可以復(fù)制鏈接和下載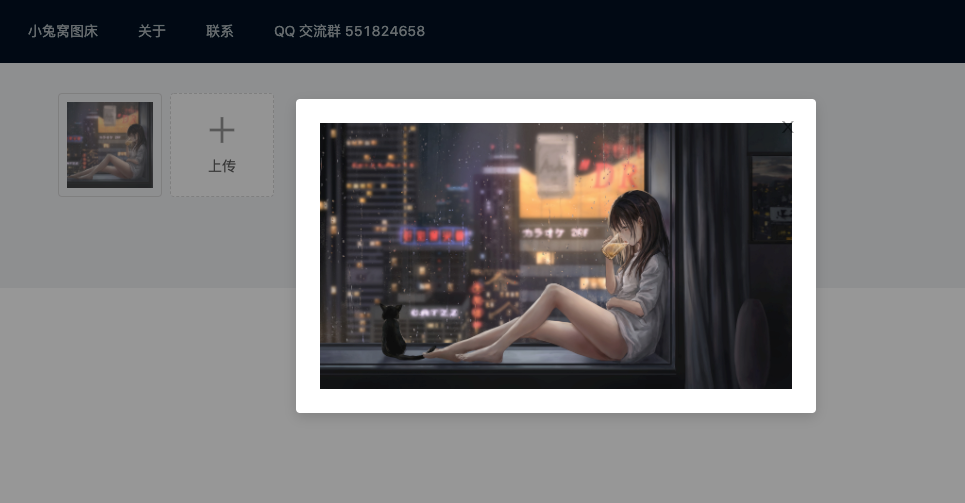
準(zhǔn)備前端環(huán)境
安裝 nodejs 自行去nodejs 官網(wǎng)下載,我們主要是為了使用 npm 工具。 安裝淘寶鏡像,如果是在國內(nèi),下載鏡像很慢,所以使用國內(nèi)的鏡像 ?。
sudo?npm?install?-g?cnpm?--registry=https://registry.npm.taobao.org
安裝 vue-cli 工具 因為我們前端使用的 vue,所以需要安裝vue-cli
cnpm?install?-g?@vue/cli
創(chuàng)建項目
vue?create?xiaotuwo
添加 antd 依賴
cnpm?install?ant-design-vue?--save
啟動
cd?xiaotuwo??
npm?run?serve??
訪問,能夠訪問 HelloWorld 頁面說明我們環(huán)境準(zhǔn)備成功了。
http://localhost:8080
編寫前端代碼
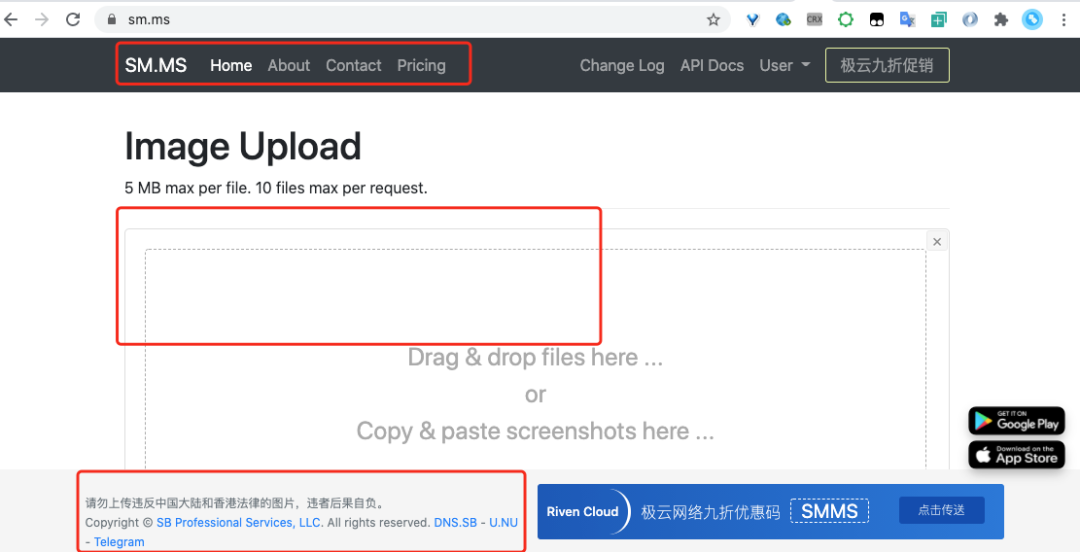
到這里我們基礎(chǔ)環(huán)境就搭建完成了,下面就開始編寫前端的代碼。我們是以 sm.ms 作為原型進(jìn)行搭建。如下圖我們只編輯他的頭部,上傳部分和尾部
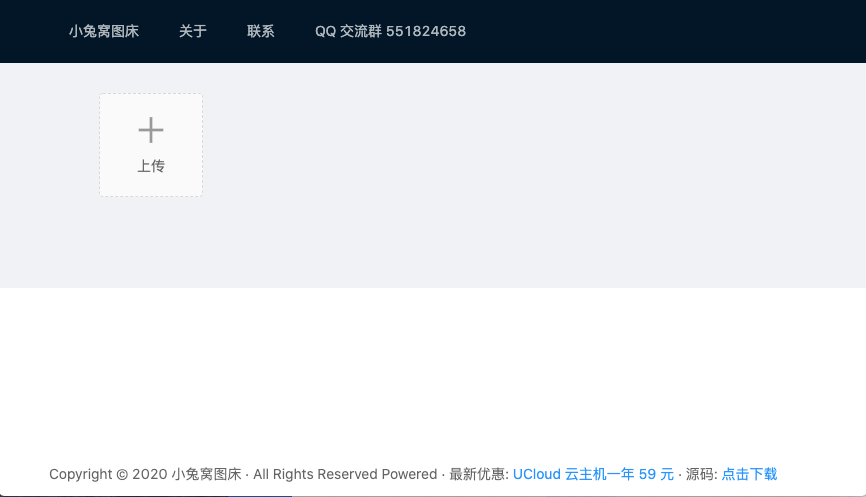
成品形態(tài)如下,把 sm.ms 拖拽上傳圖片的交互設(shè)計改成了點擊上傳圖片,不過如果你想實現(xiàn)拖拽也是非常簡單,下面是 antd 的樣式,換一個標(biāo)簽即可。https://www.antdv.com/components/upload-cn/
頭部和尾部代碼非常簡單,我們只講解上傳部分代碼。搭建好 vue 框架以后去上面提供的 antd 的網(wǎng)址里面找到 upload 控件,直接點擊復(fù)制自己喜歡的代碼樣式,粘貼到 content/index.vue 里面就可以了,然后修改 a-upload 的 action 為自己的服務(wù)器地址即可,本地測試就是http://localhost:8887/api/images/upload,下文中也有配套的服務(wù)端代碼。

vue 的語法就不具體展開了,主要講解一個地方, handlePreview 方法里面我添加了一個復(fù)制鏈接的邏輯,可以輕松的點擊預(yù)覽的時候復(fù)制圖片鏈接,這樣方便的把網(wǎng)址放入其他地方進(jìn)行使用。
his.$message.success('復(fù)制圖片鏈接成功');
document.addEventListener("copy",?function?copyCall(e)?{
??e.preventDefault()
??e.clipboardData.setData("text/html",?file.preview)
??e.clipboardData.setData("text/plain",?file.preview)
??document.removeEventListener("copy",?copyCall)
})
到這里基本的前端的搭建完成了,可以直接查看源碼 https://github.com/xiaotuwo/xiaotuwo-client
服務(wù)器端環(huán)境準(zhǔn)備
本文采用的是 US3 進(jìn)行圖床搭建,目前 US3 有 20G 的免費存儲和 每個月 20G 的免費流量,對于自用和起步還是足夠的。
復(fù)制下面的鏈接到瀏覽器訪問查看 US3 官網(wǎng),首次進(jìn)入需要注冊 https://urlify.cn/YNNBNn 注冊完成以后,進(jìn)入控制臺創(chuàng)建 US3 空間
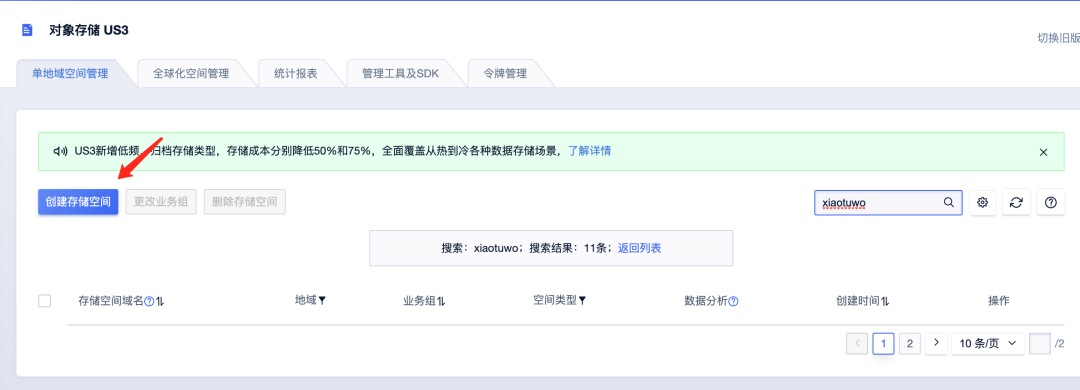
進(jìn)入空間以后填寫存儲名,私有空間和公開空間都可以,我創(chuàng)建的是 xiaotuwo.cn-bj.ufileos.com 留存?zhèn)溆谩?img src="https://filescdn.proginn.com/dc123bd908720af2669344138847720e/653fc558ac6981fe1591a4ff13b55963.webp" style="display: block;margin-right: auto;margin-left: auto;border-radius: 4px;margin-bottom: 25px;" data-type="png" data-ratio="0.6555555555555556" data-w="1080">
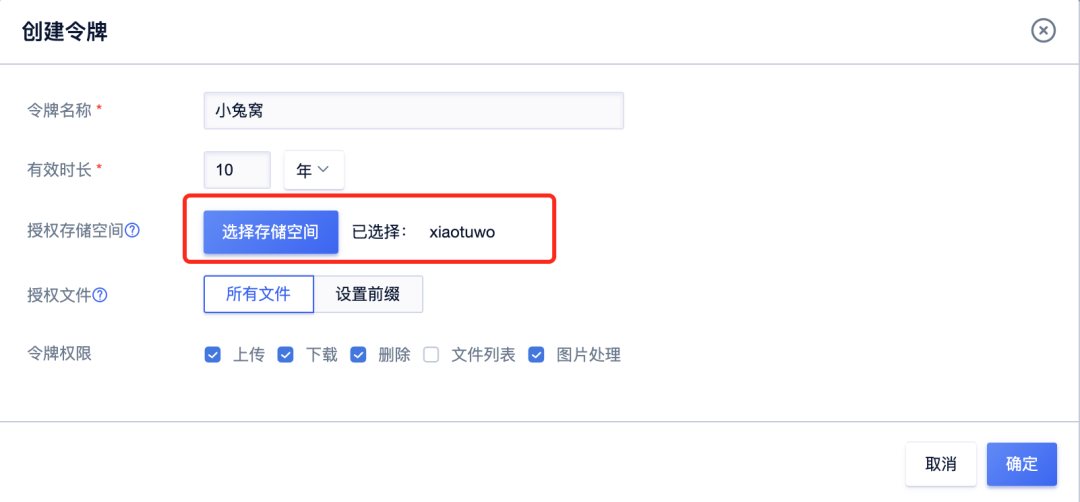
在 US3 控制臺創(chuàng)建令牌,主要是用來上傳,刪除圖片使用
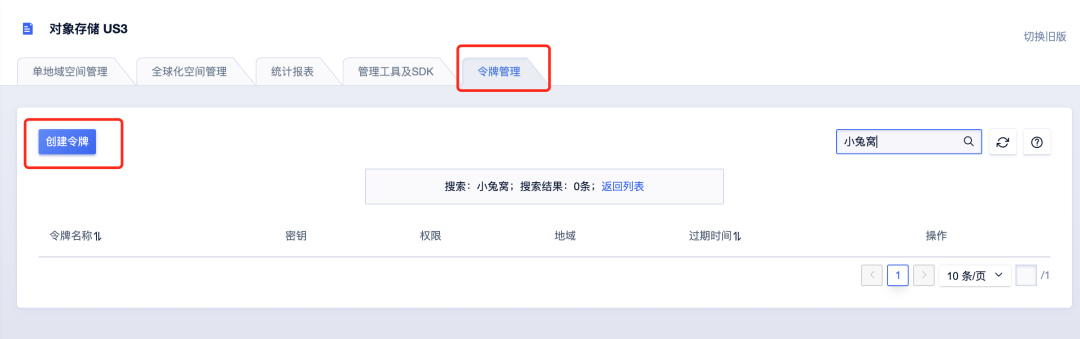
選擇好自己剛才創(chuàng)建的空間,設(shè)置年限點擊確定即可,記得一定要勾選令牌的權(quán)限
 點擊完成以后獲取到公鑰私鑰,復(fù)制備用

編寫服務(wù)端代碼
服務(wù)端代碼主要分為三個部分 1、接收請求的 Controller 2、上傳圖片到 US3 的邏輯 3、返回內(nèi)容處理
1、 編寫 Controller
使用 MultipartHttpServletRequest 接收到前端的 file 文件,調(diào)用 uCloudProvider進(jìn)行上傳。
@PostMapping({"/api/files/upload"})
????@ResponseBody
????public?FileDTO?upload(HttpServletRequest?request)?{
????????FileDTO?resultFileDTO?=?new?FileDTO();
????????MultipartHttpServletRequest?multipartRequest?=?(MultipartHttpServletRequest)?request;
????????MultipartFile?file?=?multipartRequest.getFile("file");
????????long?start?=?System.currentTimeMillis();
????????try?{
????????????if?(file?==?null)?{
????????????????resultFileDTO.setStatus("error");
????????????}
????????????FileDTO?fileDTO?=?uCloudProvider.uploadWithExpired(file.getInputStream(),?file.getContentType(),?Objects.requireNonNull(file.getOriginalFilename()));
????????????log.info("UPLOAD_FILE_EXPIRED|ip:{}|referer:{}|url:{}|cost:{}",?getIpAddress(request),?request.getHeader("referer"),?fileDTO.getUrl(),?System.currentTimeMillis()?-?start);
????????????executorService.submit(new?UCloudScanner(fileDTO,?uCloudProvider,?executorService,?1));
????????????resultFileDTO.setName(fileDTO.getName());
????????????resultFileDTO.setUrl(fileDTO.getUrl());
????????????resultFileDTO.setThumbUrl(fileDTO.getUrl());
????????????resultFileDTO.setStatus("done");
????????}?catch?(Exception?e)?{
????????????log.error("UPLOAD_FILE_ERROR",?e);
????????????resultFileDTO.setStatus("error");
????????}
????????return?resultFileDTO;
????}
2、上傳圖片到 US3 的邏輯 上傳 US3 主要是一些配置文件,我直接使用的 Maven 的 Filter 處理,配置文件在 pom.xml 里面,編譯的時候?qū)懭?application.properties
<id>devid>
<properties>
????<server.port>8887server.port>
????<ucloud.ufile.public-key>你的公鑰ucloud.ufile.public-key>
????<ucloud.ufile.private-key>你的私鑰ucloud.ufile.private-key>
????<ucloud.ufile.upload-domain-private>你的bucket名字.cn-bj.ufileos.comucloud.ufile.upload-domain-private>
????<ucloud.ufile.download-domain-private>你的bucket名字.cn-bj.ufileos.comucloud.ufile.download-domain-private>
????<ucloud.uaicensor.publicKey>鑒黃公鑰ucloud.uaicensor.publicKey>
????<ucloud.uaicensor.privateKey>鑒黃私鑰ucloud.uaicensor.privateKey>
????<ucloud.uaicensor.resourceId>鑒黃IDucloud.uaicensor.resourceId>
????<ucloud.uaicensor.url>http://api.uai.ucloud.cn/v1/image/scanucloud.uaicensor.url>
properties>
<activation>
????<activeByDefault>trueactiveByDefault>
activation>
我們會發(fā)現(xiàn)配置文件里面除了文件的配置還有一套鑒黃的配置,對的這個地方不是本文的重點,但是圖床一定要有鑒黃的能力. 具體 US3 的邏輯代碼也是非常的簡單,主要的邏輯就是上傳,使用私鑰和時間戳生成鏈接,顯示。
public?FileDTO?upload(InputStream?fileStream,?String?mimeType,?String?fileName)?{
????????String?generatedFileName;
????????String[]?filePaths?=?fileName.split("\\.");
????????if?(filePaths.length?>?1)?{
????????????generatedFileName?=?UUID.randomUUID().toString()?+?"."?+?filePaths[filePaths.length?-?1];
????????}?else?{
????????????throw?new?ErrorCodeException(ErrorCode.FILE_UPLOAD_FAIL);
????????}
????????long?start?=?System.currentTimeMillis();
????????try?{
????????????log.debug("UCloudProvider?start?upload?file,?filename?:?{},?time?:?{}",?fileName,?new?Date());
????????????ObjectAuthorization?objectAuthorization?=?new?UfileObjectLocalAuthorization(publicKey,?privateKey);
????????????ObjectConfig?config?=?new?ObjectConfig(uploadDomainPrivate);
????????????PutObjectResultBean?response?=?UfileClient.object(objectAuthorization,?config)
????????????????????.putObject(fileStream,?mimeType)
????????????????????.nameAs(generatedFileName)
????????????????????.toBucket(bucketNamePrivate)
????????????????????.setOnProgressListener((bytesWritten,?contentLength)?->?{
????????????????????})
????????????????????.execute();
????????????log.debug("UCloudProvider?end?upload?file,?filename?:?{},?time?:?{},?cost?:?{}",?fileName,?new?Date(),?System.currentTimeMillis()?-?start);
????????????if?(response?!=?null?&&?response.getRetCode()?==?0)?{
????????????????long?start2?=?System.currentTimeMillis();
????????????????log.debug("UCloudProvider?start?get?url,?filename?:?{},?time?:?{}",?fileName,?new?Date());

????????????????String?url?=?UfileClient.object(objectAuthorization,?new?ObjectConfig(downloadDomainPrivate))
????????????????????????.getDownloadUrlFromPrivateBucket(generatedFileName,?bucketNamePrivate,?24?*?60?*?60)
????????????????????????.createUrl();

????????????????log.debug("UCloudProvider?end?get?url,?filename?:?{},?time?:?{},?cost?:?{}",?fileName,?new?Date(),?System.currentTimeMillis()?-?start2);

????????????????FileDTO?fileDTO?=?new?FileDTO();
????????????????fileDTO.setUrl(url.replace("http",?"https"));
????????????????fileDTO.setName(generatedFileName);
????????????????return?fileDTO;
????????????}?else?{
????????????????log.debug("UCloudProvider?end?upload?file,?filename?:?{},?time?:?{},?cost?:?{}",?fileName,?new?Date(),?System.currentTimeMillis()?-?start);
????????????????log.error("upload?error,{}",?response);
????????????????throw?new?ErrorCodeException(ErrorCode.FILE_UPLOAD_FAIL);
????????????}
????????}?catch?(UfileClientException?|?UfileServerException?e)?{
????????????log.debug("UCloudProvider?end?upload?file,?filename?:?{},?time?:?{},?cost?:?{}",?fileName,?new?Date(),?System.currentTimeMillis()?-?start);
????????????log.error("upload?error,{}",?fileName,?e);
????????????throw?new?ErrorCodeException(ErrorCode.FILE_UPLOAD_FAIL);
????????}
????}
3、 返回內(nèi)容處理,這里也需要注意一下,為了配合 antd 的 upoad 控件,我們的 dto 如下
@Data
public?class?FileDTO?{
????private?String?name;
????private?String?status;
????private?String?url;
????private?String?thumbUrl;
}
服務(wù)器端源碼訪問 https://github.com/xiaotuwo/xiaotuwo-server
到這里就全部結(jié)束了,你學(xué)會了嗎?如果有任何問題,可以到 US3 自己的官方論壇提問 https://uclub.ucloud.cn/invite/93
END
有熱門推薦??
最近面試BAT,整理一份面試資料《Java面試BATJ通關(guān)手冊》,覆蓋了Java核心技術(shù)、JVM、Java并發(fā)、SSM、微服務(wù)、數(shù)據(jù)庫、數(shù)據(jù)結(jié)構(gòu)等等。
獲取方式:點“在看”,關(guān)注公眾號并回復(fù)?Java?領(lǐng)取,更多內(nèi)容陸續(xù)奉上。
文章有幫助的話,在看,轉(zhuǎn)發(fā)吧。
謝謝支持喲 (*^__^*)
