
SpringCloud:服務(wù)注冊與發(fā)現(xiàn)
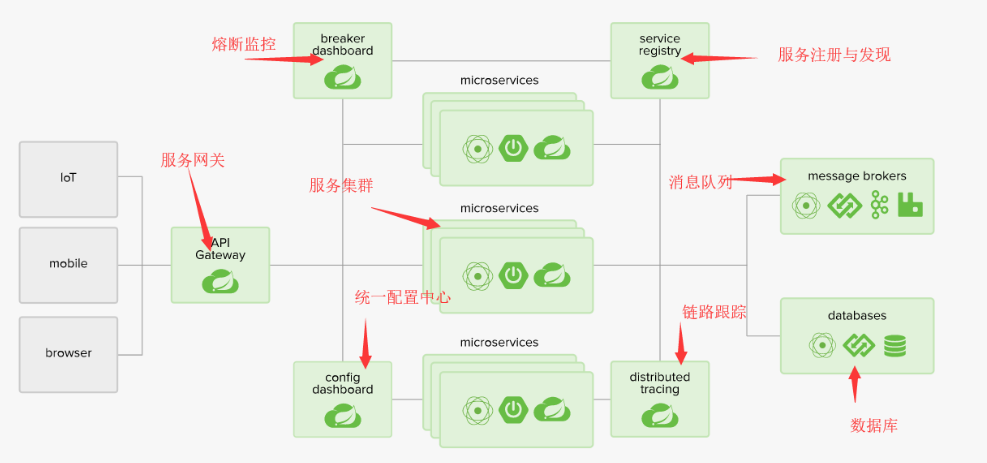
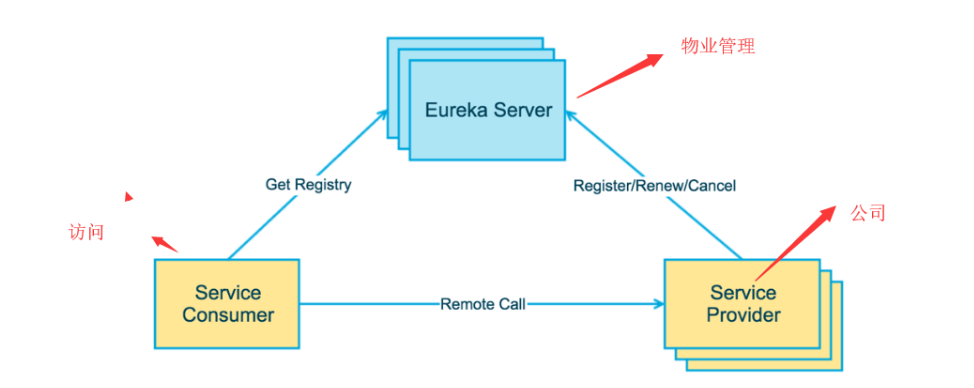
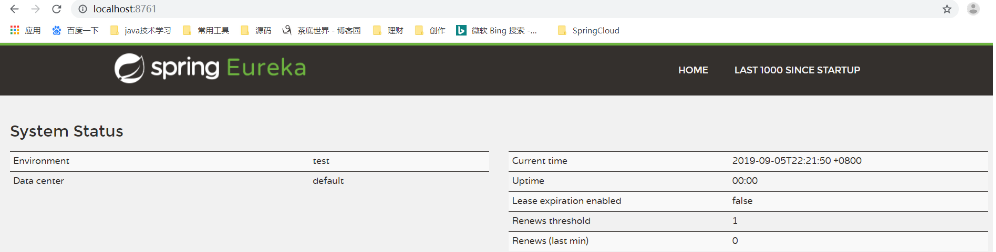
Eureka Server 提供服務(wù)注冊和發(fā)現(xiàn)。
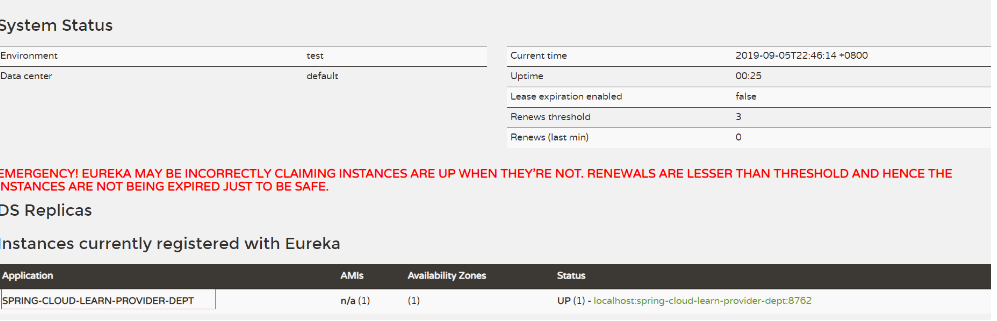
Service Provider服務(wù)提供方將自身服務(wù)注冊到Eureka,從而使服務(wù)消費方能夠找到。
Service Consumer服務(wù)消費方從Eureka獲取注冊服務(wù)列表,從而能夠消費服務(wù)。

<?xml version="1.0" encoding="UTF-8"?><project xmlns="http://maven.apache.org/POM/4.0.0" xmlns:xsi="http://www.w3.org/2001/XMLSchema-instance"xsi:schemaLocation="http://maven.apache.org/POM/4.0.0 http://maven.apache.org/xsd/maven-4.0.0.xsd"><modelVersion>4.0.0</modelVersion><parent><groupId>org.springframework.boot</groupId><artifactId>spring-boot-starter-parent</artifactId><version>2.0.2.RELEASE</version></parent><groupId>com.yuanqinnan</groupId><artifactId>spring-cloud-learn-parent</artifactId><version>1.0.0-SNAPSHOT</version><packaging>pom</packaging><properties><!-- Environment Settings --><java.version>1.8</java.version><project.build.sourceEncoding>UTF-8</project.build.sourceEncoding><project.reporting.outputEncoding>UTF-8</project.reporting.outputEncoding><maven.compiler.source>1.8</maven.compiler.source><maven.compiler.target>1.8</maven.compiler.target><!-- Spring Settings --><spring-cloud.version>Finchley.RELEASE</spring-cloud.version></properties><dependencyManagement><dependencies><dependency><groupId>org.springframework.cloud</groupId><artifactId>spring-cloud-dependencies</artifactId><version>${spring-cloud.version}</version><type>pom</type><scope>import</scope></dependency></dependencies></dependencyManagement><build><finalName>spring-cloud-learn-parent</finalName><!-- 資源文件配置 --><resources><resource><directory>src/main/java</directory><excludes><exclude>**/*.java</exclude></excludes></resource><resource><directory>src/main/resources</directory></resource></resources><plugins><plugin><groupId>org.apache.maven.plugins</groupId><artifactId>maven-resources-plugin</artifactId><configuration><delimiters><delimit>$</delimit></delimiters></configuration></plugin></plugins></build></project>
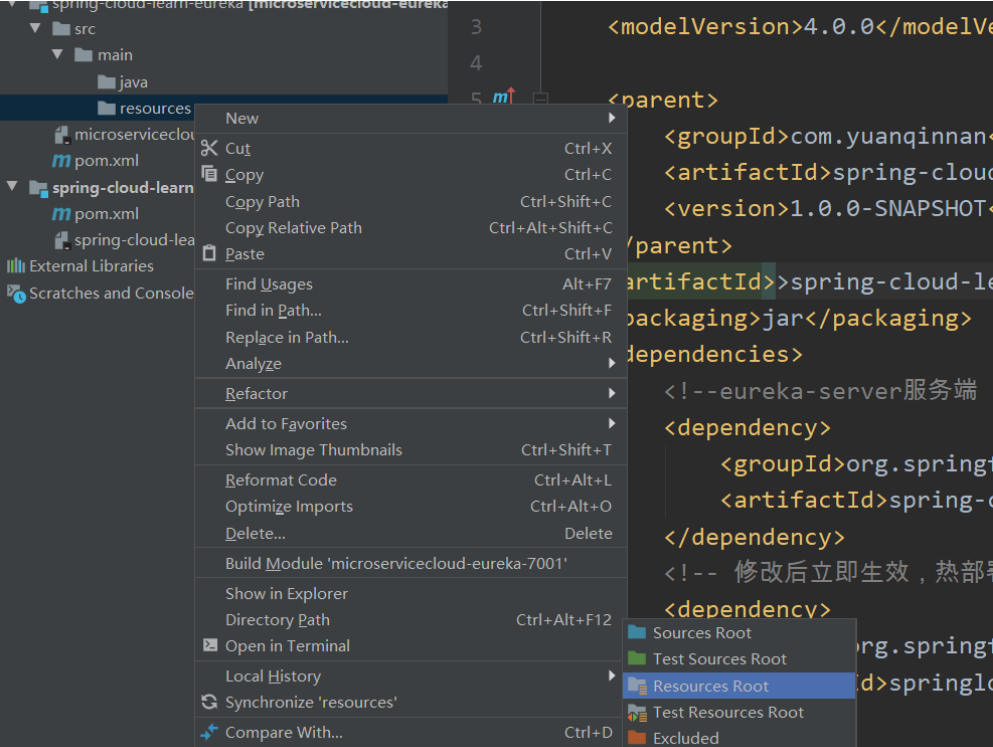
<project xmlns="http://maven.apache.org/POM/4.0.0" xmlns:xsi="http://www.w3.org/2001/XMLSchema-instance"xsi:schemaLocation="http://maven.apache.org/POM/4.0.0 http://maven.apache.org/xsd/maven-4.0.0.xsd"><modelVersion>4.0.0</modelVersion><parent><groupId>com.yuanqinnan</groupId><artifactId>spring-cloud-learn-parent</artifactId><version>1.0.0-SNAPSHOT</version></parent><artifactId>>spring-cloud-learn-eureka</artifactId><packaging>jar</packaging><dependencies><!--eureka-server服務(wù)端 --><dependency><groupId>org.springframework.cloud</groupId><artifactId>spring-cloud-starter-netflix-eureka-server</artifactId></dependency></dependencies></project>
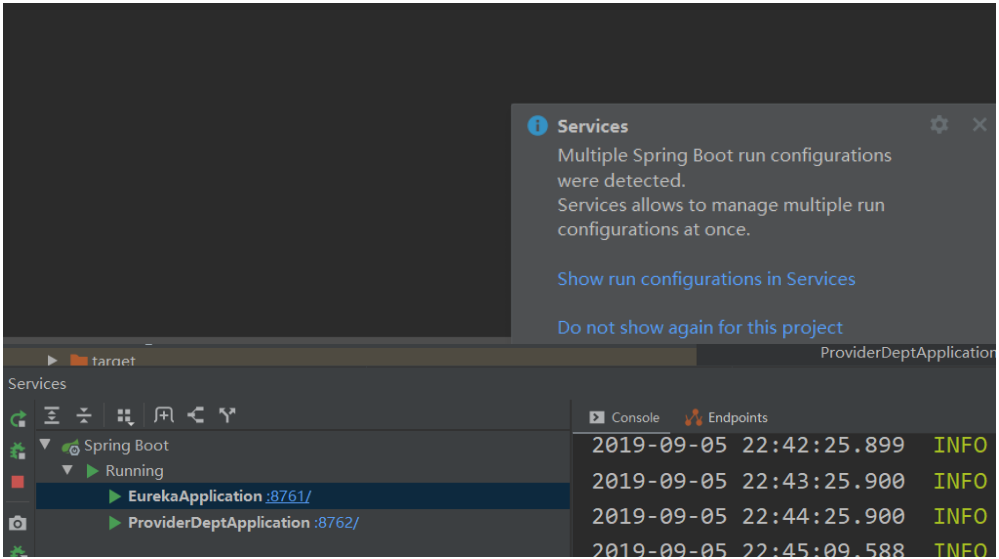
@EnableEurekaServer@SpringBootApplicationpublic class EurekaApplication {public static void main(String[] args) {SpringApplication.run(EurekaApplication.class, args);}}
spring:application:name: spring-cloud-learn-eurekaserver:port: 8761eureka:instance:hostname: localhostclient:#表示是否將自己注冊到Eureka Server,默認為true。registerWithEureka: false#表示是否從Eureka Server獲取注冊信息,默認為true。fetchRegistry: falseserviceUrl:#設(shè)置與Eureka Server交互的地址,查詢服務(wù)和注冊服務(wù)都需要依賴這個地址。默認是http://localhost:8761/eureka ;多個地址可使用 , 分隔defaultZone: http://${eureka.instance.hostname}:${server.port}/eureka/
<?xml version="1.0" encoding="UTF-8"?><project xmlns="http://maven.apache.org/POM/4.0.0" xmlns:xsi="http://www.w3.org/2001/XMLSchema-instance"xsi:schemaLocation="http://maven.apache.org/POM/4.0.0 http://maven.apache.org/xsd/maven-4.0.0.xsd"><modelVersion>4.0.0</modelVersion><parent><groupId>com.yuanqinnan</groupId><artifactId>spring-cloud-learn-parent</artifactId><version>1.0.0-SNAPSHOT</version></parent><artifactId>spring-cloud-learn-provider-dept</artifactId><packaging>jar</packaging><dependencies><!-- Spring Boot Begin --><dependency><groupId>org.springframework.boot</groupId><artifactId>spring-boot-starter-test</artifactId><scope>test</scope></dependency><!-- Spring Boot End --><!-- Spring Cloud Begin --><dependency><groupId>org.springframework.cloud</groupId><artifactId>spring-cloud-starter-netflix-eureka-server</artifactId></dependency><!-- Spring Cloud End --></dependencies></project>
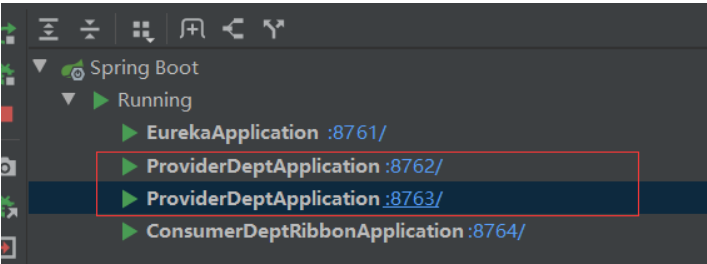
spring:application:name: spring-cloud-learn-provider-deptserver:port: 8762eureka:client:serviceUrl:#服務(wù)注冊地址defaultZone: http://localhost:8761/eureka/
@EnableEurekaClient@SpringBootApplicationpublic class ProviderDeptApplication {public static void main(String[] args) {SpringApplication.run(ProviderDeptApplication.class, args);}}
@Configurationpublic class RestTemplateConfiguration {@Bean@LoadBalancedpublic RestTemplate restTemplate() {return new RestTemplate();}}
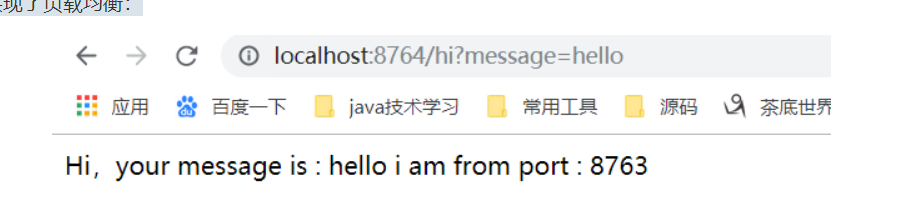
@Servicepublic class DeptService {@Autowiredprivate RestTemplate restTemplate;public String sayHi(String message) {//這里指指定了服務(wù)名稱,不用管ip 地址與端口return restTemplate.getForObject("http://SPRING-CLOUD-LEARN-PROVIDER-DEPT/hi?message=" + message, String.class);}}
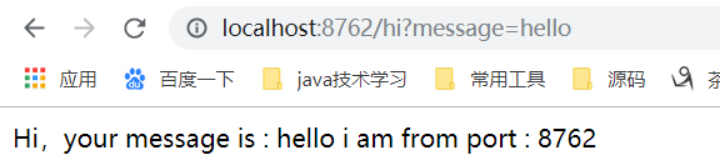
@RestControllerpublic class DeptController {@Autowiredprivate DeptService deptService;@RequestMapping(value = "hi", method = RequestMethod.GET)public String sayHi(@RequestParam String message) {return deptService.sayHi(message);}}
@RestControllerpublic class DeptController {@Value("${server.port}")private String port;@RequestMapping(value = "hi", method = RequestMethod.GET)public String sayHi(@RequestParam(value = "message") String message) {return String.format("Hi,your message is : %s i am from port : %s", message, port);}}
<project xmlns="http://maven.apache.org/POM/4.0.0" xmlns:xsi="http://www.w3.org/2001/XMLSchema-instance"xsi:schemaLocation="http://maven.apache.org/POM/4.0.0 http://maven.apache.org/xsd/maven-4.0.0.xsd"><modelVersion>4.0.0</modelVersion><parent><groupId>com.yuanqinnan</groupId><artifactId>spring-cloud-learn-parent</artifactId><version>1.0.0-SNAPSHOT</version></parent><artifactId>spring-cloud-learn-consumer-dept-ribbon</artifactId><packaging>jar</packaging><dependencies><!-- Spring Boot Begin --><dependency><groupId>org.springframework.boot</groupId><artifactId>spring-boot-starter-web</artifactId></dependency><dependency><groupId>org.springframework.boot</groupId><artifactId>spring-boot-starter-tomcat</artifactId></dependency><dependency><groupId>org.springframework.boot</groupId><artifactId>spring-boot-starter-test</artifactId><scope>test</scope></dependency><!-- Spring Boot End --><!-- Spring Cloud Begin --><dependency><groupId>org.springframework.cloud</groupId><artifactId>spring-cloud-starter-netflix-eureka-server</artifactId></dependency><dependency><groupId>org.springframework.cloud</groupId><artifactId>spring-cloud-starter-netflix-ribbon</artifactId></dependency><!-- Spring Cloud End --></dependencies></project>
spring:application:name: spring-cloud-learn-consumer-dept-ribbonserver:port: 8764eureka:client:serviceUrl:defaultZone: http://localhost:8761/eureka/
public class ConsumerDeptRibbonApplication {public static void main(String[] args) {SpringApplication.run(ConsumerDeptRibbonApplication.class, args);}}
public class DeptController {private DeptService deptService;public String sayHi( String message) {return deptService.sayHi(message);}}


剩下的就不會給大家一展出來了,以上資料按照一下操作即可獲得
——將文章進行轉(zhuǎn)發(fā)和評論,關(guān)注公眾號【Java烤豬皮】,關(guān)注后繼續(xù)后臺回復(fù)領(lǐng)取口令“ 666 ”即可免費領(lǐng)文章取中所提供的資料。

騰訊、阿里、滴滴后臺試題匯集總結(jié) — (含答案)
面試:史上最全多線程序面試題!
最新阿里內(nèi)推Java后端試題
JVM難學?那是因為你沒有真正看完整這篇文章

關(guān)注作者微信公眾號 — 《JAVA烤豬皮》
了解了更多java后端架構(gòu)知識以及最新面試寶典
看完本文記得給作者點贊+在看哦~~~大家的支持,是作者來源不斷出文的動力~
評論
圖片
表情