
利用Python做一個小姐姐詞云跳舞視頻
作者:北山啦
https://blog.csdn.net/qq_45176548/article/details/113410073
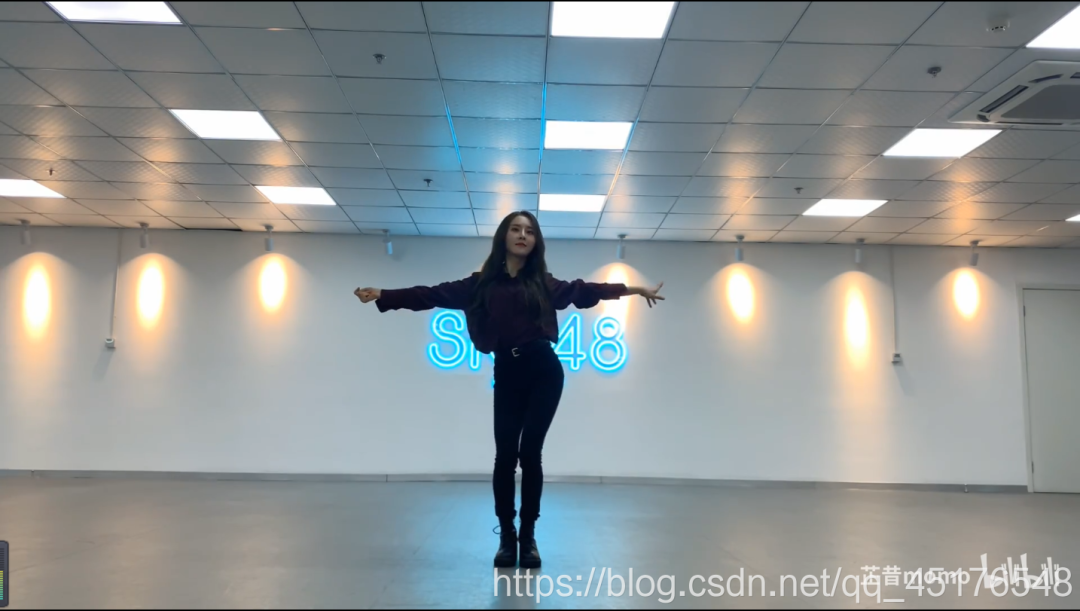
本文將以嗶哩嗶哩–乘風(fēng)破浪視頻為例,you-get下載視頻,同時利用python爬取B站視頻彈幕,并利用opencv對視頻進行分割,百度AI進行人像分割,moviepy生成詞云跳舞視頻,并添加音頻。
1. 導(dǎo)入模塊
1.1 下載所需模塊
import osimport timelibs = {"lxml","requests","pandas","numpy","you-get","opencv-python","pandas","fake_useragent","matplotlib","moviepy"}try:for lib in libs:os.system(f"pip3 install -i https://pypi.doubanio.com/simple/ {lib}")print(lib+"下載成功")except:print("下載失敗")
1.2 導(dǎo)入模塊
import osimport reimport cv2import jiebaimport requestsimport moviepyimport pandas as pdimport numpy as npfrom PIL import Imagefrom lxml import etreefrom wordcloud import WordCloudimport matplotlib.pyplot as pltfrom fake_useragent import UserAgent
2. 視頻處理
2.1 下載視頻
2.2 視頻分割
2.2.1代碼展示
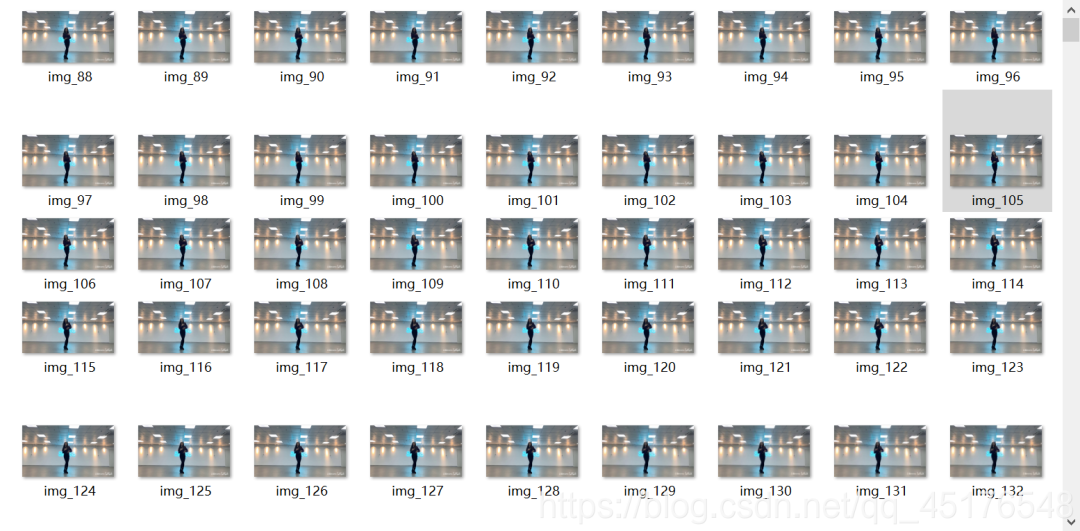
# -*- coding:utf-8 -*-# @Author : 北山啦# @Time : 2021/1/29 14:08# @File : 視頻分割.py# @Software : PyCharmimport cv2cap = cv2.VideoCapture(r"無價之姐~讓我乘風(fēng)破浪~~~.flv")while 1:# 逐幀讀取視頻 按順序保存到本地文件夾ret,frame = cap.read()if ret:cv2.imwrite(f".\pictures\img_{num}.jpg",frame)else:breakcap.release() # 釋放資源
2.2.2 結(jié)果展示
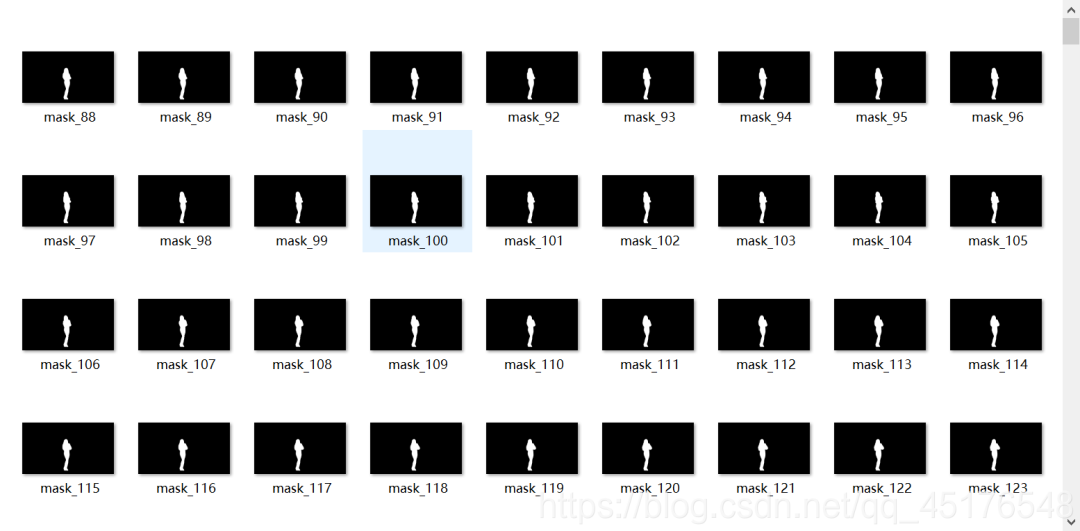
2.3 人像分割
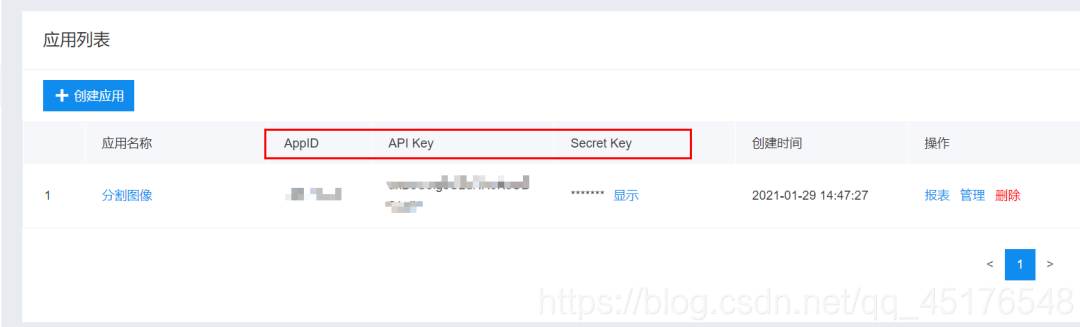
2.3.1創(chuàng)建應(yīng)用
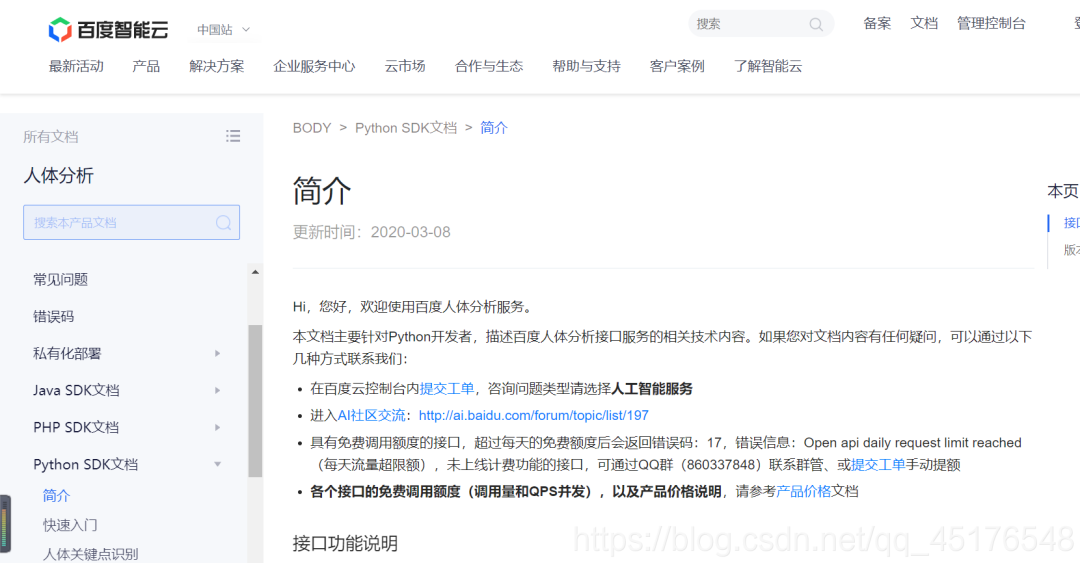
2.3.2 Python SDK參考文檔
2.3.3 代碼展示
# -*- coding:utf-8 -*-# @Author : 北山啦# @Time : 2021/1/29 14:38# @File : 人像分割.py# @Software : PyCharm"""原文鏈接:"""import cv2import base64import numpy as npimport osfrom aip import AipBodyAnalysisimport timeimport randomAPP_ID = '******'API_KEY = '*******************'SECRET_KEY = '********************'client = AipBodyAnalysis(APP_ID, API_KEY, SECRET_KEY)# 保存圖像分割后的路徑path = './mask_img/'# os.listdir 列出保存到圖片名稱img_files = os.listdir('./pictures')print(img_files)for num in range(1, len(img_files) + 1):# 按順序構(gòu)造出圖片路徑img = f'./pictures/img_{num}.jpg'img1 = cv2.imread(img)height, width, _ = img1.shape# print(height, width)# 二進制方式讀取圖片with open(img, 'rb') as fp:img_info = fp.read()# 設(shè)置只返回前景 也就是分割出來的人像seg_res = client.bodySeg(img_info)labelmap = base64.b64decode(seg_res['labelmap'])nparr = np.frombuffer(labelmap, np.uint8)labelimg = cv2.imdecode(nparr, 1)labelimg = cv2.resize(labelimg, (width, height), interpolation=cv2.INTER_NEAREST)new_img = np.where(labelimg == 1, 255, labelimg)mask_name = path + 'mask_{}.png'.format(num)# 保存分割出來的人像cv2.imwrite(mask_name, new_img)print(f'======== 第{num}張圖像分割完成 ========')
2.3.4 結(jié)果展示
3. 彈幕爬取
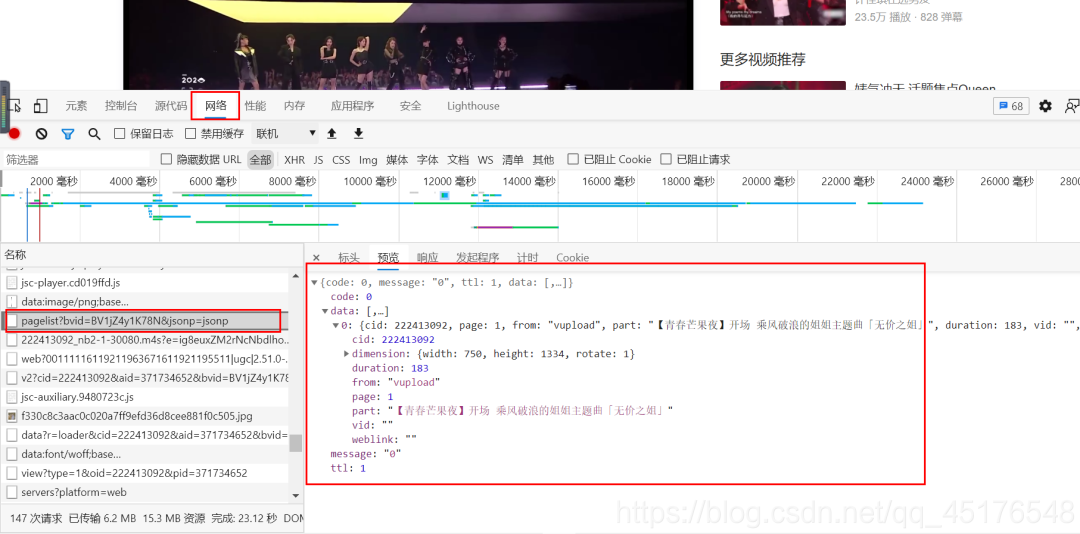
3.1 網(wǎng)頁分析
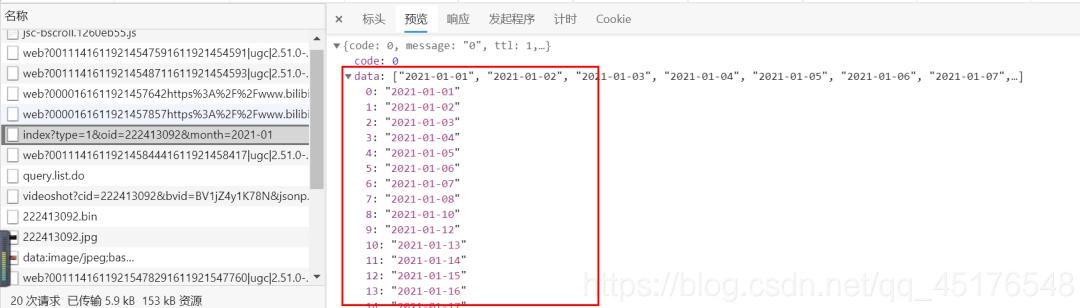
3.2 觀察歷史彈幕
3.3爬取彈幕
3.3.1構(gòu)造時間序列
import pandas as pda = pd.date_range("2020-08-08","2020-09-08")print(a)DatetimeIndex(['2020-08-08', '2020-08-09', '2020-08-10', '2020-08-11','2020-08-12', '2020-08-13', '2020-08-14', '2020-08-15','2020-08-50', '2020-08-17', '2020-08-18', '2020-08-19','2020-08-20', '2020-08-21', '2020-08-22', '2020-08-23','2020-08-24', '2020-08-25', '2020-08-26', '2020-08-27','2020-08-28', '2020-08-29', '2020-08-30', '2020-08-31','2020-09-01', '2020-09-02', '2020-09-03', '2020-09-04','2020-09-05', '2020-09-06', '2020-09-07', '2020-09-08'],dtype='datetime64[ns]', freq='D')
3.3.2 爬取數(shù)據(jù)
# -*- coding:utf-8 -*-# @Author : 北山啦# @Time : 2021/1/29 19:33# @File : 彈幕爬取.py# @Software : PyCharmimport requestsimport pandas as pdimport reimport csvfrom fake_useragent import UserAgentfrom concurrent.futures import ThreadPoolExecutorimport datetimeua = UserAgent()start_time = datetime.datetime.now()def Grab_barrage(date):headers = {"origin": "https://www.bilibili.com","referer": "https://www.bilibili.com/video/BV1jZ4y1K78N?from=search&seid=1084505810439035065","cookie": "","user-agent": ua.random(),}params = {'type': 1,'oid' : "222413092",'date': date}r= requests.get(url, params=params, headers=headers)r.encoding = 'utf-8'comment = re.findall('<d p=".*?">(.*?)</d>', r.text)for i in comments:df.append(i)a = pd.DataFrame(df)a.to_excel("danmu.xlsx")def main():with ThreadPoolExecutor(max_workers=4) as executor:executor.map(Grab_barrage, date_list)"""計算所需時間"""delta = (datetime.datetime.now() - start_time).total_seconds()print(f'用時:{delta}s')if __name__ == '__main__':# 目標(biāo)urlurl = "https://api.bilibili.com/x/v2/dm/history"start,end = '20200808','20200908'date_list = [x for x in pd.date_range(start, end).strftime('%Y-%m-%d')]count = 0main()
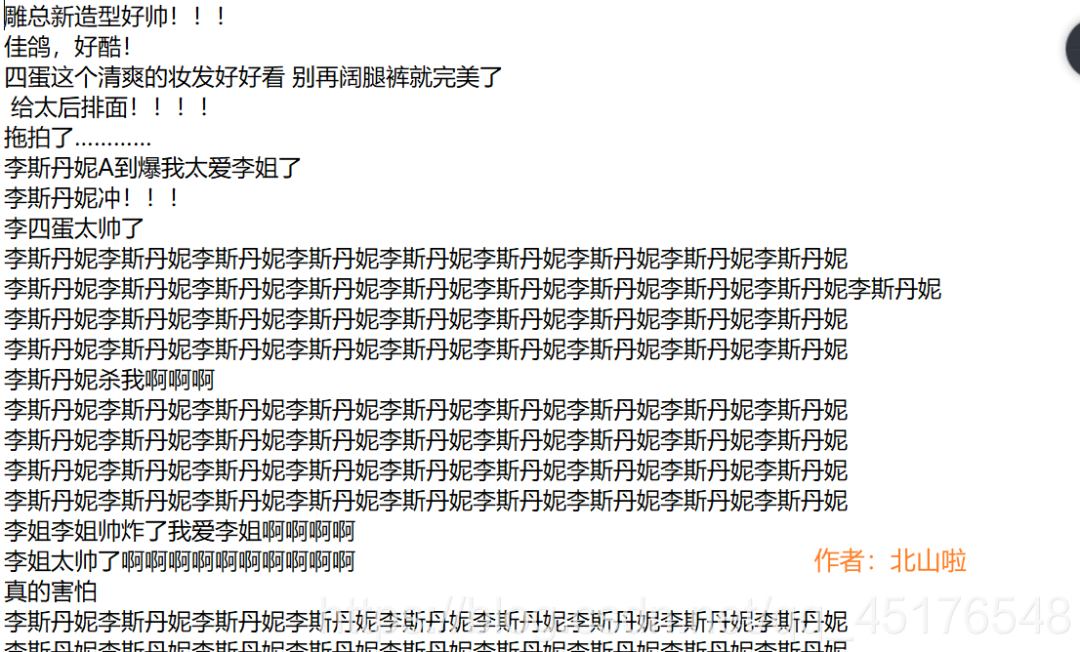
3.3.3結(jié)果展示
4.生成詞云圖
4.1 評論內(nèi)容機械壓縮去重
def func(s):for i in range(1,int(len(s)/2)+1):for j in range(len(s)):if s[j:j+i] == s[j+i:j+2*i]:k = j + iwhile s[k:k+i] == s[k+i:k+2*i] and k<len(s):k = k + is = s[:j] + s[k:]return sdata["短評"] = data["短評"].apply(func)
4.2 添加停用詞和自定義詞組
import pandas as pdfrom wordcloud import WordCloudimport jiebafrom tkinter import _flattenimport matplotlib.pyplot as pltjieba.load_userdict("./詞云圖//add.txt")with open('./詞云圖//stoplist.txt', 'r', encoding='utf-8') as f:stopWords = f.read()
4.3生成詞云圖
# -*- coding:utf-8 -*-# @Author : 北山啦# @Time : 2021/1/29 19:10# @File : 跳舞詞云圖生成.py# @Software : PyCharmfrom wordcloud import WordCloudimport collectionsimport jiebaimport refrom PIL import Imageimport matplotlib.pyplot as pltimport numpy as npwith open('barrages.txt') as f:data = f.read()jieba.load_userdict("./詞云圖//add.txt")# 讀取數(shù)據(jù)with open('barrages.txt') as f:data = f.read()jieba.load_userdict("./詞云圖//add.txt")# 文本預(yù)處理 去除一些無用的字符 只提取出中文出來new_data = re.findall('[\u4e00-\u9fa5]+', data, re.S)new_data = "/".join(new_data)# 文本分詞seg_list_exact = jieba.cut(new_data, cut_all=True)result_list = []with open('./詞云圖/stoplist.txt', encoding='utf-8') as f:con = f.read().split('\n')stop_words = set()for i in con:stop_words.add(i)for word in seg_list_exact:# 設(shè)置停用詞并去除單個詞if word not in stop_words and len(word) > 1:result_list.append(word)# 篩選后統(tǒng)計詞頻word_counts = collections.Counter(result_list)path = './wordcloud/'img_files = os.listdir('./mask_img')print(img_files)for num in range(1, len(img_files) + 1):img = fr'.\mask_img\mask_{num}.png'# 獲取蒙版圖片mask_ = 255 - np.array(Image.open(img))# 繪制詞云plt.figure(figsize=(8, 5), dpi=200)my_cloud = WordCloud(background_color='black', # 設(shè)置背景顏色 默認是blackmask=mask_, # 自定義蒙版mode='RGBA',max_words=500,font_path='simhei.ttf', # 設(shè)置字體 顯示中文).generate_from_frequencies(word_counts)# 顯示生成的詞云圖片plt.imshow(my_cloud)# 顯示設(shè)置詞云圖中無坐標(biāo)軸plt.axis('off')word_cloud_name = path + 'wordcloud_{}.png'.format(num)my_cloud.to_file(word_cloud_name) # 保存詞云圖片print(f'======== 第{num}張詞云圖生成 ========')
5. 合成視頻
5.1圖片合成
# -*- coding:utf-8 -*-# @Author : 北山啦# @Time : 2021/1/29 19:10# @File : 跳舞詞云圖生成.py# @Software : PyCharmimport cv2import os# 輸出視頻的保存路徑video_dir = 'result.mp4'# 幀率fps = 30# 圖片尺寸img_size = (1920, 1080)fourcc = cv2.VideoWriter_fourcc('M', 'P', '4', 'V') # opencv3.0 mp4會有警告但可以播放videoWriter = cv2.VideoWriter(video_dir, fourcc, fps, img_size)img_files = os.listdir('.//wordcloud')for i in range(88, 888):img_path = './/wordcloud//wordcloud_{}.png'.format(i)frame = cv2.imread(img_path)frame = cv2.resize(frame, img_size) # 生成視頻 圖片尺寸和設(shè)定尺寸相同videoWriter.write(frame) # 寫進視頻里print(f'======== 按照視頻順序第{i}張圖片合進視頻 ========')videoWriter.release() # 釋放資源
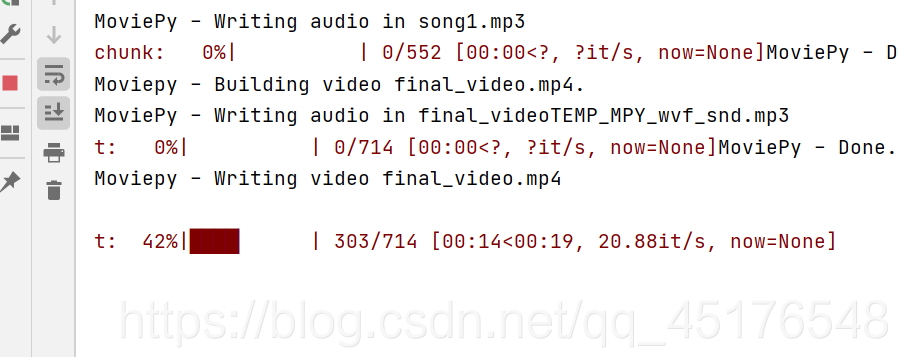
5.2 音頻添加
# -*- coding:utf-8 -*-# @Author : 北山啦# @Time : 2021/1/29 19:10# @File : 跳舞詞云圖生成.py# @Software : PyCharmimport moviepy.editor as mpy# 讀取詞云視頻my_clip = mpy.VideoFileClip('result.mp4')# 截取背景音樂audio_background = mpy.AudioFileClip('song.mp3').subclip(0,25)audio_background.write_audiofile('song1.mp3')# 視頻中插入音頻final_clip = my_clip.set_audio(audio_background)# 保存為最終的視頻 動聽的音樂!漂亮小姐姐詞云跳舞視頻!final_clip.write_videofile('final_video.mp4')
6. 結(jié)果展示
到這里就結(jié)束了,如果對你有幫助,歡迎點贊,你的點贊對我很重要。
微信掃碼關(guān)注,了解更多內(nèi)容
評論
圖片
表情