
FaceNet人臉識(shí)別(二)
前面我們說(shuō)到了FacNet的模型結(jié)構(gòu)以及其損失函數(shù),那么這一篇文章我們就來(lái)進(jìn)行數(shù)據(jù)處理
?人臉ROI提取?
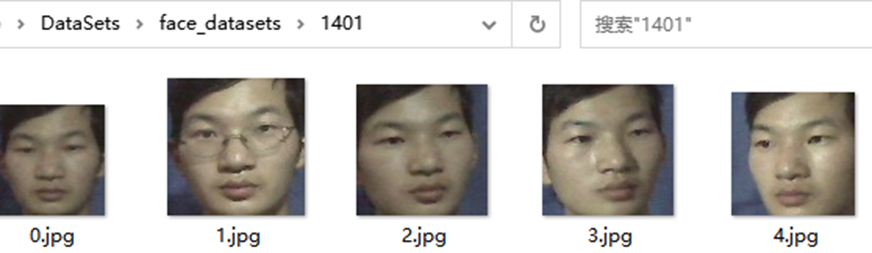
首先,數(shù)據(jù)集如下,被命名為XXX_XX.jpg,下劃線前面是指人的id,下劃線后面是指這個(gè)人的第幾張圖片,這個(gè)數(shù)據(jù)集名為CASIA-FaceV5,是亞洲人臉數(shù)據(jù)集,共有500人,每個(gè)人5張圖片。不同圖片的光照、角度、配飾(眼鏡),都有些許不同。

接下來(lái),我們需要進(jìn)行數(shù)據(jù)處理,由于我們的任務(wù)是進(jìn)行人臉識(shí)別,所以數(shù)據(jù)處理的第一步就是將人臉ROI區(qū)域提取出來(lái)。首先新建一個(gè)utils.py文件,寫入如下代碼:
import numpy as npfrom PIL import Imageimport cv2face_detection = cv2.CascadeClassifier('models/haarcascade_frontalface_default.xml')def get_face_rect(img):img1 = Noneface_rect = face_detection.detectMultiScale(img,1.1,5)for rect in face_rect:x,y,w,h = rect# cv2.rectangle(img,(x,y),(x+w,y+h),(0,255,0),1)img1 = img[y:y+h,x:x+w]return img1
然后新建一個(gè)change_file.py文件,寫入如下代碼,用來(lái)將數(shù)據(jù)集中的人臉提取出來(lái),然后分別保存到不同的文件夾中。
import osimport cv2from utils import get_face_rect# 數(shù)據(jù)文件夾,保存文件夾base_path = r'C:\dataset\all_faces'save=path = r'C:\dataset\face_datasets'file_names = [os.path.join(base_path ,p ) for p in os.listdir(base_path)]for file_name in file_names:# print(file_name)floder_name = file_name.split('\\')[-1].split('_')[0]name = file_name.split('\\')[-1].split('_')[-1]try :if not os.path.isdir(os.path.join(save,floder_name)):os.mkdir(os.path.join(save,floder_name))img = cv2.imread(file_name)print(os.path.join(save,'%s\%s'%(floder_name,name)))face_roi = get_face_rect(img)cv2.imwrite(os.path.join(save,'%s\%s'%(floder_name,name)),face_roi)except Exception as e:print(e)continue
運(yùn)行程序,可以看到保存文件夾中多出了很多個(gè)目錄,存放了不同的人臉,如下所示:
Json 文件生成
下一步,我們進(jìn)行數(shù)據(jù)分割,具體流程如下:
讀取數(shù)據(jù)保存路徑的所有文件
隨機(jī)打亂
以9:1分割
根據(jù)文件名劃分 id與路徑并保存成json,如下所示(紅圈部分為id后面的數(shù)組為該id的所有人臉圖片):

代碼如下,新建一個(gè)gen_json.py文件,寫入如下代碼,運(yùn)行程序,train.json 以及 test.json就生成成啦。
import jsonimport osimport randomfrom tqdm import tqdmdef write_json(list,name='train'):data_dict ={}for floder in tqdm(list):image_paths = [os.path.join(floder,p) for p in os.listdir(floder)]key_ = floder.split('\\')[-1]for image_path in image_paths:if key_ in data_dict.keys():data_dict[key_].append(image_path)else:data_dict[key_]=[image_path]json_ = json.dumps(data_dict)with open('%s.json'%name, 'w', encoding='utf8') as f:f.writelines(json_)if __name__ == '__main__':dataset_paths = r'D:\data\face_datasets'floder_list = [os.path.join(dataset_paths,p) for p in os.listdir(dataset_paths)]random.shuffle(floder_list)split_ =0.9train_len = int(len(floder_list)*split_)print(train_len)train_list = floder_list[:train_len]test_list = floder_list[train_len:]write_json(train_list)????write_json(test_list,name='test')
?工具函數(shù)編寫
下一步,我們進(jìn)行數(shù)據(jù)處理,因?yàn)槟壳暗臄?shù)據(jù)還只是路徑,是無(wú)法輸入到我們的模型中進(jìn)行訓(xùn)練的,所以我們需要讀取圖片,并且通過(guò)各種變換,轉(zhuǎn)換成可供訓(xùn)練的數(shù)據(jù),首先在utils.py中添加如下代碼,用來(lái)獲得隨機(jī)數(shù)以及不失真的圖像縮放:
def rand(a=0, b=1):????return?np.random.rand()*(b-a)?+?a????def letterbox_image(self, image, size):if self.input_shape[-1] == 1:image = image.convert("RGB")ih = image.sizeh = sizescale = min(w / iw, h / ih)nw = int(iw * scale)nh = int(ih * scale)image = image.resize((nw, nh), Image.BICUBIC)new_image = Image.new('RGB', size, (128, 128, 128))((w - nw) // 2, (h - nh) // 2))if self.input_shape[-1] == 1:new_image = new_image.convert("L")????return?new_image
數(shù)據(jù)加載類?
接著,新建一個(gè)load_data.py用來(lái)編寫加載數(shù)據(jù)的類,首先導(dǎo)入依賴庫(kù):
from PIL import Imagefrom utils import randimport tensorflow.keras as kimport cv2import numpy as npimport mathfrom tensorflow.keras import utils as np_utilsimport jsonimport?glob
然后,新建一個(gè)類叫Face_Dataset,并初始化數(shù)據(jù),這里我們必須完成 __len__ 以及 __getitem__ 這兩個(gè)函數(shù),前者是用來(lái)判斷總共需要多少次讀取才能把數(shù)據(jù)完全拿到,公式為
讀取次數(shù) = 總圖片數(shù)/batch_size ,而后者是用來(lái)獲取每一個(gè)批次的可供訓(xùn)練的數(shù)據(jù),
class Face_Dataset(k.utils.Sequence):def __init__(self, image_path, batch_size, train=True, input_size=(160, 160, 3)):self.image_path = image_path# 一共有多少?gòu)垐D片self.num_len = len(glob.glob(self.image_path+'/*/*.jpg'))# 批次大小self.batch_size = batch_size# 訓(xùn)練還是測(cè)試self.train = train# json 數(shù)據(jù)self.json_data = self.load_data_path()# json 的 keyself.json_key = list(self.json_data.keys())# 輸入圖片的尺寸self.image_height, self.image_width, self.channel = input_sizedef __len__(self):return math.ceil(self.num_len / float(self.batch_size))def __getitem__(self, item):??????pass
接著,我們?cè)賹懭雔oad_data_path函數(shù),用來(lái)讀取訓(xùn)練,或者測(cè)試時(shí)的json數(shù)據(jù),并返回。
def load_data_path(self):if self.train:with open('train.json', 'r', encoding='utf8') as f:json_ = json.loads(f.read())return json_else:with open('test.json', 'r', encoding='utf8') as f:json_ = json.loads(f.read())return json_
然后,為了使模型更具魯棒性,所以我們?cè)倬帉懸粋€(gè)數(shù)據(jù)增強(qiáng)的函數(shù),用來(lái)對(duì)人臉數(shù)據(jù)進(jìn)行隨機(jī)裁剪、隨機(jī)翻轉(zhuǎn)、隨機(jī)縮放等。
# 隨機(jī)增強(qiáng)數(shù)據(jù)??def?get_random_data(self,?image,?input_shape,?jitter=.1,?hue=.1,?sat=1.3,?val=1.3,?flip_signal=True):''':param image: PIL Image:param input_shape: 輸入尺寸:param jitter: 裁剪:param hue: h:param sat: s:param val: v:param flip_signal: 翻轉(zhuǎn):return:'''image = image.convert("RGB")h, w = input_shaperand_jit1 = rand(1 - jitter, 1 + jitter)rand_jit2 = rand(1 - jitter, 1 + jitter)new_ar = w / h * rand_jit1 / rand_jit2# 隨機(jī)裁剪圖片scale = rand(0.9, 1.1)if new_ar < 1:nh = int(scale * h)nw = int(nh * new_ar)else:nw = int(scale * w)nh = int(nw / new_ar)image = image.resize((nw, nh), Image.BICUBIC)# 隨機(jī)翻轉(zhuǎn)圖片flip = rand() < .5if flip and flip_signal:image = image.transpose(Image.FLIP_LEFT_RIGHT)dx = int(rand(0, w - nw))dy = int(rand(0, h - nh))new_image = Image.new('RGB', (w, h), (128, 128, 128))new_image.paste(image, (dx, dy))image = new_image# 隨機(jī)rotate = rand() < .5if rotate:angle = np.random.randint(-10, 10)a, b = w / 2, h / 2M = cv2.getRotationMatrix2D((a, b), angle, 1)image = cv2.warpAffine(np.array(image), M, (w, h), borderValue=[128, 128, 128])image_data = image# 如果是單通道圖片if self.channel == 1:????????image_data?=?Image.fromarray(np.uint8(image)).convert("L")????return?image_data
最后就是完成__getitem__函數(shù)中的內(nèi)容啦,我們先使用numpy新創(chuàng)建兩個(gè)全0的數(shù)組,維度分別為(batch_size,3,h,w,c)以及(batch_size,3),用來(lái)存放圖片數(shù)據(jù)以及標(biāo)簽數(shù)據(jù)。
??def?__getitem__(self,?item):????images?=?np.zeros((self.batch_size,?3,?self.image_height,?self.image_width,?self.channel))????labels?=?np.zeros((self.batch_size,?3))
然后使用循環(huán)讀取一個(gè)批次的數(shù)據(jù)并返回,具體流程如下:
在讀取的json中隨機(jī)取得第一個(gè)人,并判斷這個(gè)人擁有的圖片數(shù)是否大于2,否則重取
在取得的第一個(gè)人的圖片中隨機(jī)獲取2張圖片分別進(jìn)行圖像處理以及標(biāo)簽處理
在取得的json中隨機(jī)取得第二個(gè)人,并判斷此人與第一個(gè)人是否是同一個(gè)人,是則重取
在取得的第二個(gè)人的圖片中隨機(jī)獲取1張圖片并進(jìn)行圖像處理以及標(biāo)簽處理
組合數(shù)據(jù)與標(biāo)簽
返回
# 循環(huán)獲取一個(gè)批次的數(shù)據(jù)for i in range(self.batch_size):# 隨機(jī)在json中獲取一個(gè)人c = np.random.choice(self.json_key, 1)select_path = self.json_data[c[0]]# 當(dāng)獲取人的圖片數(shù)量小于2 則重新獲取while len(select_path) < 2:c = np.random.choice(self.json_key, 1)select_path = self.json_data[c[0]]# 在隨機(jī)獲取的人 的圖片中 隨機(jī)取得兩張image_index = np.random.choice(select_path, 2)# 第一張圖片image1 = Image.open(image_index[0])# 數(shù)據(jù)增強(qiáng)image1 = self.get_random_data(image1, [self.image_height, self.image_width])image1 = np.asarray(image1).astype(np.float64) / 255.# 獲取當(dāng)前人的標(biāo)簽label = self.json_key.index(c[0])images[i, 0, :, :, :] = image1labels[i, 0] = label# 第二張圖片image2 = Image.open(image_index[1])image2 = self.get_random_data(image2, [self.image_height, self.image_width])image2 = np.asarray(image2).astype(np.float64) / 255.images[i, 1, :, :, :] = image2labels[i, 1] = label# 隨機(jī)獲取第二個(gè)人的圖片路徑diff_c = np.random.choice(self.json_key, 1)# 如果和第一個(gè)人 是同一人則重新取while diff_c[0] == c[0]:diff_c = np.random.choice(self.json_key, 1)# 隨機(jī)取得不同人的一張圖片diff_select_path = self.json_data[diff_c[0]]diff_c_image_path = np.random.choice(diff_select_path, 1)# 圖片讀取diff_image = Image.open(diff_c_image_path[0])diff_image = self.get_random_data(diff_image, [self.image_height, self.image_width])diff_image = np.asarray(diff_image).astype(np.float64) / 255.diff_label = self.json_key.index(diff_c[0])images[i, 2, :, :, :] = diff_imagelabels[i, 2] = diff_label# 組合3張圖片images1 = np.array(images)[:, 0, :, :, :]images2 = np.array(images)[:, 1, :, :, :]images3 = np.array(images)[:, 2, :, :, :]images = np.concatenate([images1, images2, images3], 0)# 組合3個(gè)標(biāo)簽labels1 = np.array(labels)[:, 0]labels2 = np.array(labels)[:, 1]labels3 = np.array(labels)[:, 2]labels = np.concatenate([labels1, labels2, labels3], 0)# 獨(dú)熱編碼labels = np_utils.to_categorical(np.array(labels), num_classes=len(self.json_key))????return?images,?{'Embedding':?np.zeros_like(labels),?'Softmax':?labels}
?測(cè)試?
這樣一個(gè)數(shù)據(jù)讀取的類就完成了,我們可以使用如下的方式進(jìn)行驗(yàn)證,看看返回的數(shù)據(jù)是否是我們所需的。
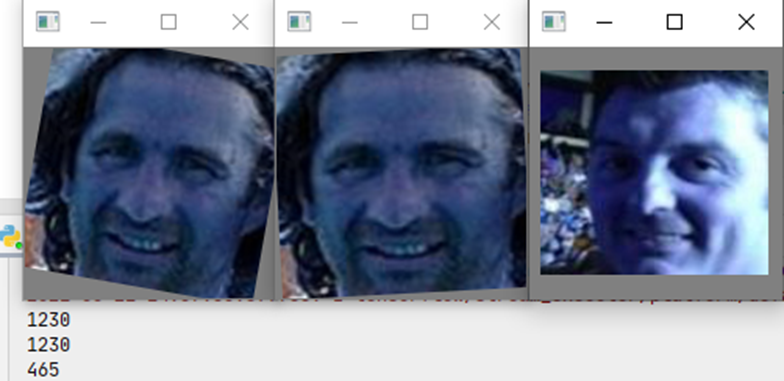
image_dir = r'E:\DataSets\face_datasets'batch_size=1# 實(shí)例化數(shù)據(jù)dataset=Face_Dataset(image_dir,batch_size)# 獲得第一個(gè)batch_size 的數(shù)據(jù)image,dict = dataset.__getitem__(1)embb=dict['Embedding']label = dict['Softmax']# 風(fēng)別取得3張圖片的索引for i in range(3):image_ = np.array(image[i]*255.,dtype='uint8')cv2.imshow('s%s'%i,image_)print(label[i].argmax())cv2.waitKey(0)
運(yùn)行結(jié)果如下,我們可以看到第一第二張圖片很明顯就是同一個(gè)人,所以他們的索引是一致的,第三張圖片是不同人,所以索引是不一樣的。
以上就是本次推文的全部?jī)?nèi)容了,下一章將為大家?guī)?lái)模型的搭建以及訓(xùn)練,喜歡的同學(xué)們可以關(guān)注一波噢!