
SpringBoot四大核心組件,你了解多少
前言
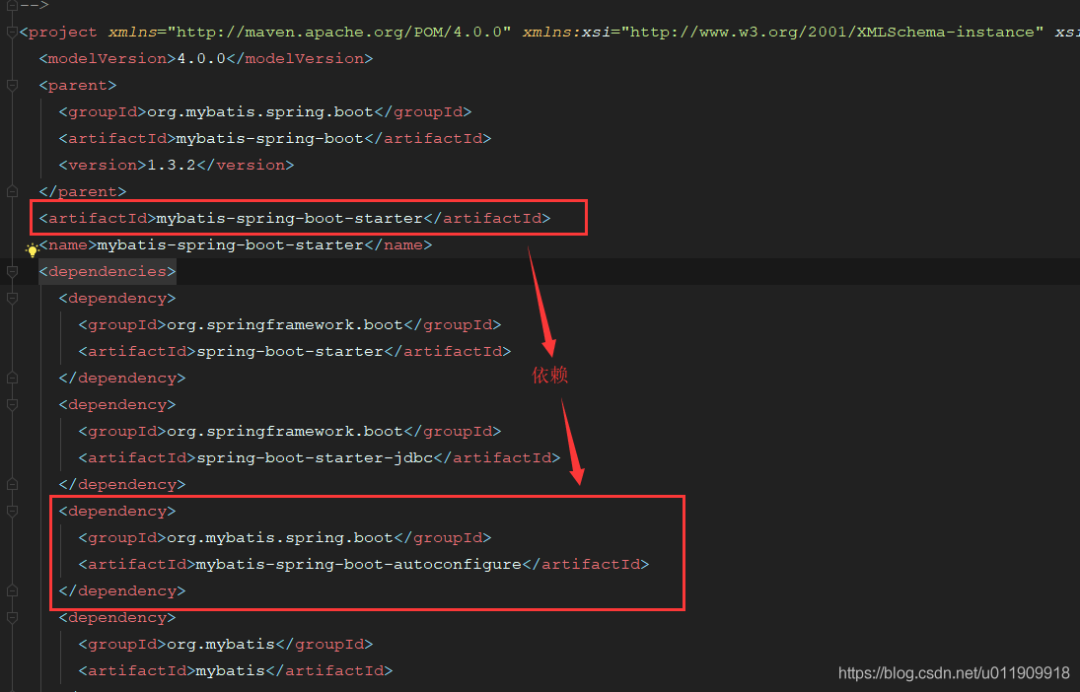
一、Spring Boot Starter
1.1 Starter的應用示例
<dependency>
    <groupId>org.springframework.boot</groupId>
    <artifactId>spring-boot-starter-thymeleaf</artifactId>
</dependency>

<dependency>
    <groupId>org.mybatis.spring.boot</groupId>
    <artifactId>mybatis-spring-boot-starter</artifactId>
    <version>1.3.2</version>
</dependency>
spring-boot-starter-xxx 和 xxx-spring-boot-starter。

官方提供的starter是這樣的:spring-boot-starter-xxx 非官方的starter是這樣的:xxx-spring-boot-starter
##前端引擎配置
spring:
  thymeleaf:
    enabled: true
    servlet:
      content-type: text/html
    mode: HTML
    ## 頁面前綴
    prefix: classpath:/templates/
    ## 后綴
    suffix: .html
mybatis:
  mapper-locations: classpath:mapper/*.xml  #注意:一定要對應mapper映射xml文件的所在路徑
  type-aliases-package: com.hi.ld.vo.system  # 注意:對應實體類的路徑
  configuration:
    log-impl: org.apache.ibatis.logging.stdout.StdOutImpl
1.2 Spring Boot之前的Thymeleaf和Mybatis應用
1.2.1 Thymeleaf配置
<dependency>
  <groupId>org.thymeleaf</groupId>
  <artifactId>thymeleaf-spring5</artifactId>
  <version>3.0.11.RELEASE</version>
</dependency>
<dependency>
  <groupId>org.thymeleaf.extras</groupId>
  <artifactId>thymeleaf-extras-java8time</artifactId>
  <version>3.0.4.RELEASE</version>
</dependency>
<bean id="templateResolver"
       class="org.thymeleaf.templateresolver.ServletContextTemplateResolver">
  <property name="prefix" value="/WEB-INF/templates/" />
  <property name="suffix" value=".html" />
  <property name="templateMode" value="HTML5" />
</bean>

<bean id="templateEngine"
      class="org.thymeleaf.spring4.SpringTemplateEngine">
  <property name="templateResolver" ref="templateResolver" />
</bean>

<bean class="org.thymeleaf.spring4.view.ThymeleafViewResolver">
  <property name="templateEngine" ref="templateEngine" />
</bean>
1.2.2 Mybatis配置
 <dependency>
   <groupId>org.springframework.boot</groupId>
   <artifactId>spring-boot-starter-jdbc</artifactId>
 </dependency>
 <dependency>
   <groupId>org.mybatis</groupId>
   <artifactId>mybatis</artifactId>
 </dependency>
 <dependency>
   <groupId>org.mybatis</groupId>
   <artifactId>mybatis-spring</artifactId>
 </dependency>
<?xml version="1.0" encoding="UTF-8"?>
<beans xmlns="http://www.springframework.org/schema/beans"
 xmlns:xsi="http://www.w3.org/2001/XMLSchema-instance" xmlns:context="http://www.springframework.org/schema/context"
 xsi:schemaLocation="http://www.springframework.org/schema/beans
 http://www.springframework.org/schema/beans/spring-beans.xsd
 http://www.springframework.org/schema/context
 http://www.springframework.org/schema/context/spring-context.xsd">
 <!-- 配置整合mybatis過程 -->
 <!-- 1.配置數(shù)據(jù)庫相關(guān)參數(shù)properties的屬性:${url} -->
 <context:property-placeholder location="classpath:jdbc.properties" />

 <!-- 2.數(shù)據(jù)庫連接池 -->
 <bean id="dataSource" class="com.mchange.v2.c3p0.ComboPooledDataSource">
  <!-- 配置連接池屬性 -->
  <property name="driverClass" value="${jdbc.driver}" />
  <property name="jdbcUrl" value="${jdbc.url}" />
  <property name="user" value="${jdbc.username}" />
  <property name="password" value="${jdbc.password}" />

  <!-- c3p0連接池的私有屬性 -->
  <property name="maxPoolSize" value="30" />
  <property name="minPoolSize" value="10" />
  <!-- 關(guān)閉連接后不自動commit -->
  <property name="autoCommitOnClose" value="false" />
  <!-- 獲取連接超時時間 -->
  <property name="checkoutTimeout" value="10000" />
  <!-- 當獲取連接失敗重試次數(shù) -->
  <property name="acquireRetryAttempts" value="2" />
 </bean>

 <!-- 3.配置SqlSessionFactory對象 -->
 <bean id="sqlSessionFactory" class="org.mybatis.spring.SqlSessionFactoryBean">
  <!-- 注入數(shù)據(jù)庫連接池 -->
  <property name="dataSource" ref="dataSource" />
  <!-- 配置MyBaties全局配置文件:mybatis-config.xml -->
  <property name="configLocation" value="classpath:mybatis-config.xml" />
  <!-- 掃描entity包 使用別名 -->
  <property name="typeAliasesPackage" value="com.soecode.lyf.entity" />
  <!-- 掃描sql配置文件:mapper需要的xml文件 -->
  <property name="mapperLocations" value="classpath:mapper/*.xml" />
 </bean>

 <!-- 4.配置掃描Dao接口包,動態(tài)實現(xiàn)Dao接口,注入到spring容器中 -->
 <bean class="org.mybatis.spring.mapper.MapperScannerConfigurer">
  <!-- 注入sqlSessionFactory -->
  <property name="sqlSessionFactoryBeanName" value="sqlSessionFactory" />
  <!-- 給出需要掃描Dao接口包 -->
  <property name="basePackage" value="com.soecode.lyf.dao" />
 </bean>
</beans>
1.2.3 小結(jié)
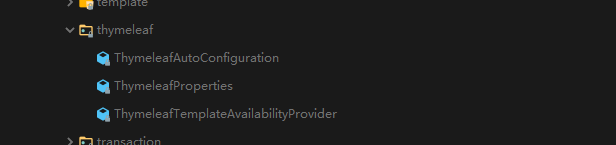
二、Spring Boot Autoconfigure
2.1 autoconfigure 簡介
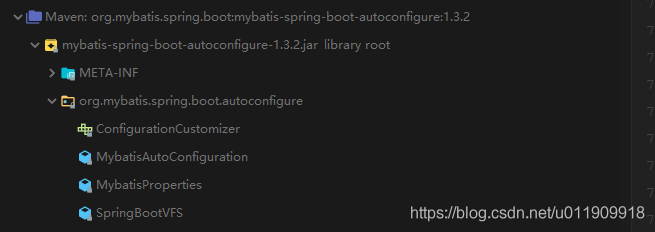
2.2 小結(jié)
三、Spring Boot CLI
運行g(shù)roovy腳本 => 官網(wǎng)2.1 打包groovy文件到j(luò)ar => 官網(wǎng)2.3 初始化Spring Boot項目 => 官網(wǎng)2.4 其他
https://docs.spring.io/spring-boot/docs/current/reference/html/spring-boot-cli.html
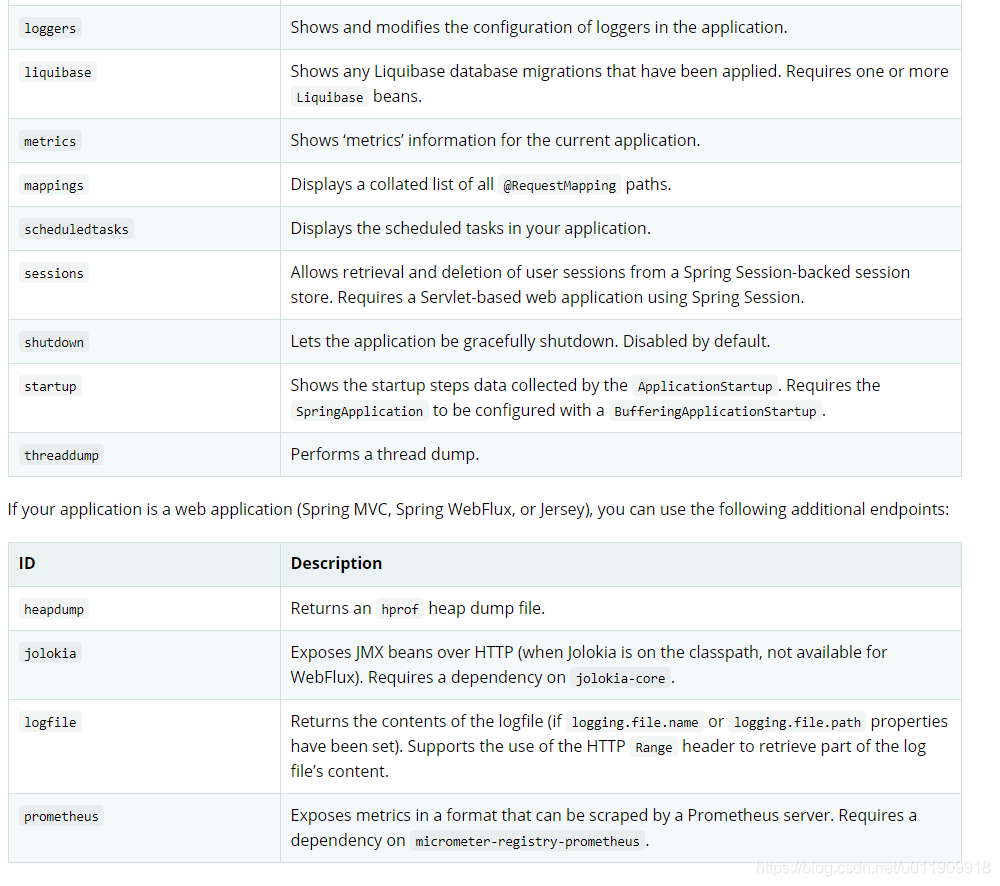
四、Spring Boot actuator
https://docs.spring.io/spring-boot/docs/2.4.0/reference/html/production-ready-features.html#production-ready

4.1 添加依賴
<dependency>
    <groupId>org.springframework.boot</groupId>
    <artifactId>spring-boot-starter-actuator</artifactId>
</dependency>
4.2 配置需要開啟監(jiān)控的端點
management:
  endpoint:
    health: ## 開啟健康監(jiān)控端點
      enabled: true
    beans: ## 開啟Bean實例監(jiān)控端點
      enabled: true
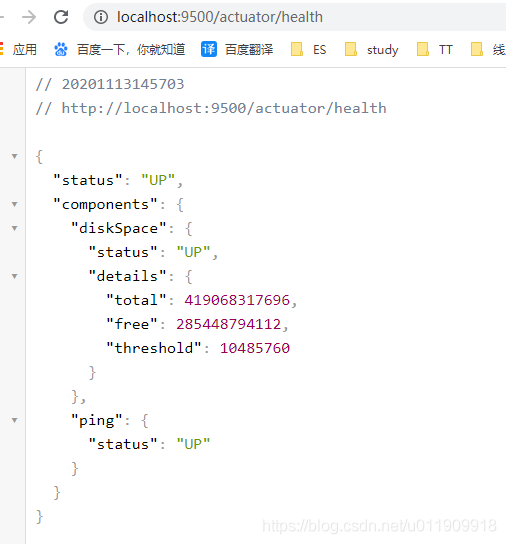
4.3 啟動服務(wù)并驗證
4.3.1 啟動結(jié)果

4.3.2 查看各個監(jiān)控信息

總結(jié)
評論
圖片
表情